
Creating a mailbox in cPanel with GoHosting is quick and easy. It allows you to set up an email address that uses your own domain, which looks more professional than a generic @gmail.com, @outlook.com, or @yahoo.com address. Best of all, it’s included at no extra cost with your GoHosting plan.
How to create a mailbox
Follow these steps to create a mailbox in cPanel with GoHosting:
1. Log in to cPanel
Go to the cPanel login page using the link provided in your GoHosting welcome email. Alternatively, if your domain’s DNS is pointing to GoHosting’s servers, you can access cPanel by visiting:
https://yourdomainhere.com/cpa...
Once on the login page, enter your username and password to log in.
2. Initiate email account creation
On the cPanel dashboard, scroll down to the “Email” section, then click the “Email Accounts” icon.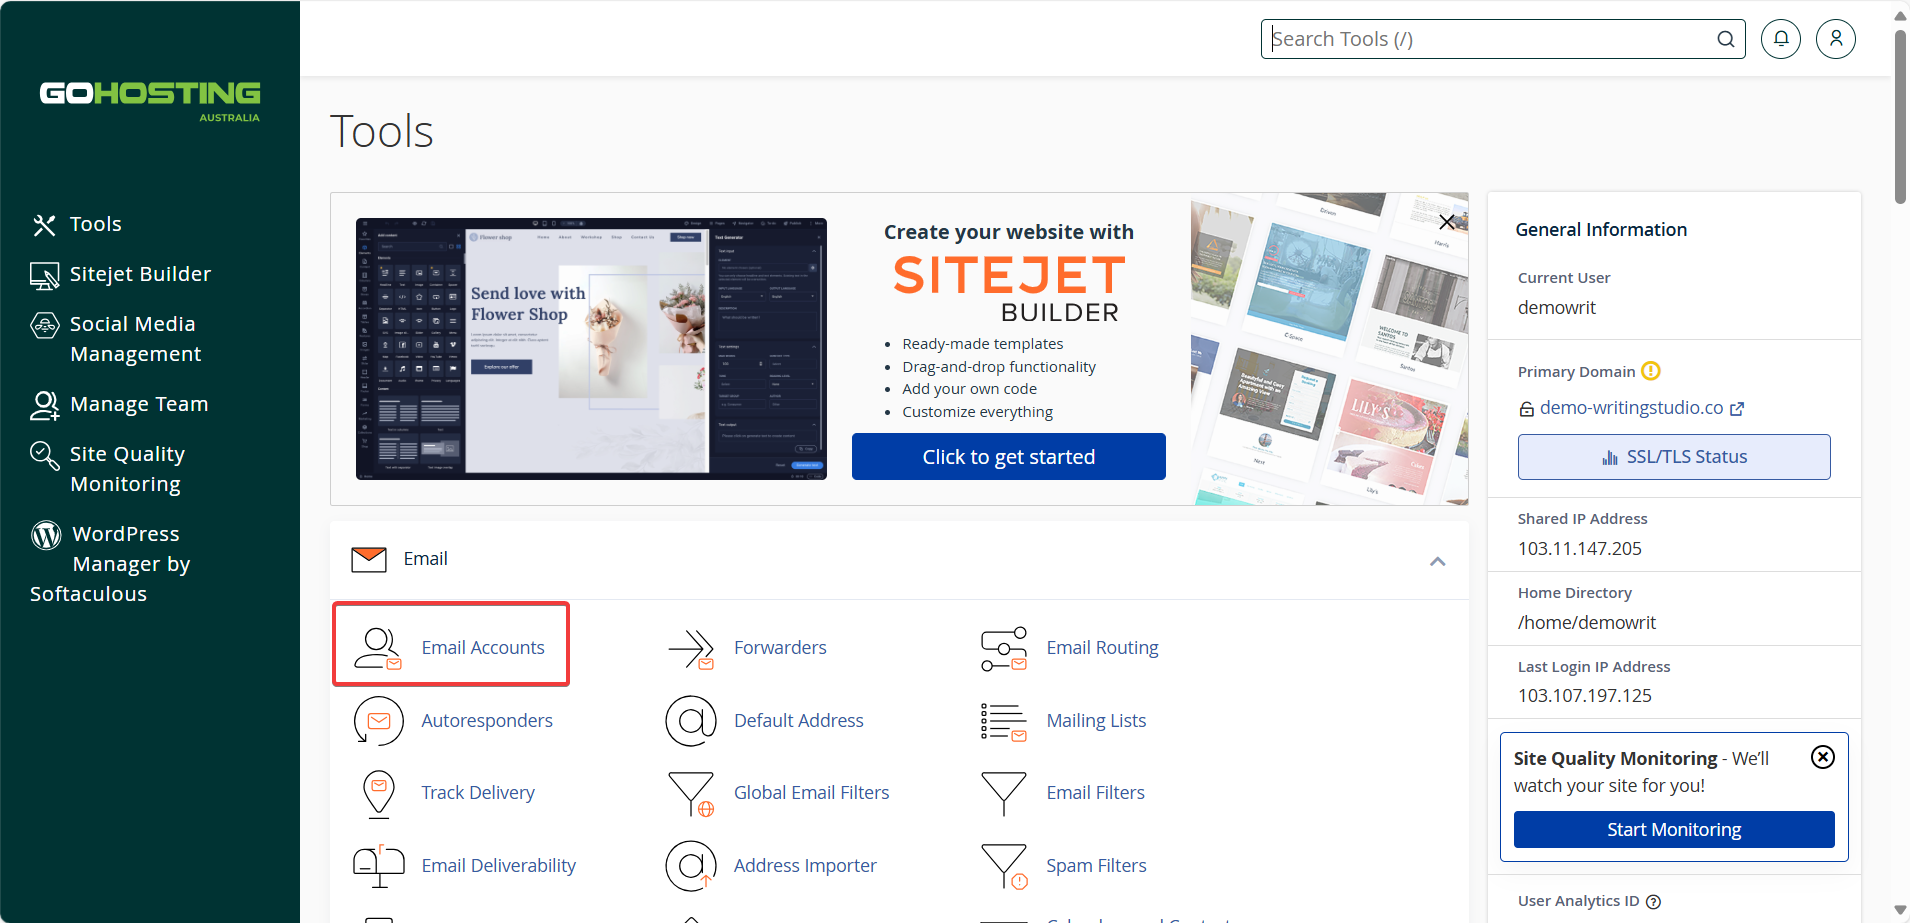
On the Email Accounts page, click the "Create" button.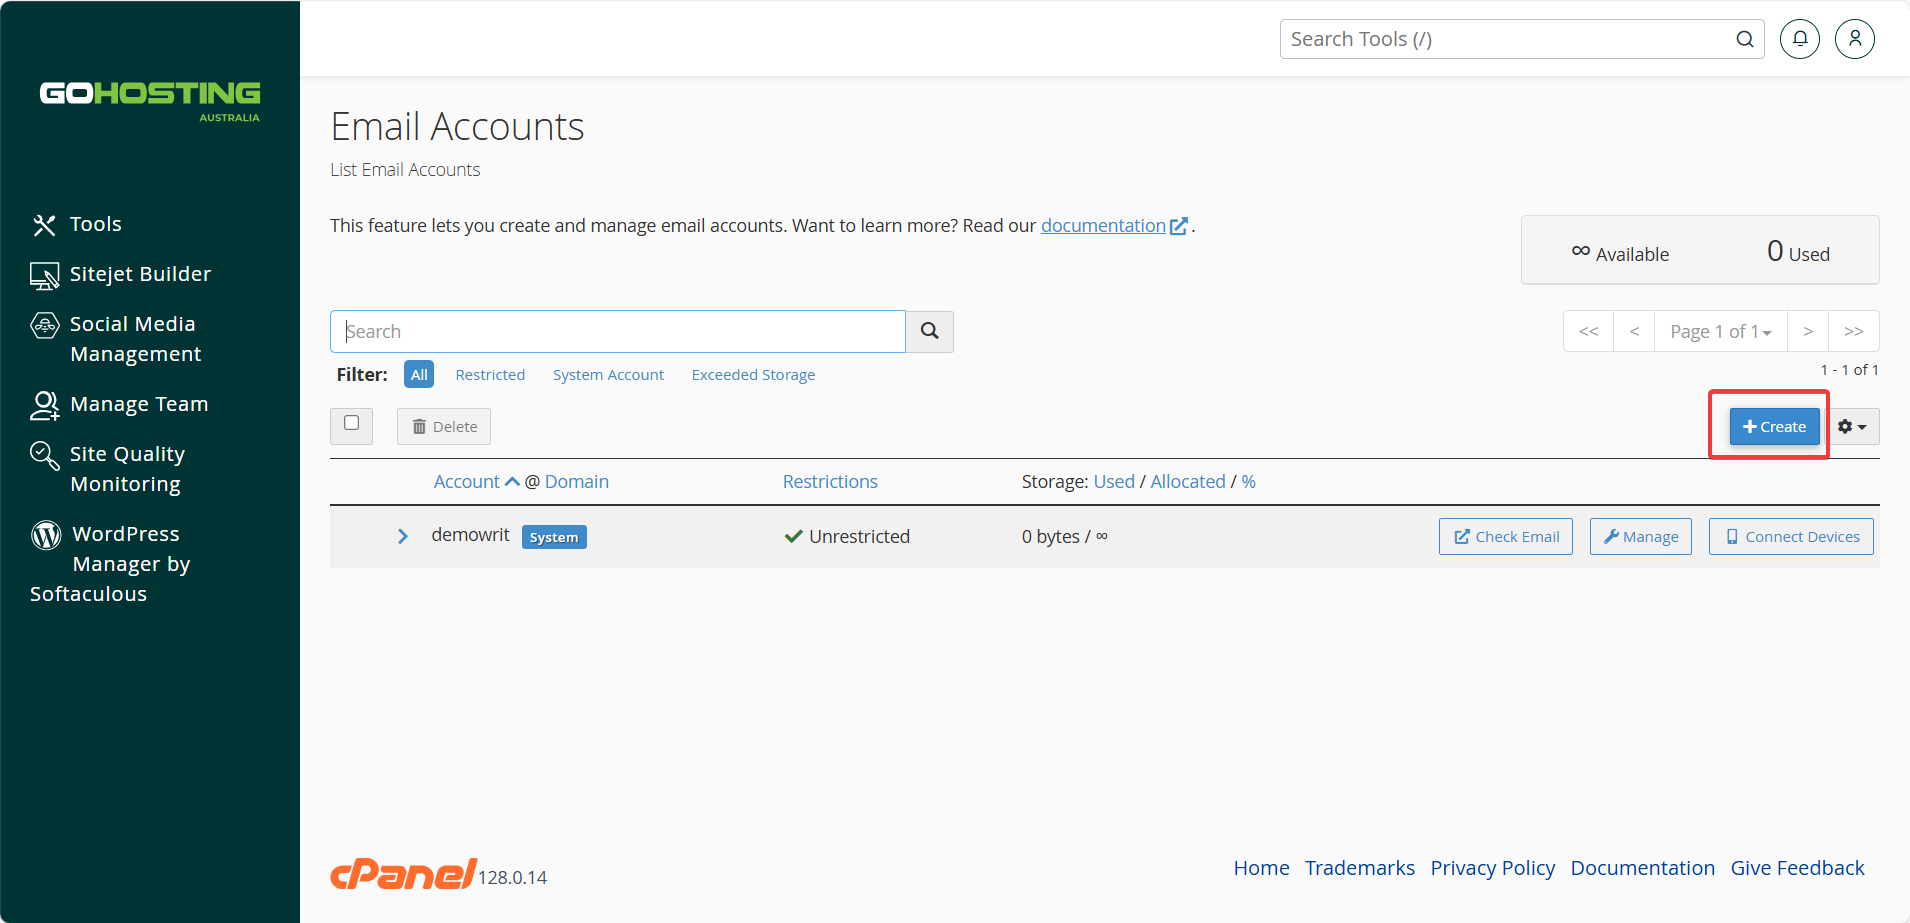
3. Set a username
Enter the username you want to use. This will become the first part of your email address before the @ symbol.
Common choices include your name (e.g., jane@) or a business role (e.g., sales@ or support@).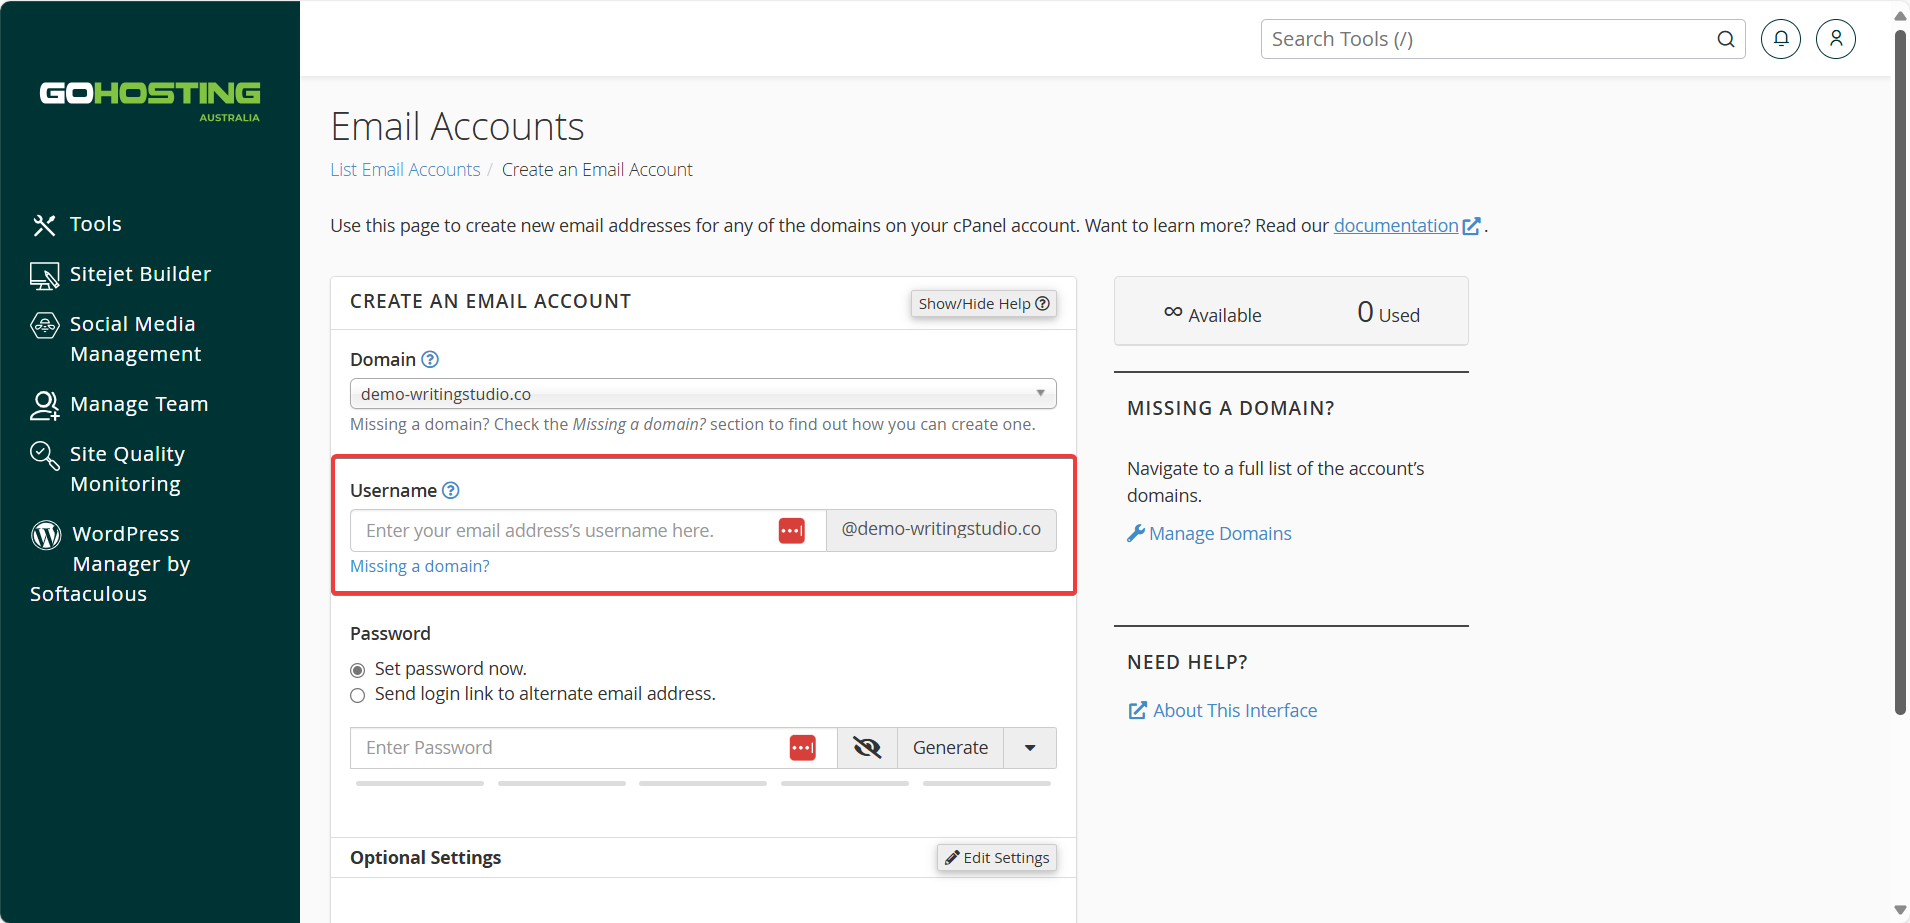
4. Choose the domain
If you have multiple domains, select the one you want to use from the drop-down menu.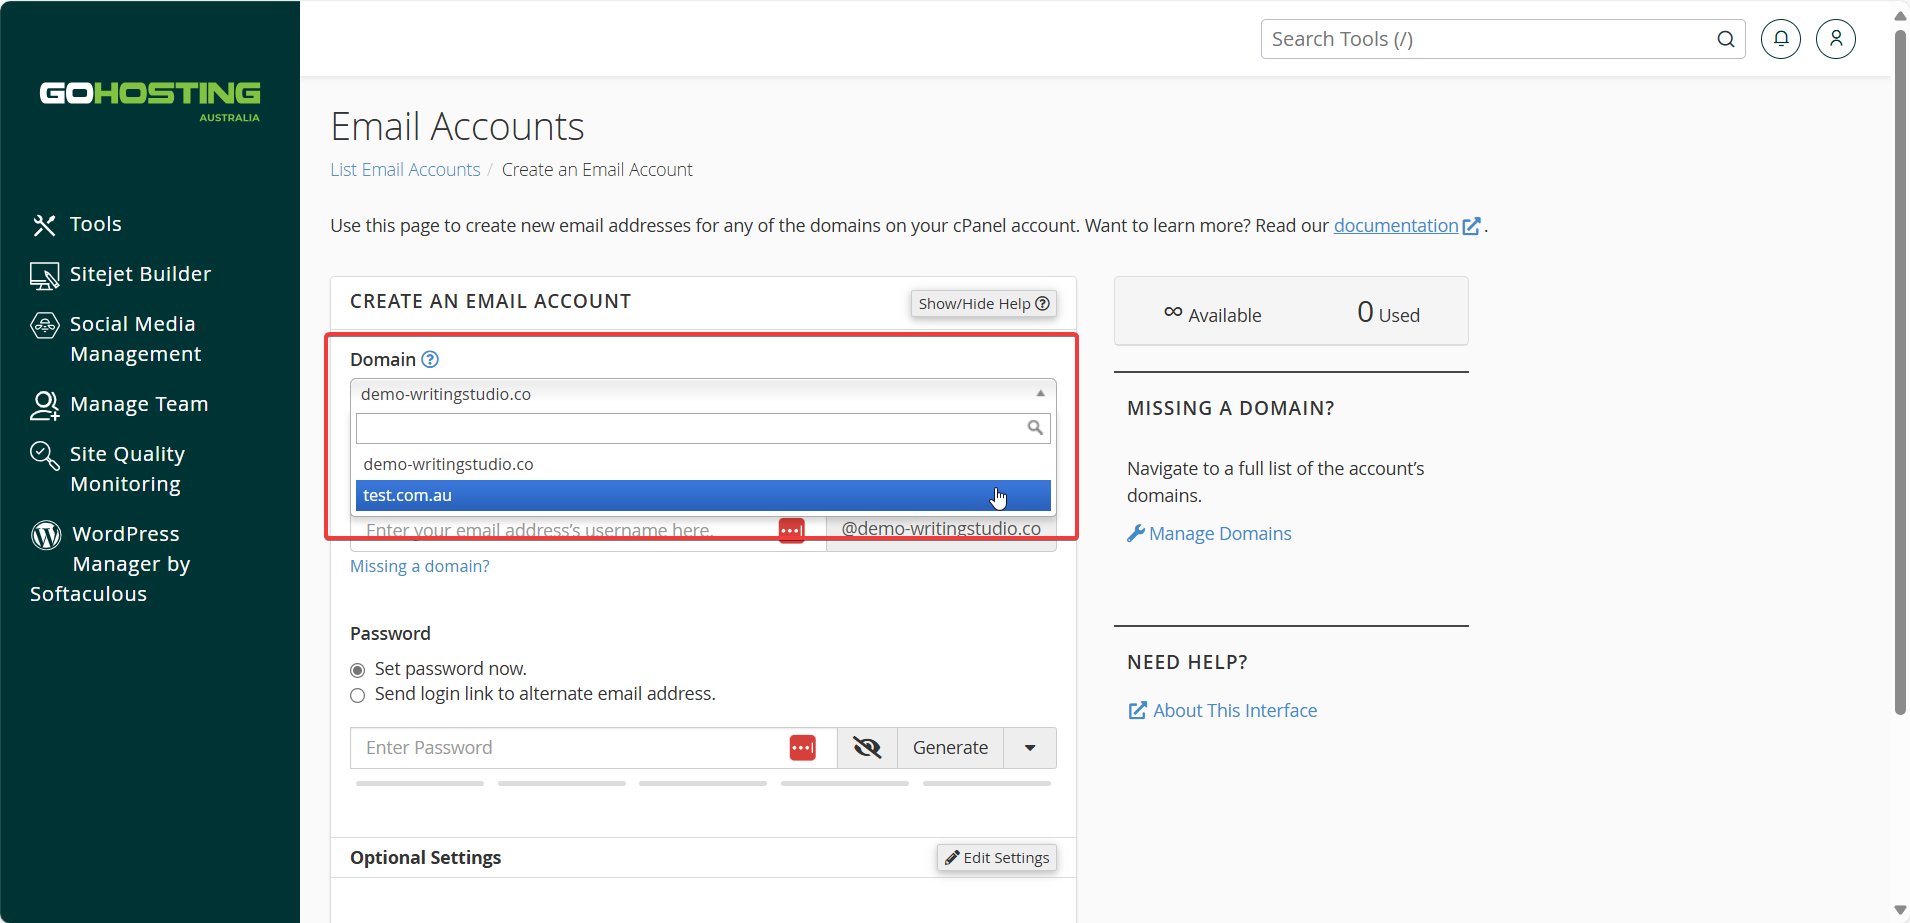
5. Set a password
Create a password by either entering one manually or using the "Generate" button to produce a secure password. Make sure to store it somewhere safe.
Alternatively, if you’re creating a mailbox for someone else, you can tick "Send login link to alternate email address." This allows the recipient to set their own password. Enter their email in the "Alternate Email" field that appears.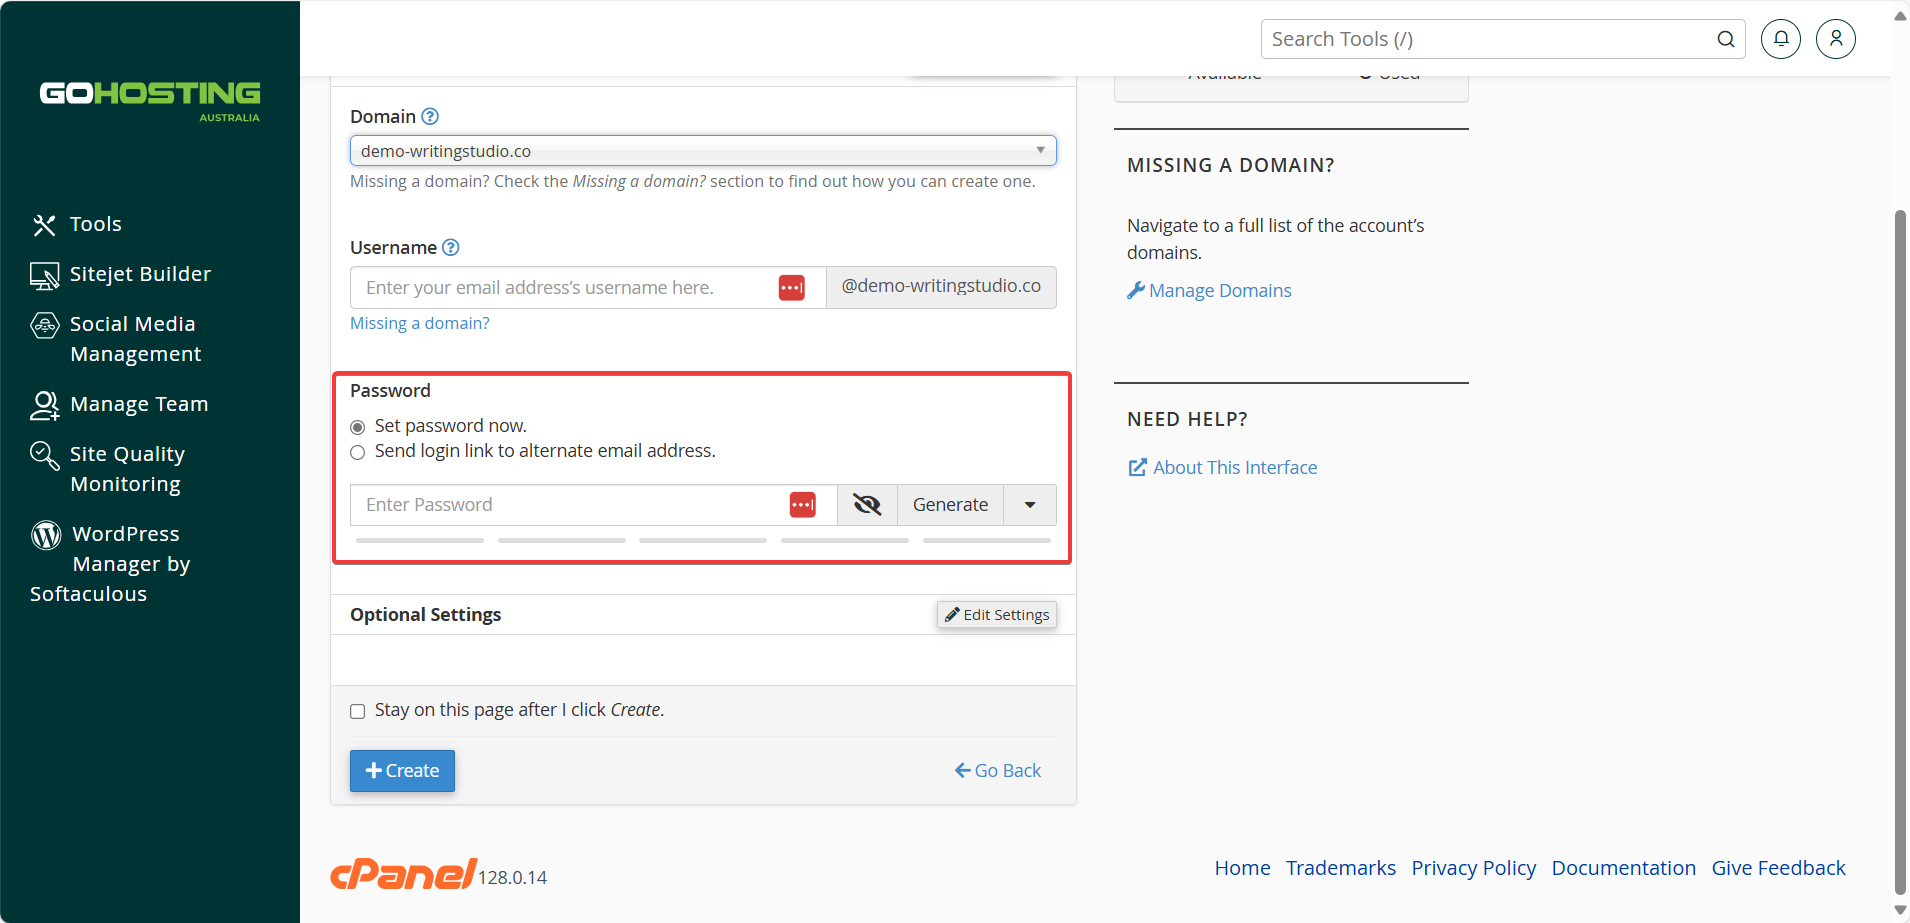
6. Configure optional settings
Click the “Edit Settings” button next to “Optional Settings.” Here, you can adjust the “Storage Space” quota if needed to limit how much space the email account can use.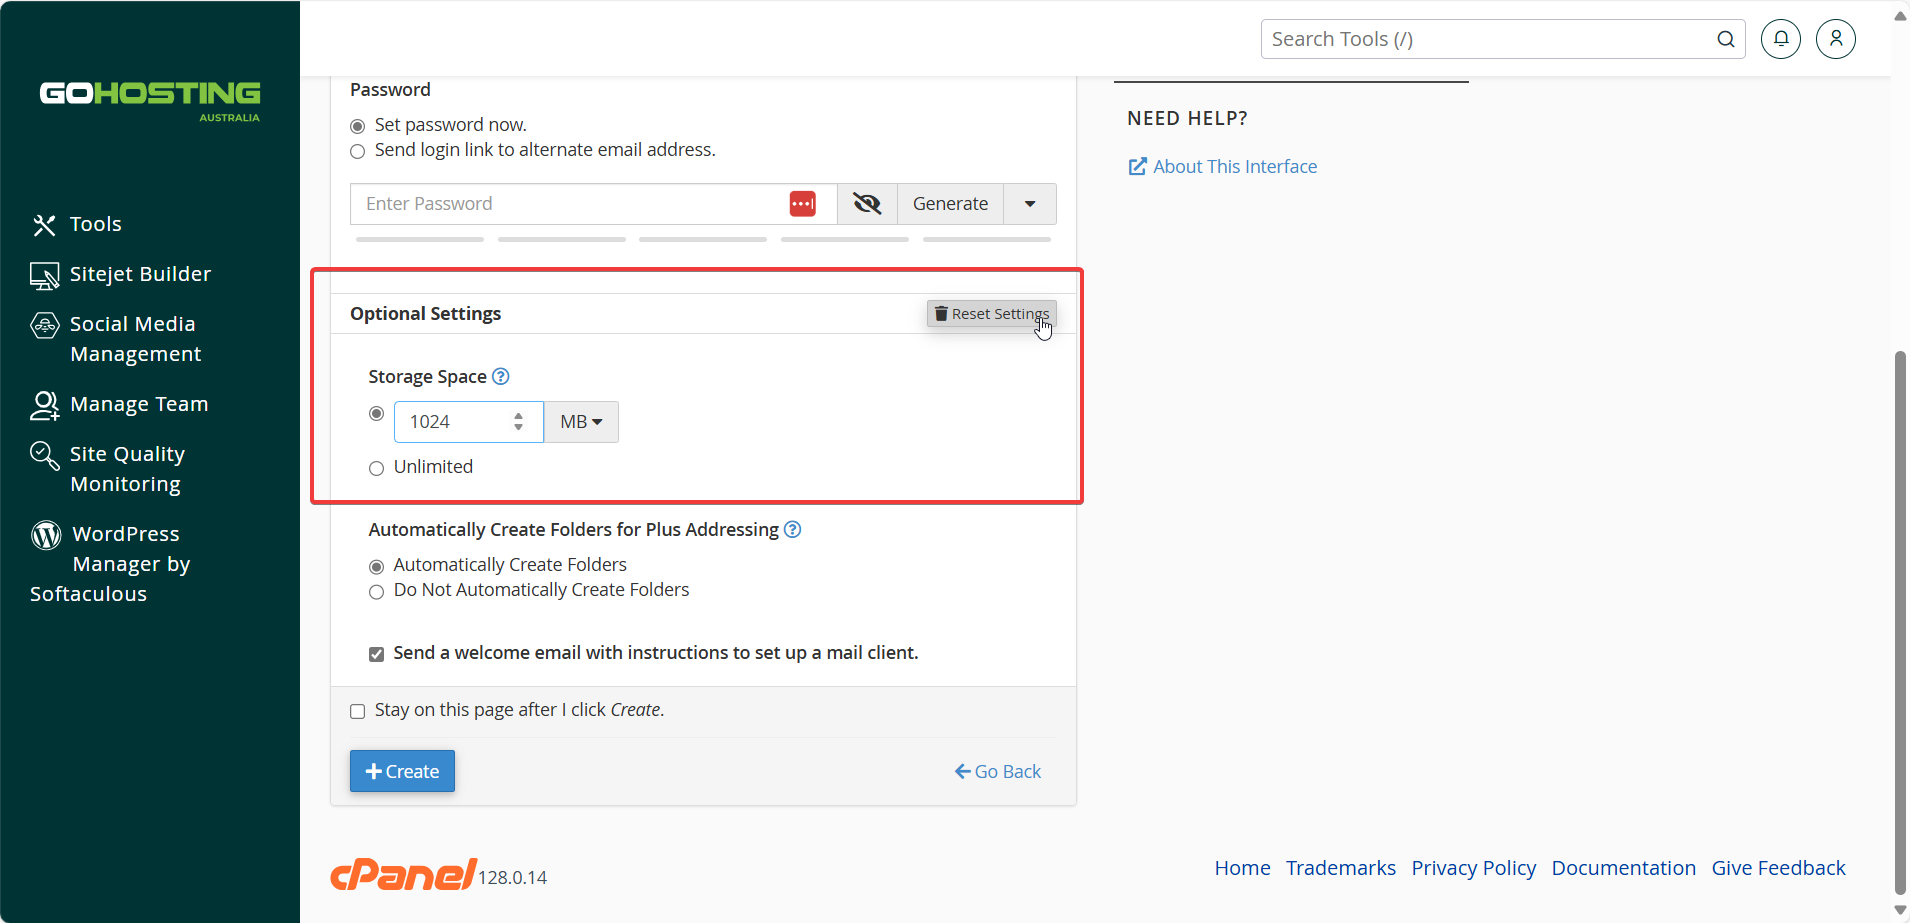
7. Create the email address
Once all fields are complete, click "Create" to finish setting up the mailbox.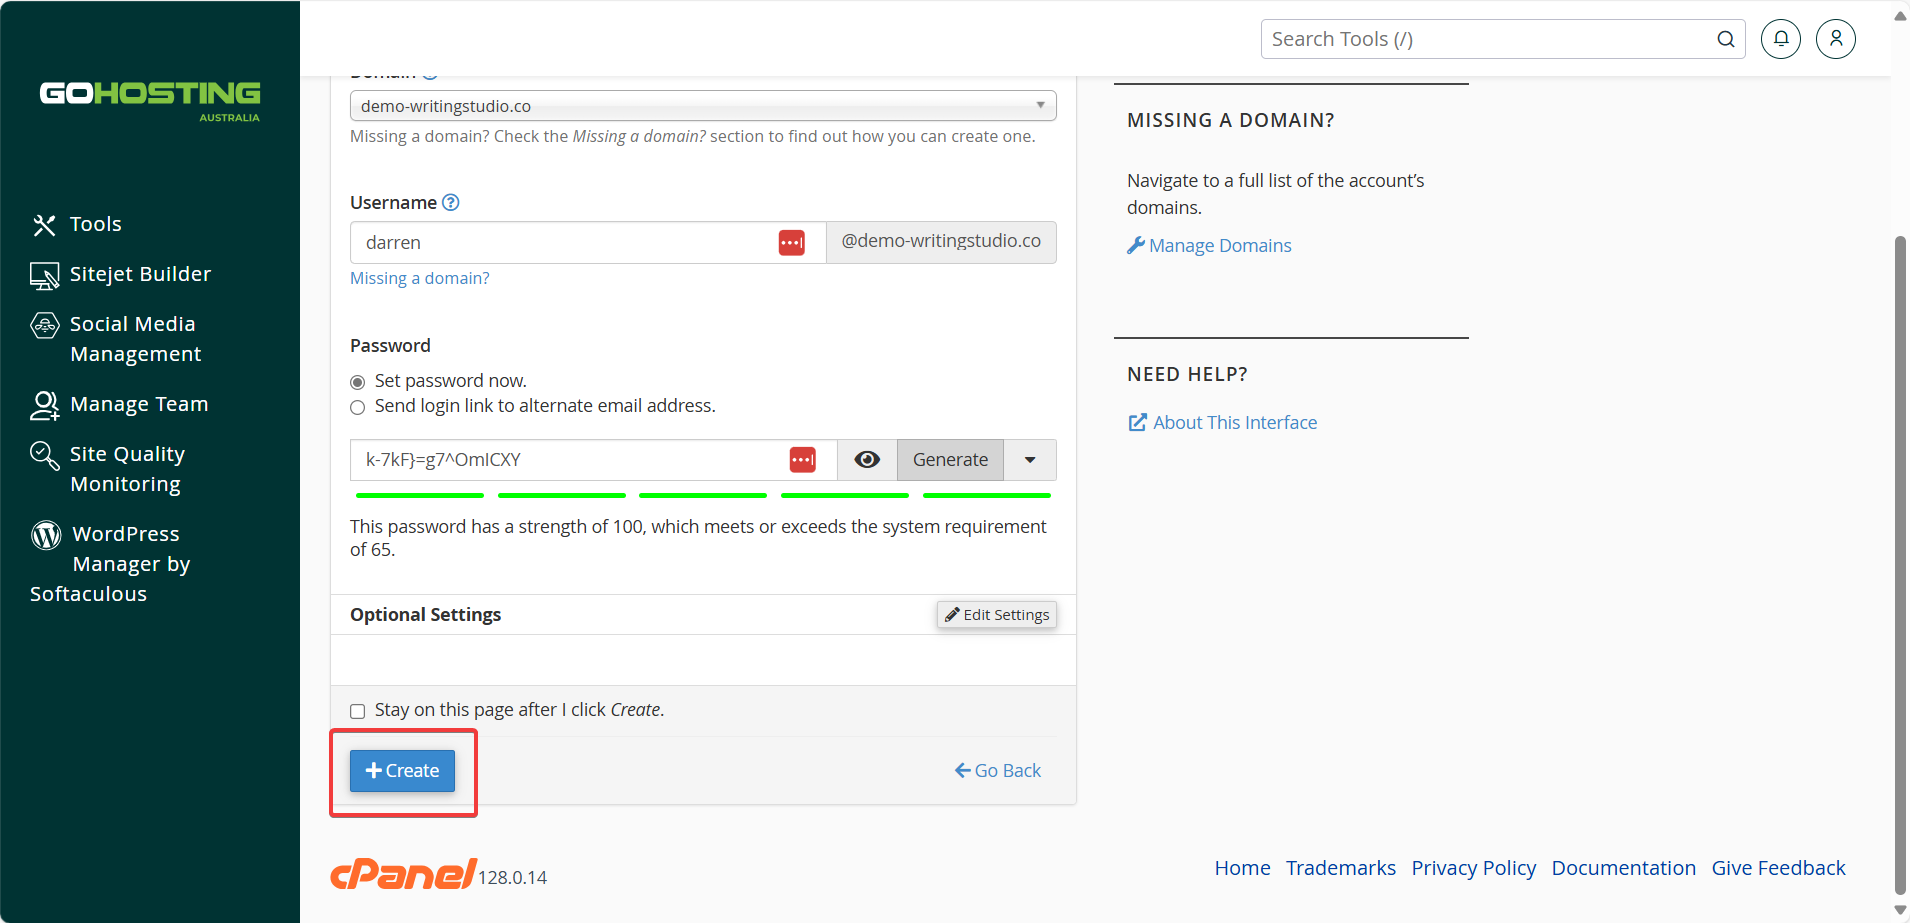
How to enter your new mailbox
Once the mailbox is created, you can access it in a few different ways:
1. Use Webmail
In cPanel, go to "Email Accounts," find your new email address, and click "Check Email."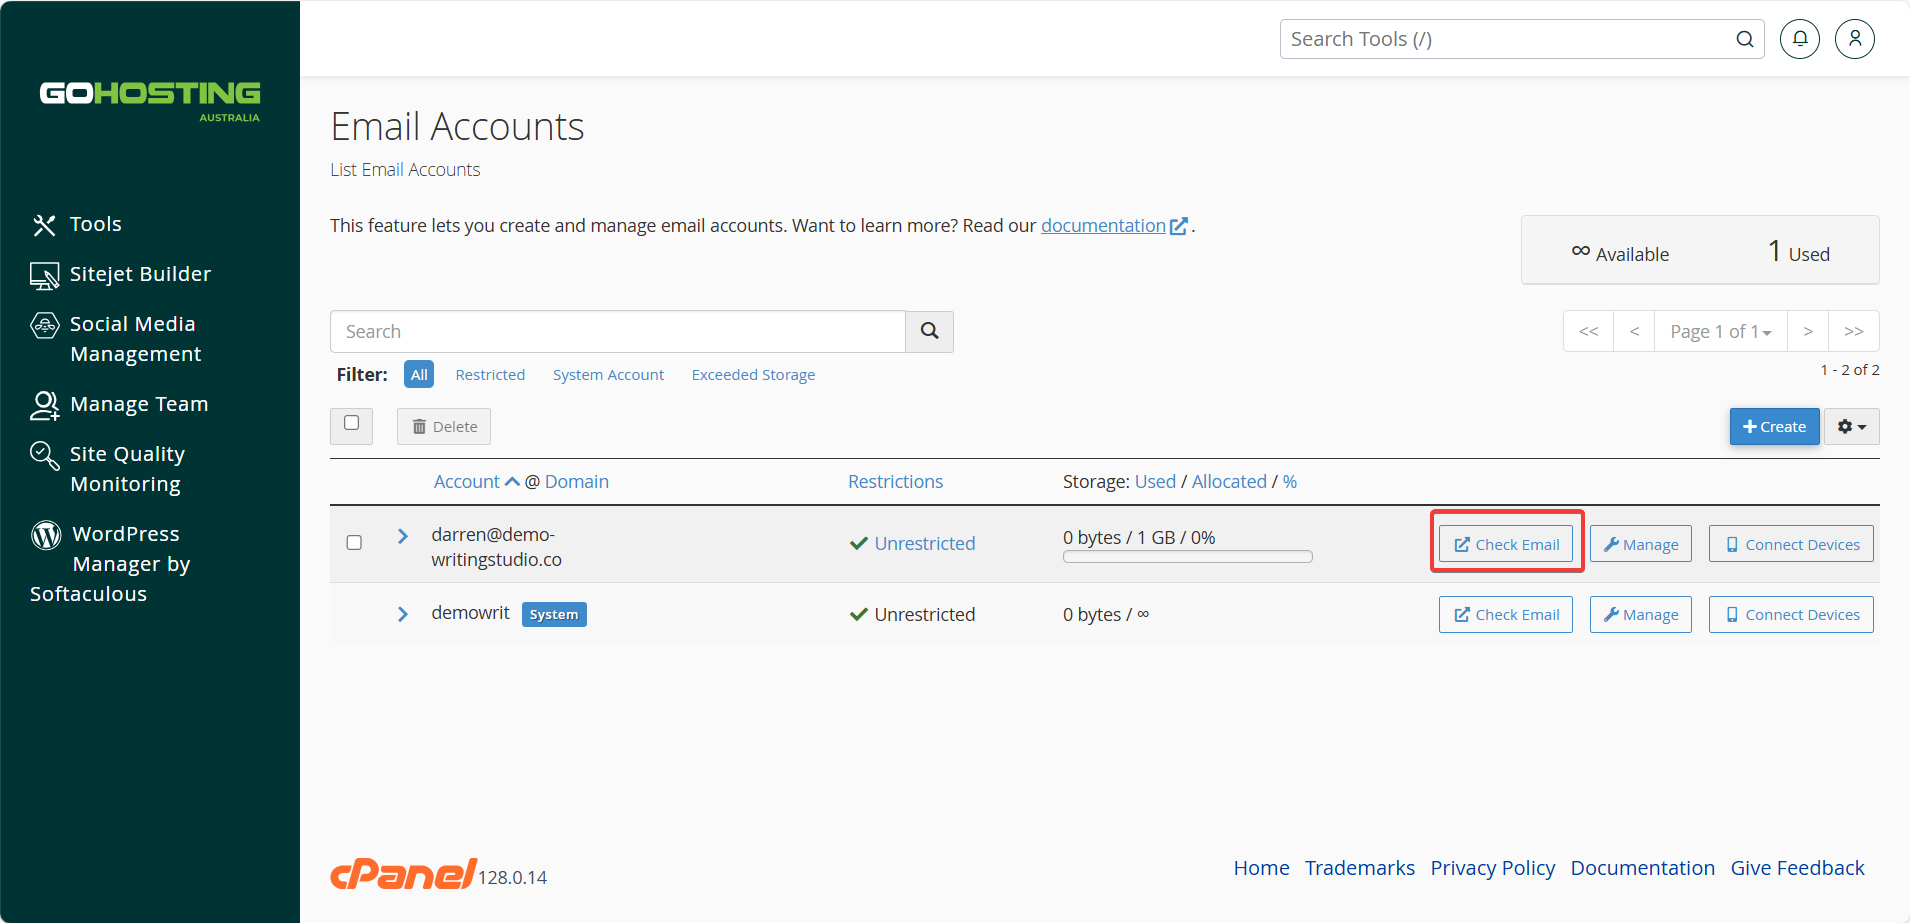
You’ll be taken to Webmail, where you can use Roundcube (an open-source webmail client) to access your inbox and send or receive emails.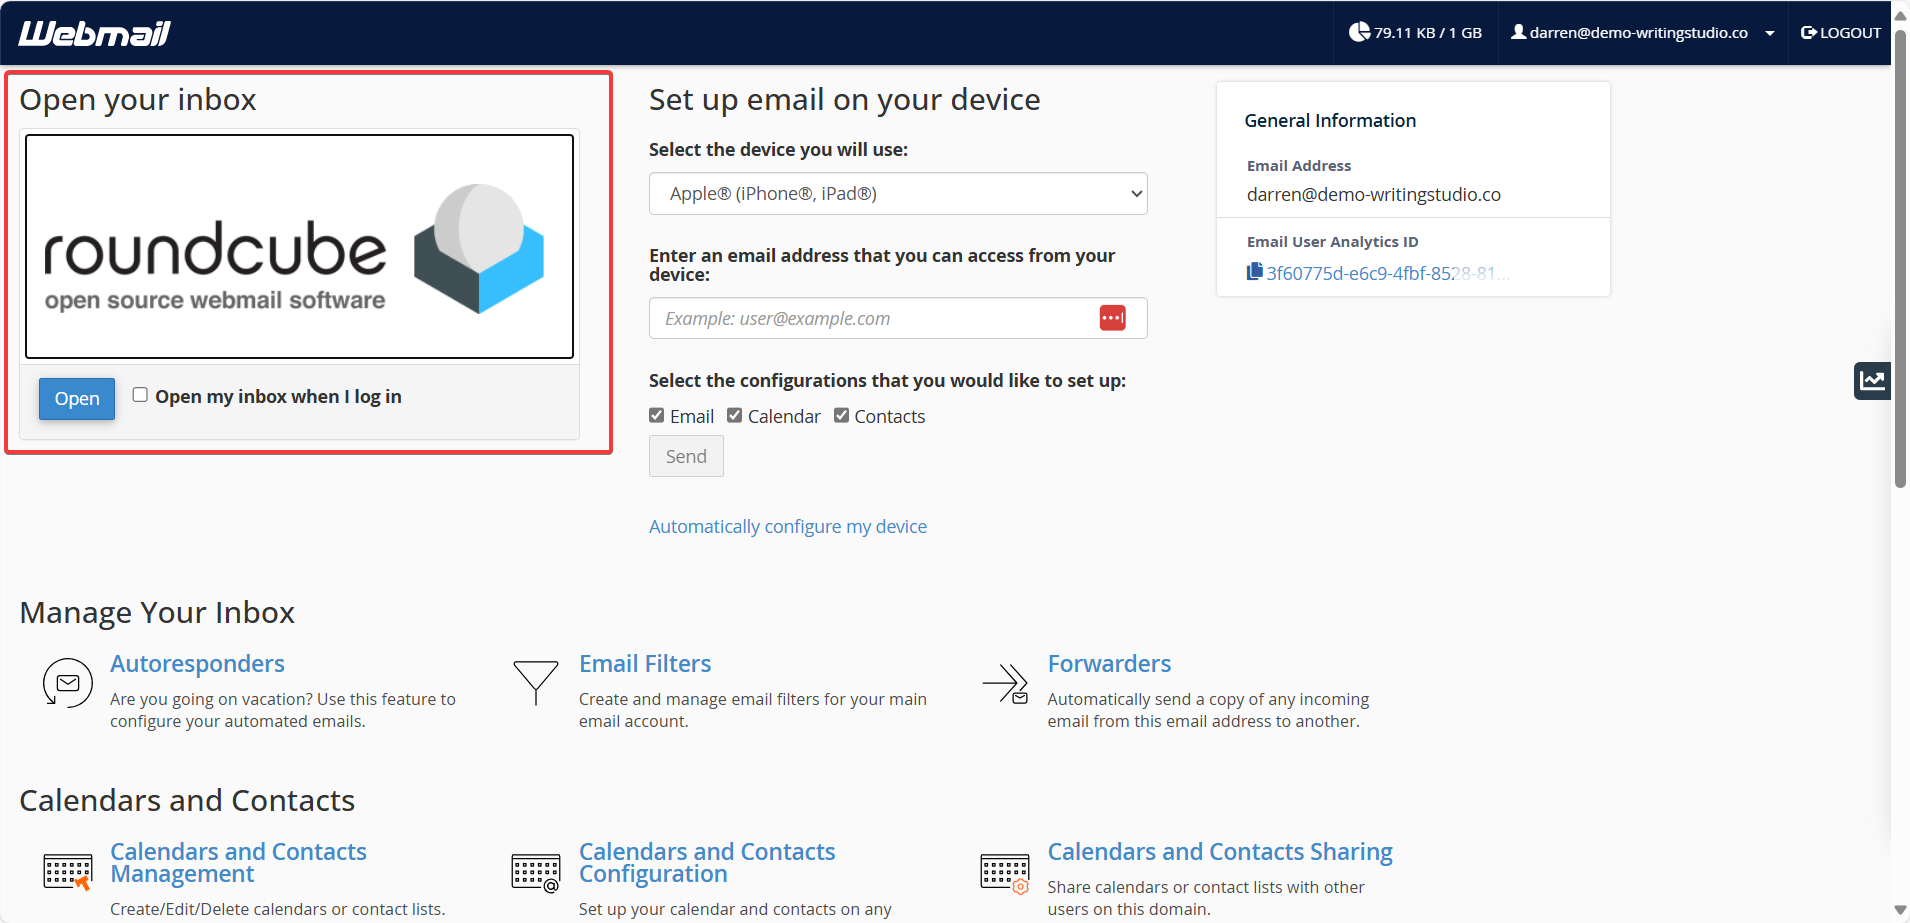
2. Connect to an email client
You can access your cPanel-hosted email from services like Gmail, Yahoo Mail, or Outlook by configuring it manually.
In your email provider’s settings, look for an option like "Check mail from other accounts" or "Add an email account." Select POP3 when prompted.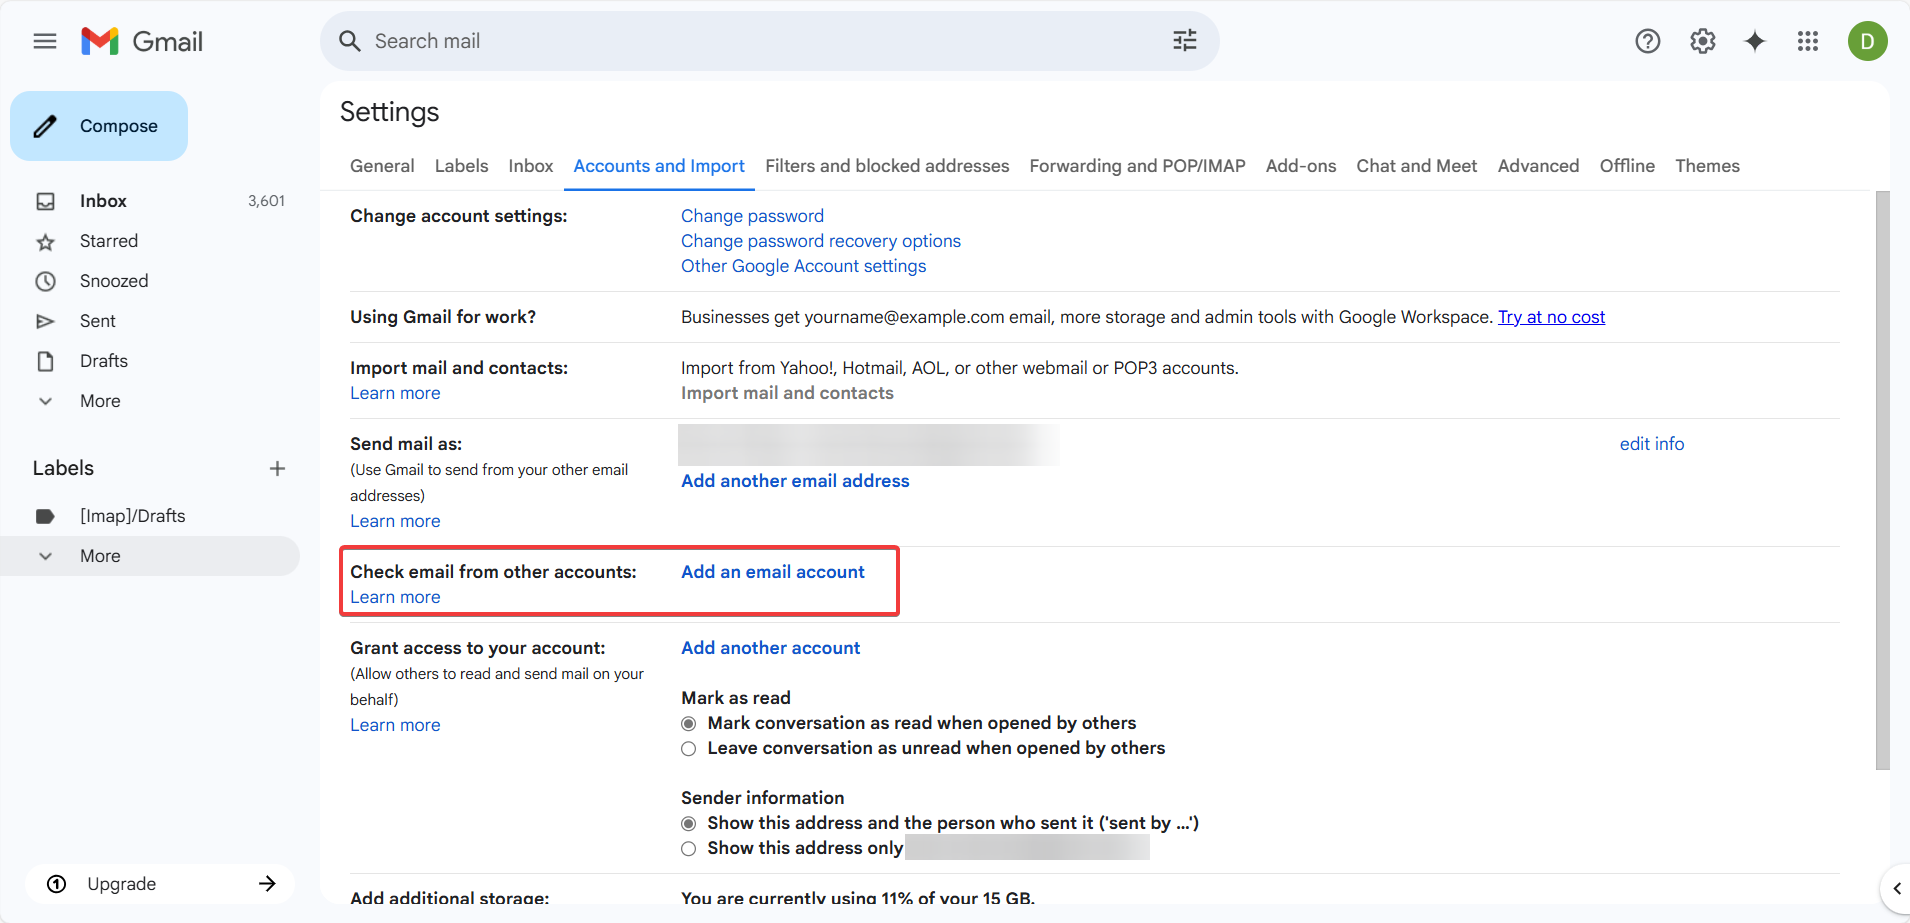
Enter the following details (found by clicking "Connect Devices" on your Email Accounts page in cPanel, under "Mail Client Manual Settings"):
Your username and password
Incoming server URL
POP3 Port number
Ensure secure connection (SSL) is enabled
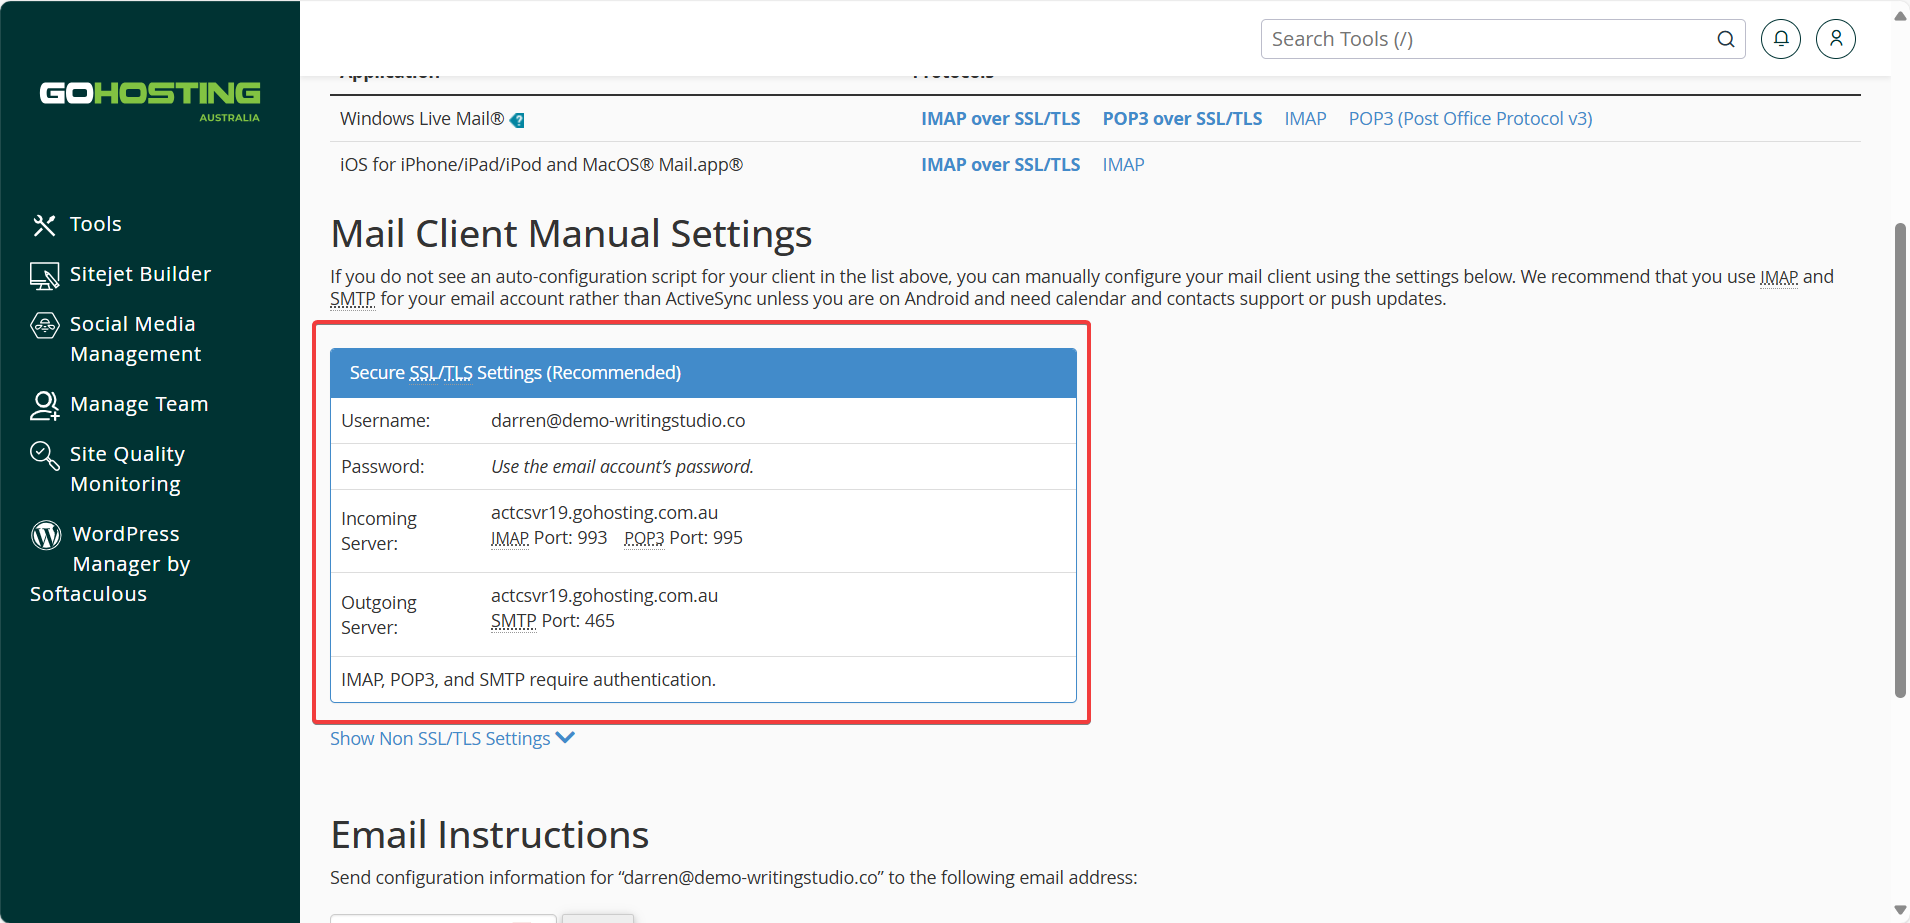
This will allow you to receive emails in your preferred email client.
To send emails, in the same settings section, look for an option like "Send mail as" or "Add another sending address," and choose to use an SMTP server.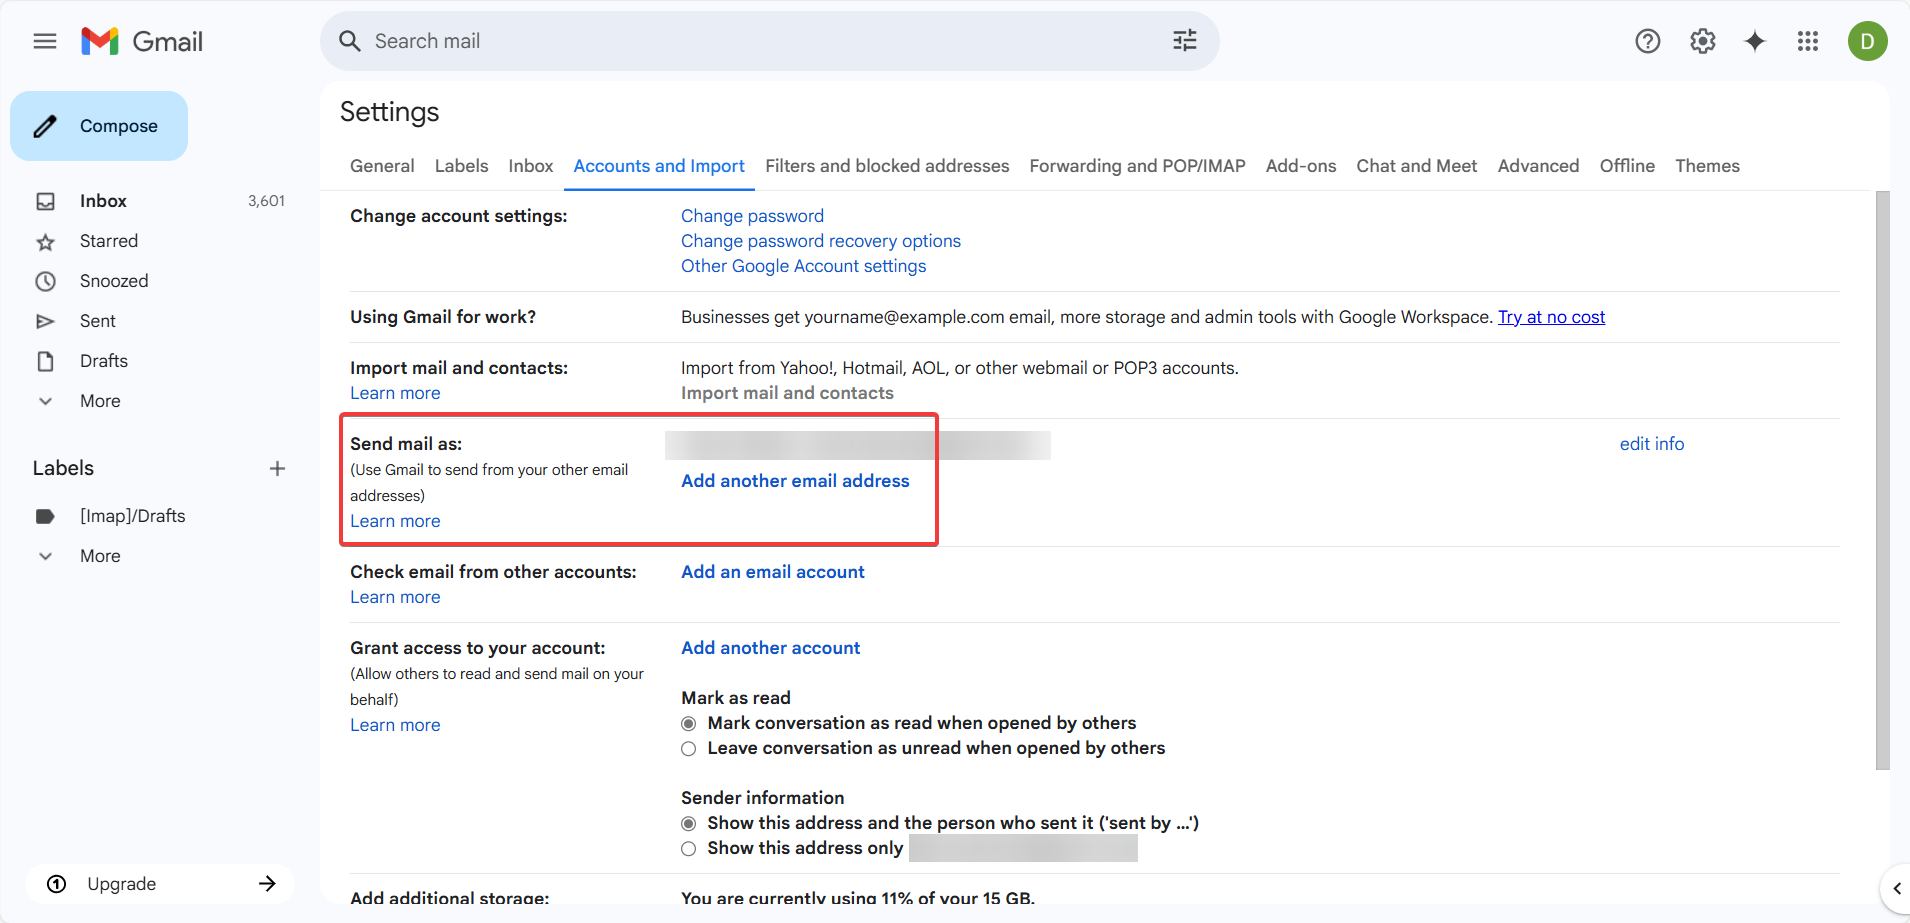
Then enter the following details (also found under Mail Client Manual Settings):
Your username and password
Outgoing server URL
SMTP Port number
Ensure secure connection (SSL) is enabled
