
SQL databases allow you to store and manage large amounts of information for your website or app in an easily accessible way - such as product data, blog content, user accounts, or activity logs.
You can easily create an SQL database using cPanel's Database Wizard.
How to create an SQL Database
Follow these steps to create an SQL Database in cPanel with GoHosting:
1. Log in to cPanel
Using the link in your GoHosting welcome email, go to the cPanel login page.
Alternatively, if your domain is pointed to GoHosting’s servers, you can access cPanel directly by visiting:
On the login page, enter your username and password to sign in.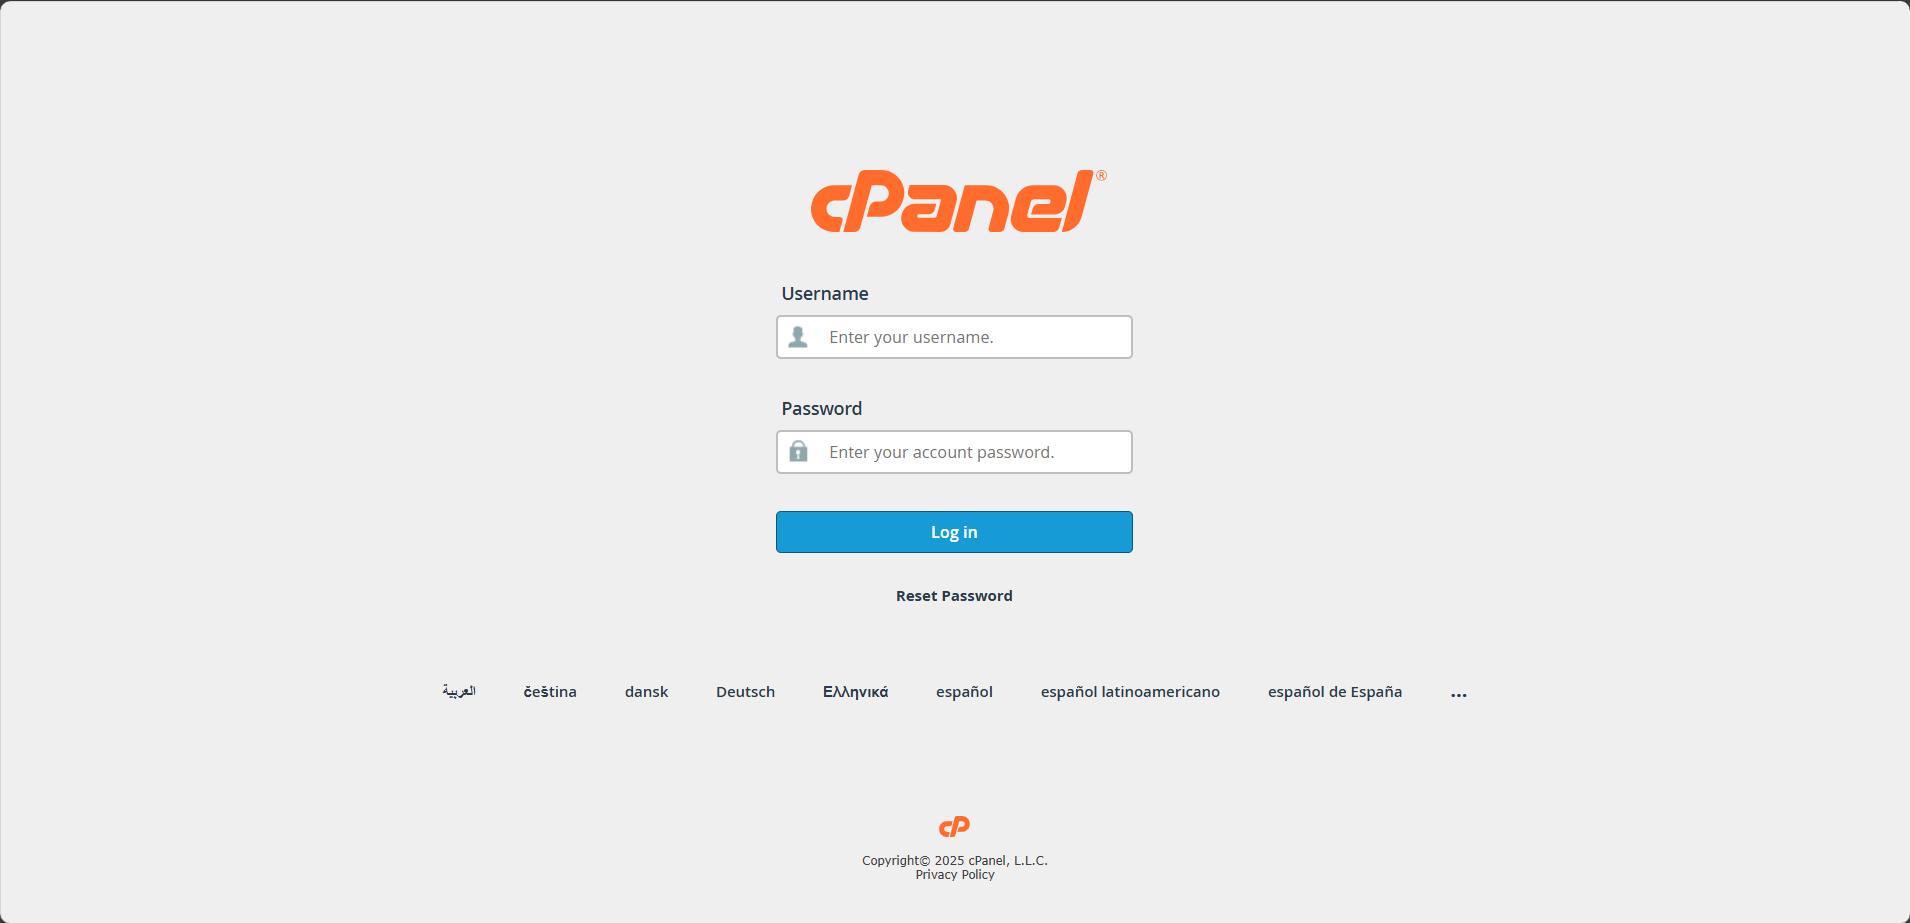
2. Open the Database Wizard
In the cPanel dashboard, scroll down to the "Databases" section and click the "Database Wizard" icon.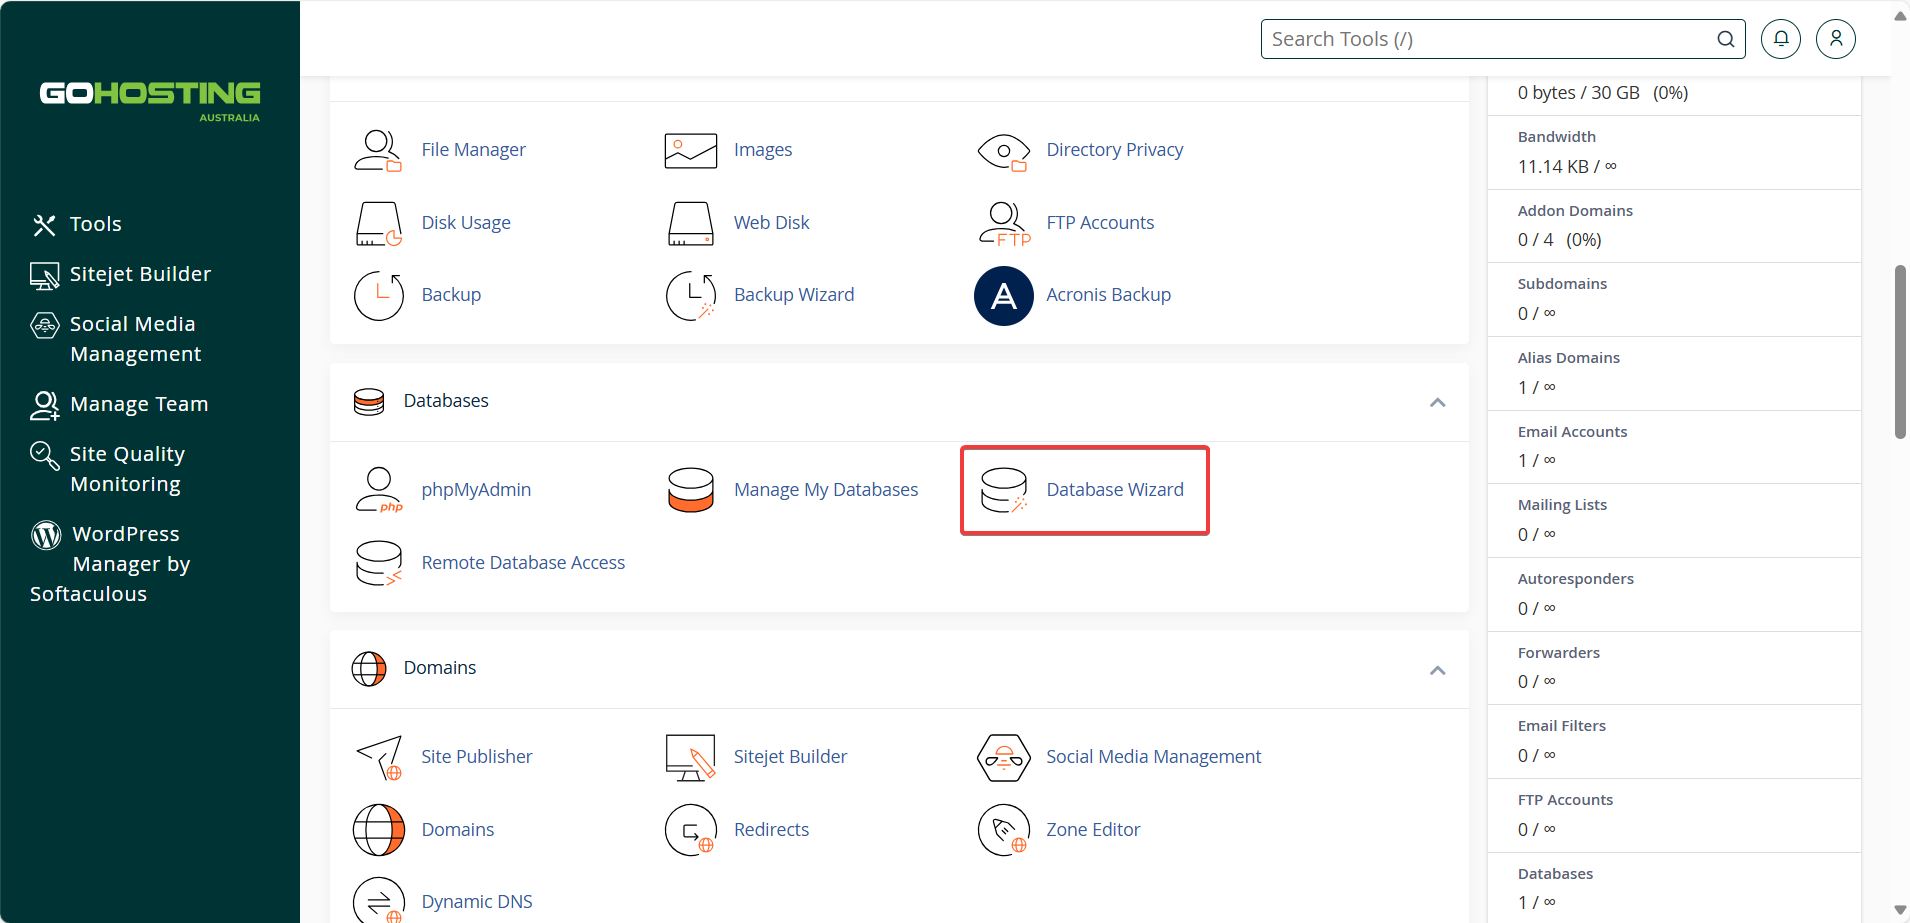
3. Create the database
Enter a name for your database in the "New Database" field, then click "Next Step."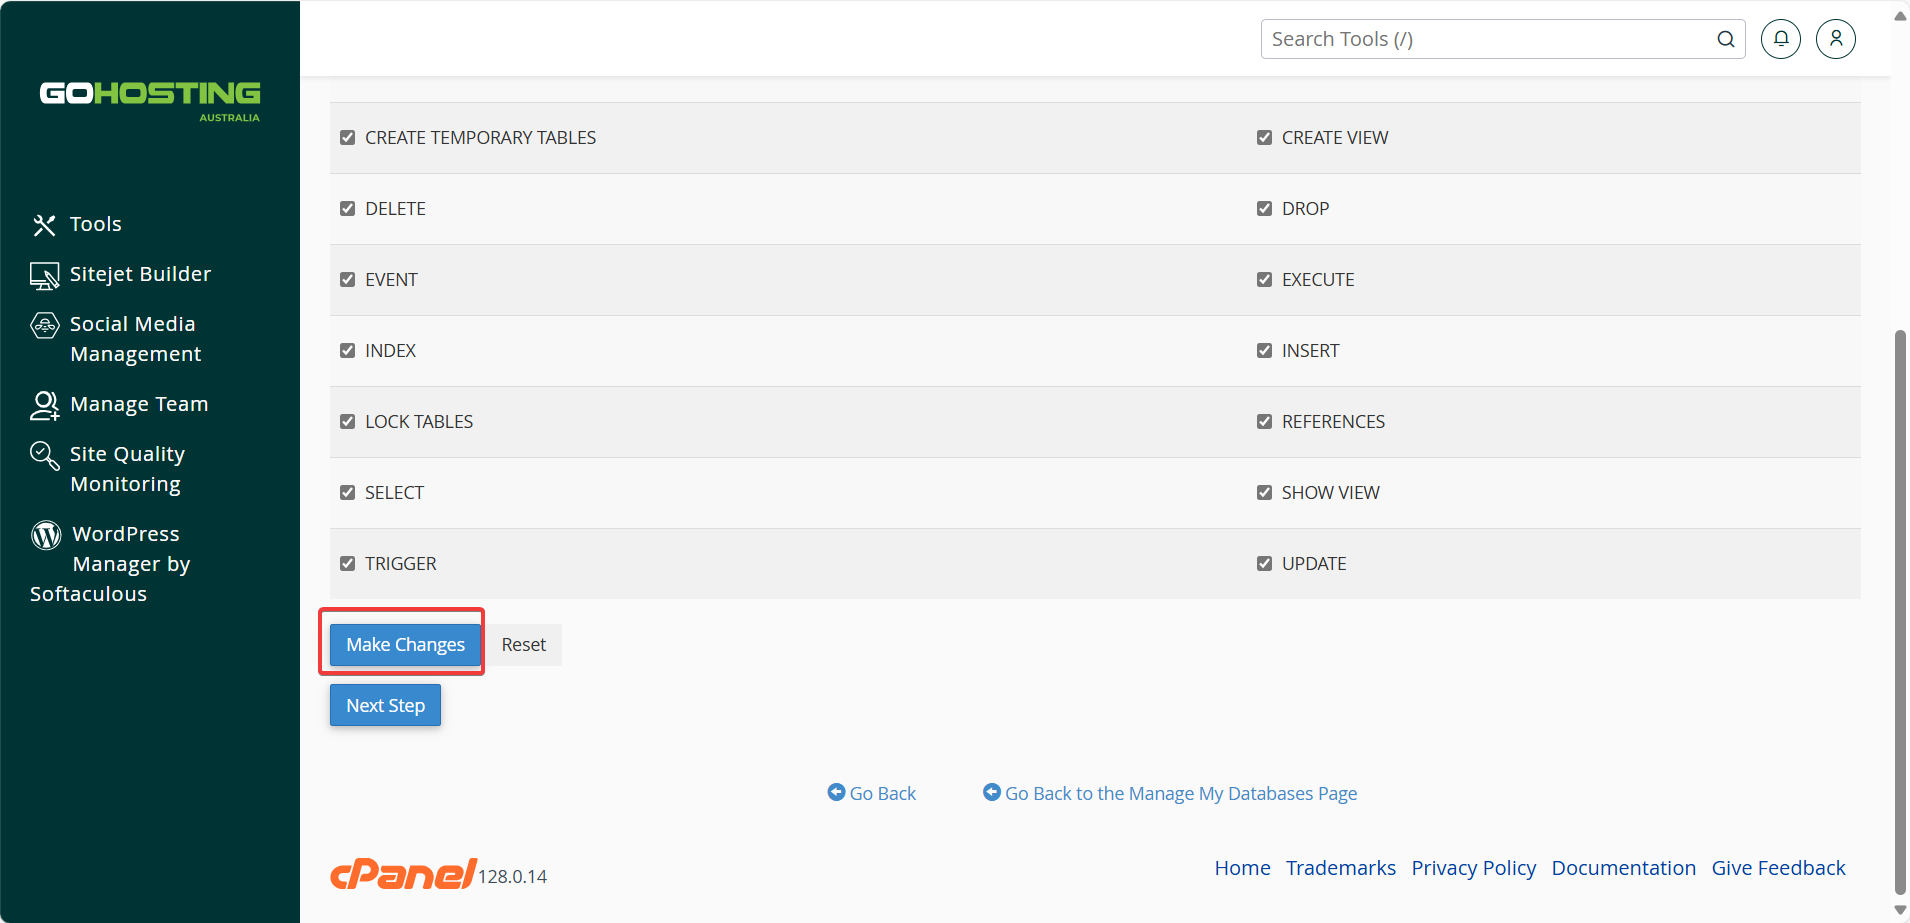
On the next screen, you’ll see a confirmation message that the database was created successfully.
4. Create a database user
Every database needs at least one user assigned to it to manage access securely. To create one, enter a username and password.
Using the built-in password generator is highly recommended, as a strong password is essential to maintaining security. If using it, check the box that says, “I have copied this password in a safe place,” then click "Use Password."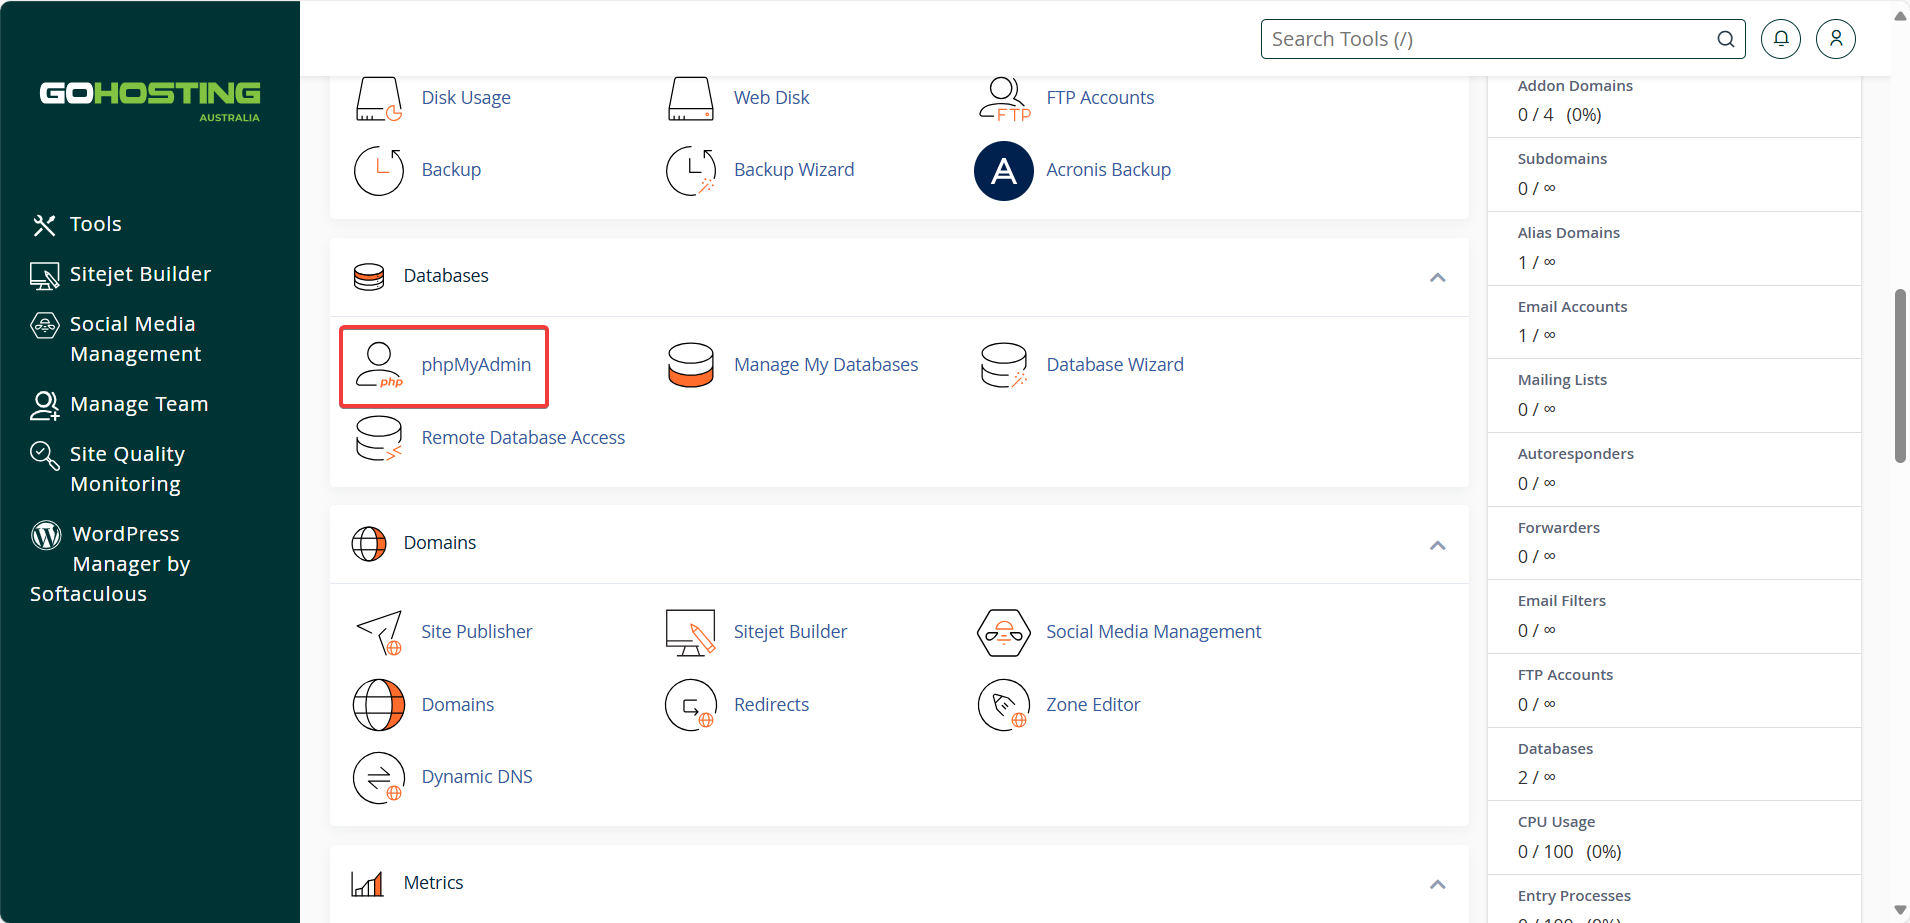
After entering the username and password, click "Create User."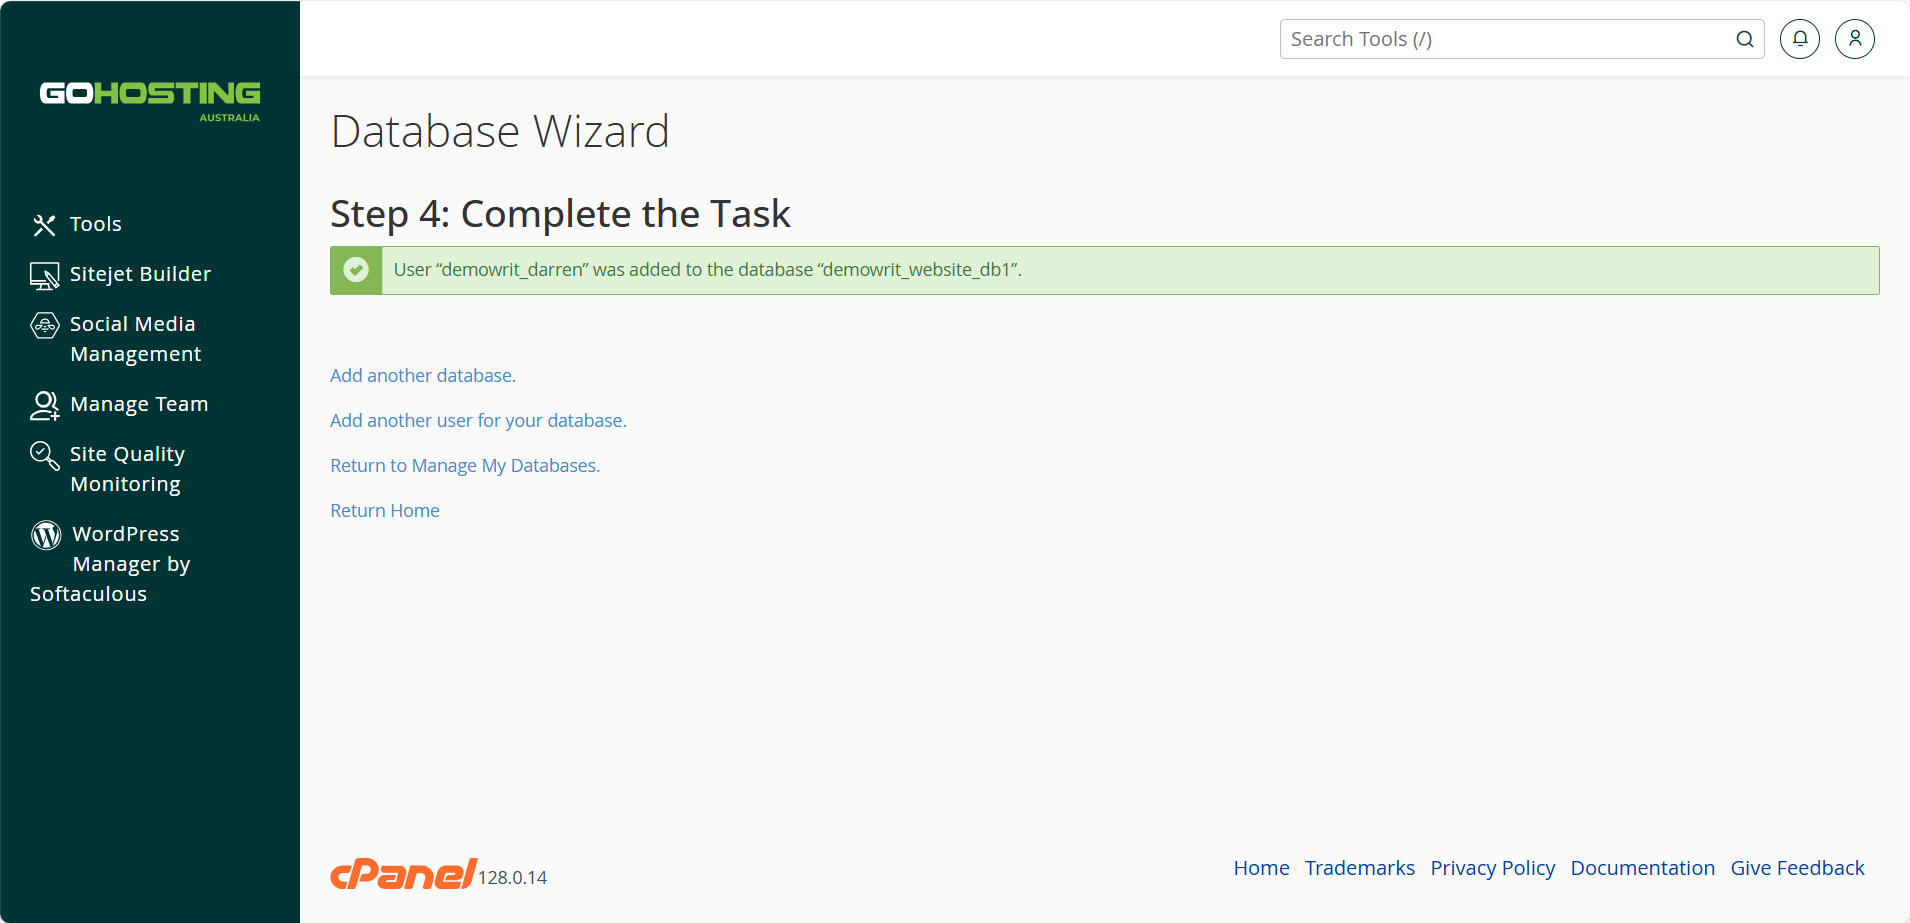
5. Assign user privileges
On the next screen, select the privileges you want to grant the user.
For most applications, it's standard to select "ALL PRIVILEGES" unless you need to restrict access.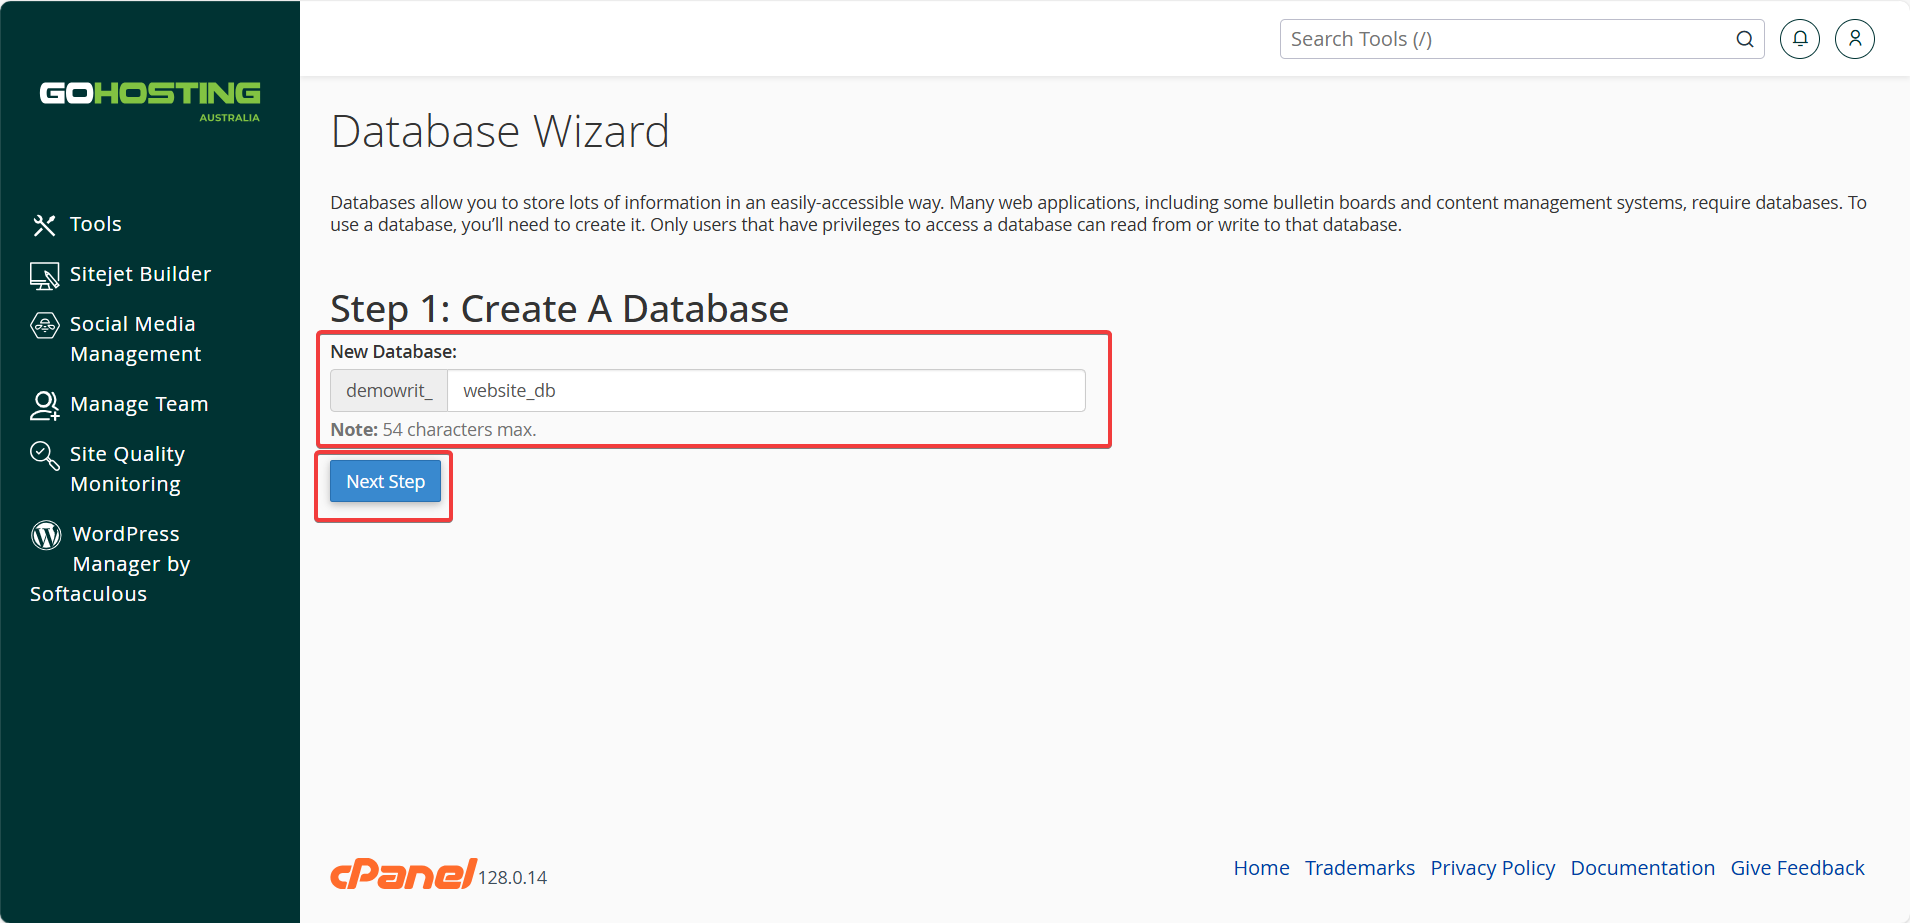
Then, click "Make Changes" to proceed.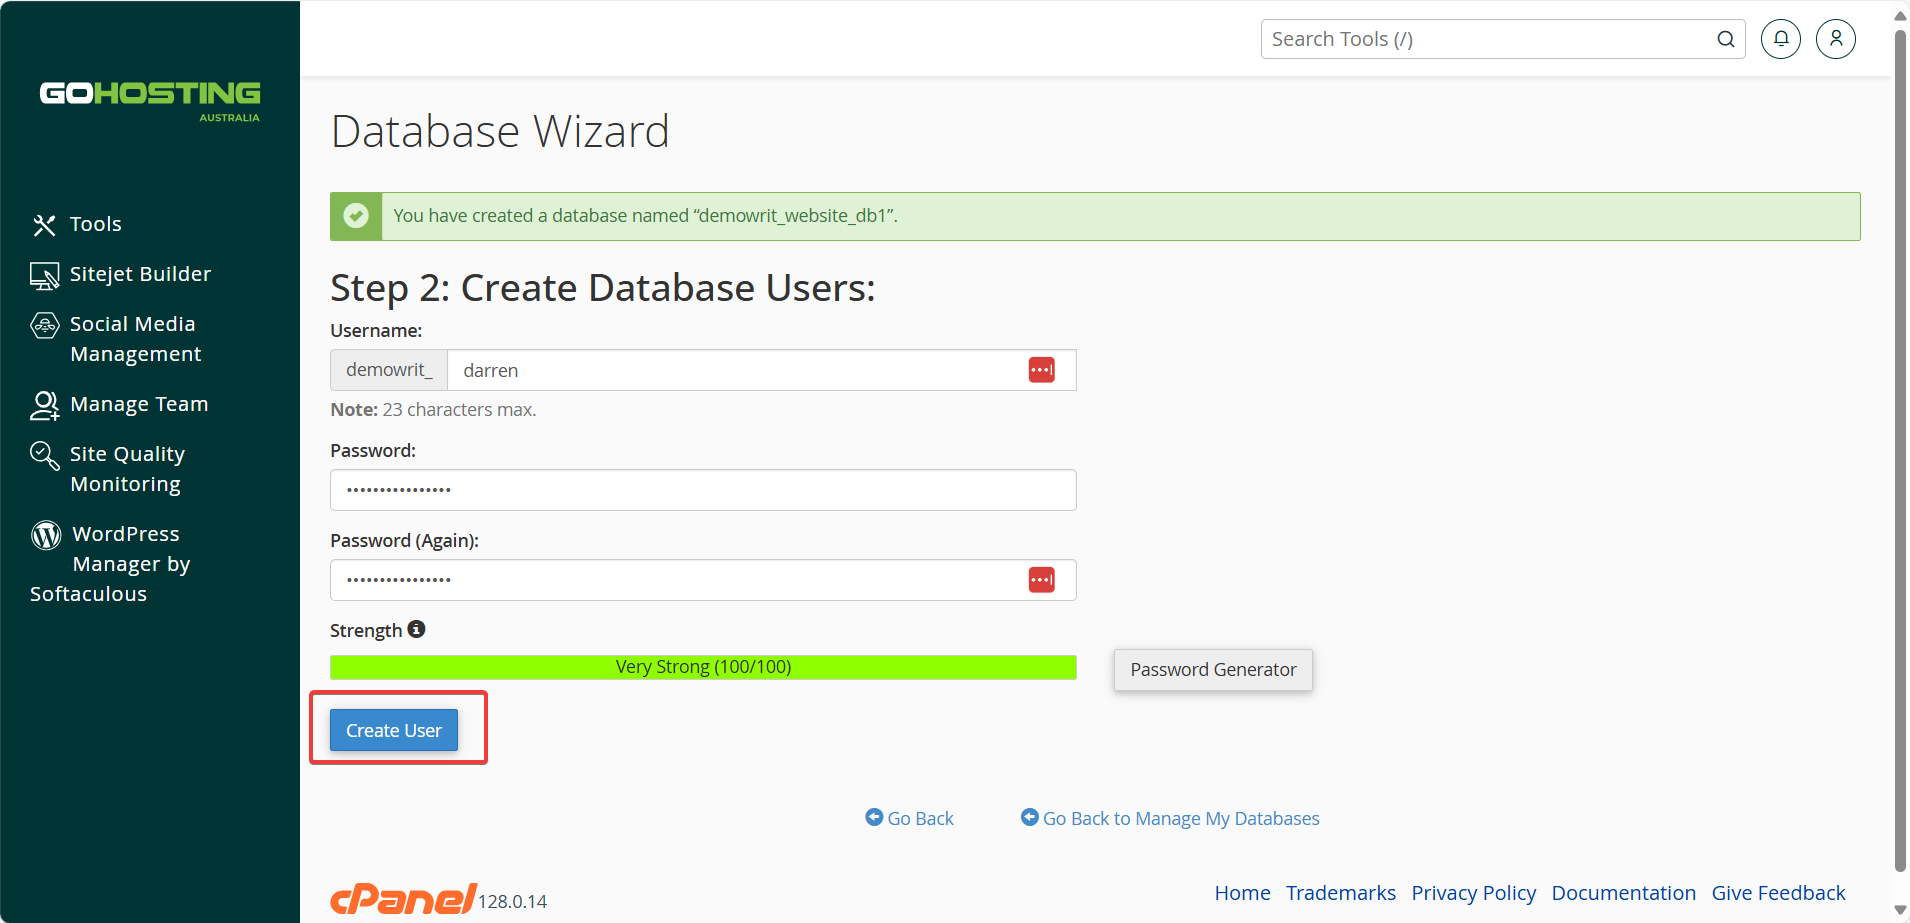
6. Finish setup
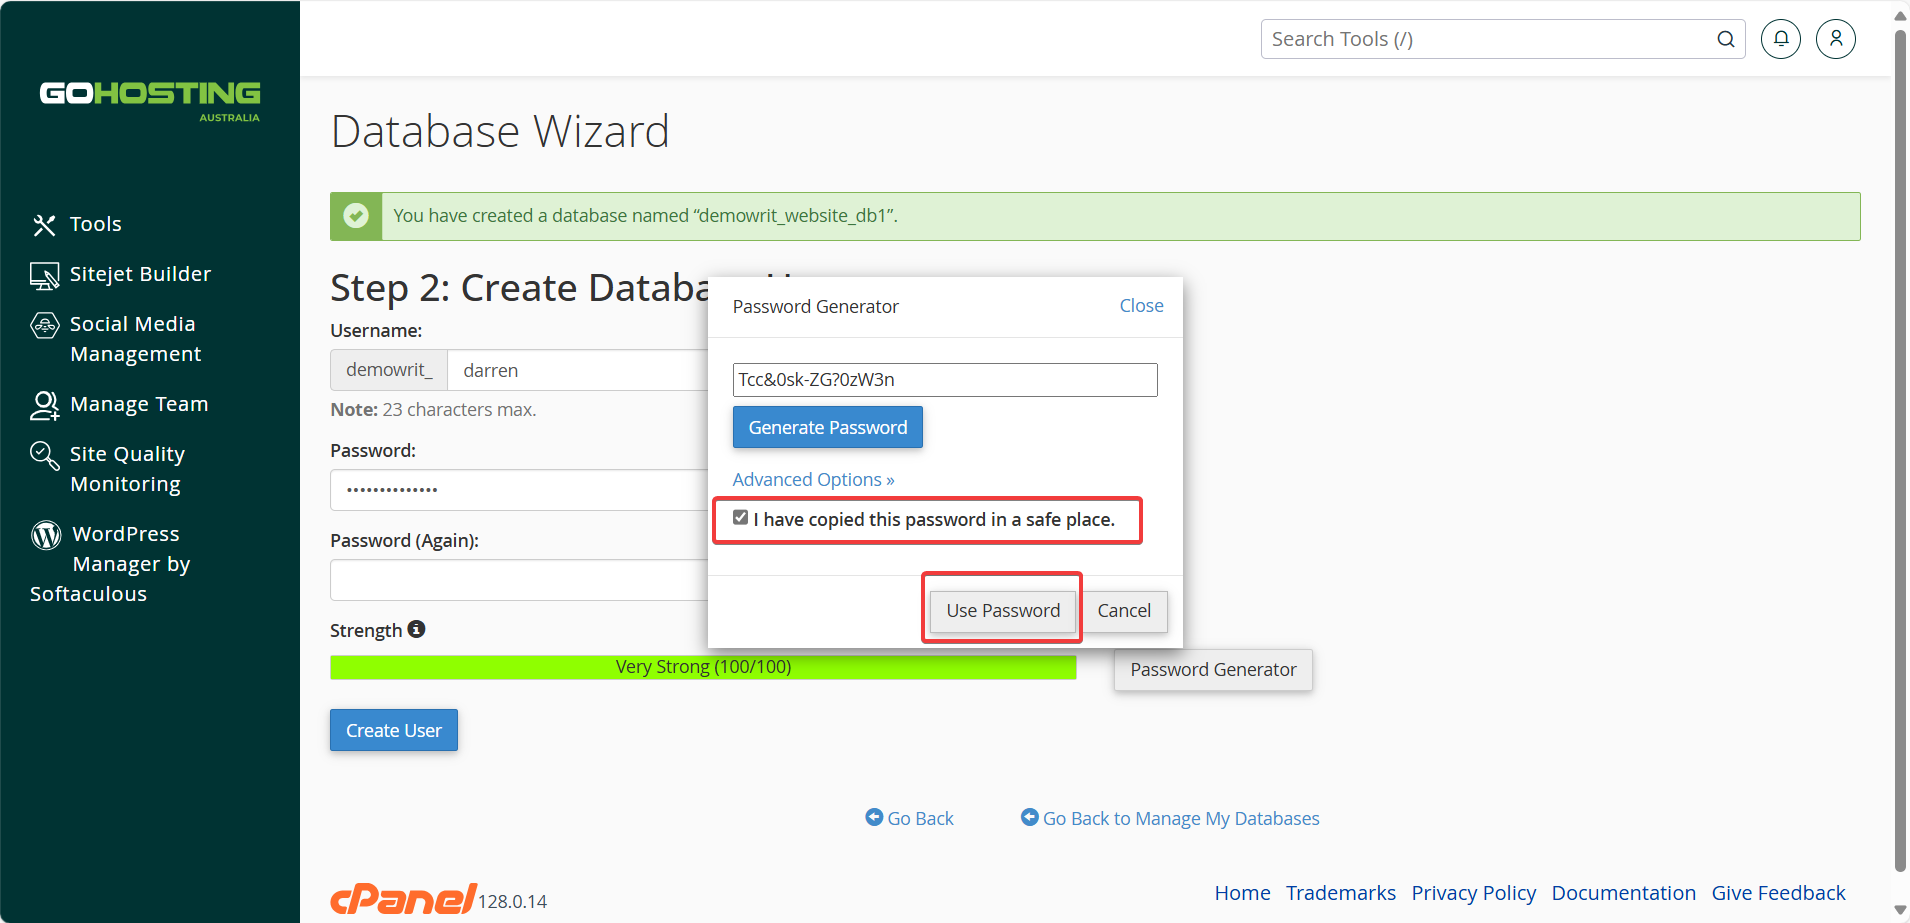
You will now see a confirmation message that your SQL database and user have been fully set up and linked.
From here, you can choose to:
Add another database
Add another user
Return to Manage My Databases
Return to Home
Access your new SQL Database via phpMyAdmin
In the cPanel dashboard, scroll down to the "Databases" section and click the "phpMyAdmin" icon.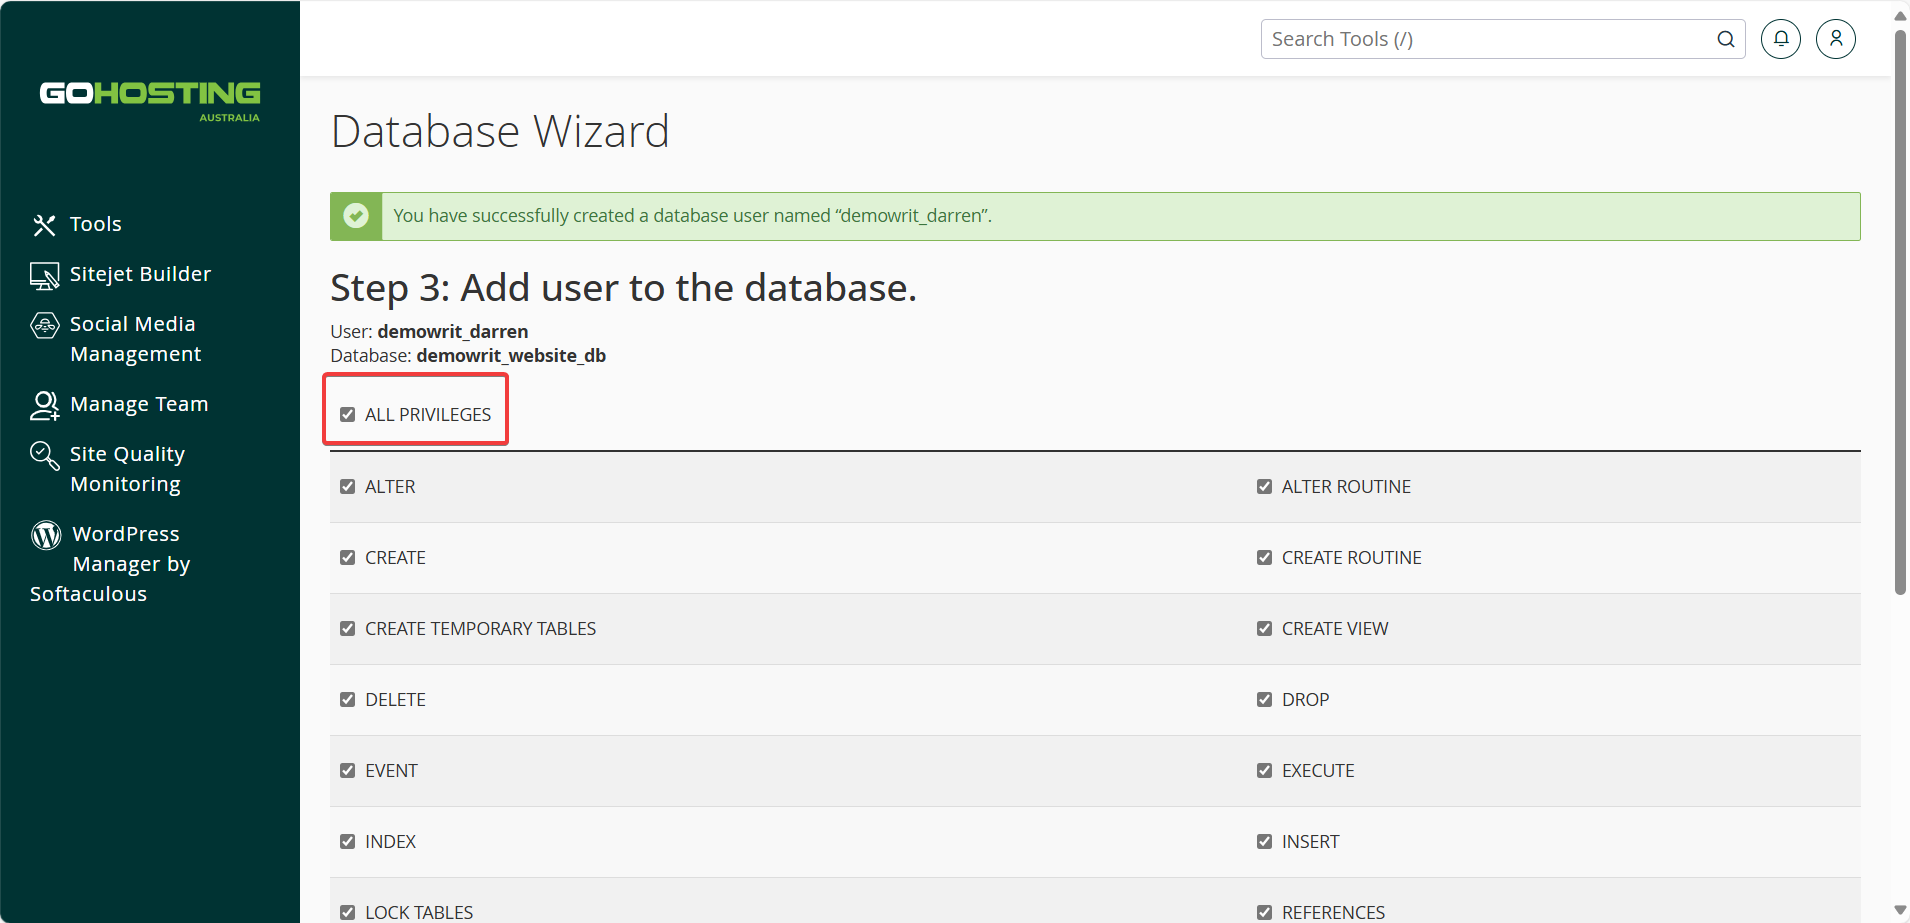
In phpMyAdmin, you'll see a list of databases on the left. Click on the name of your newly created database.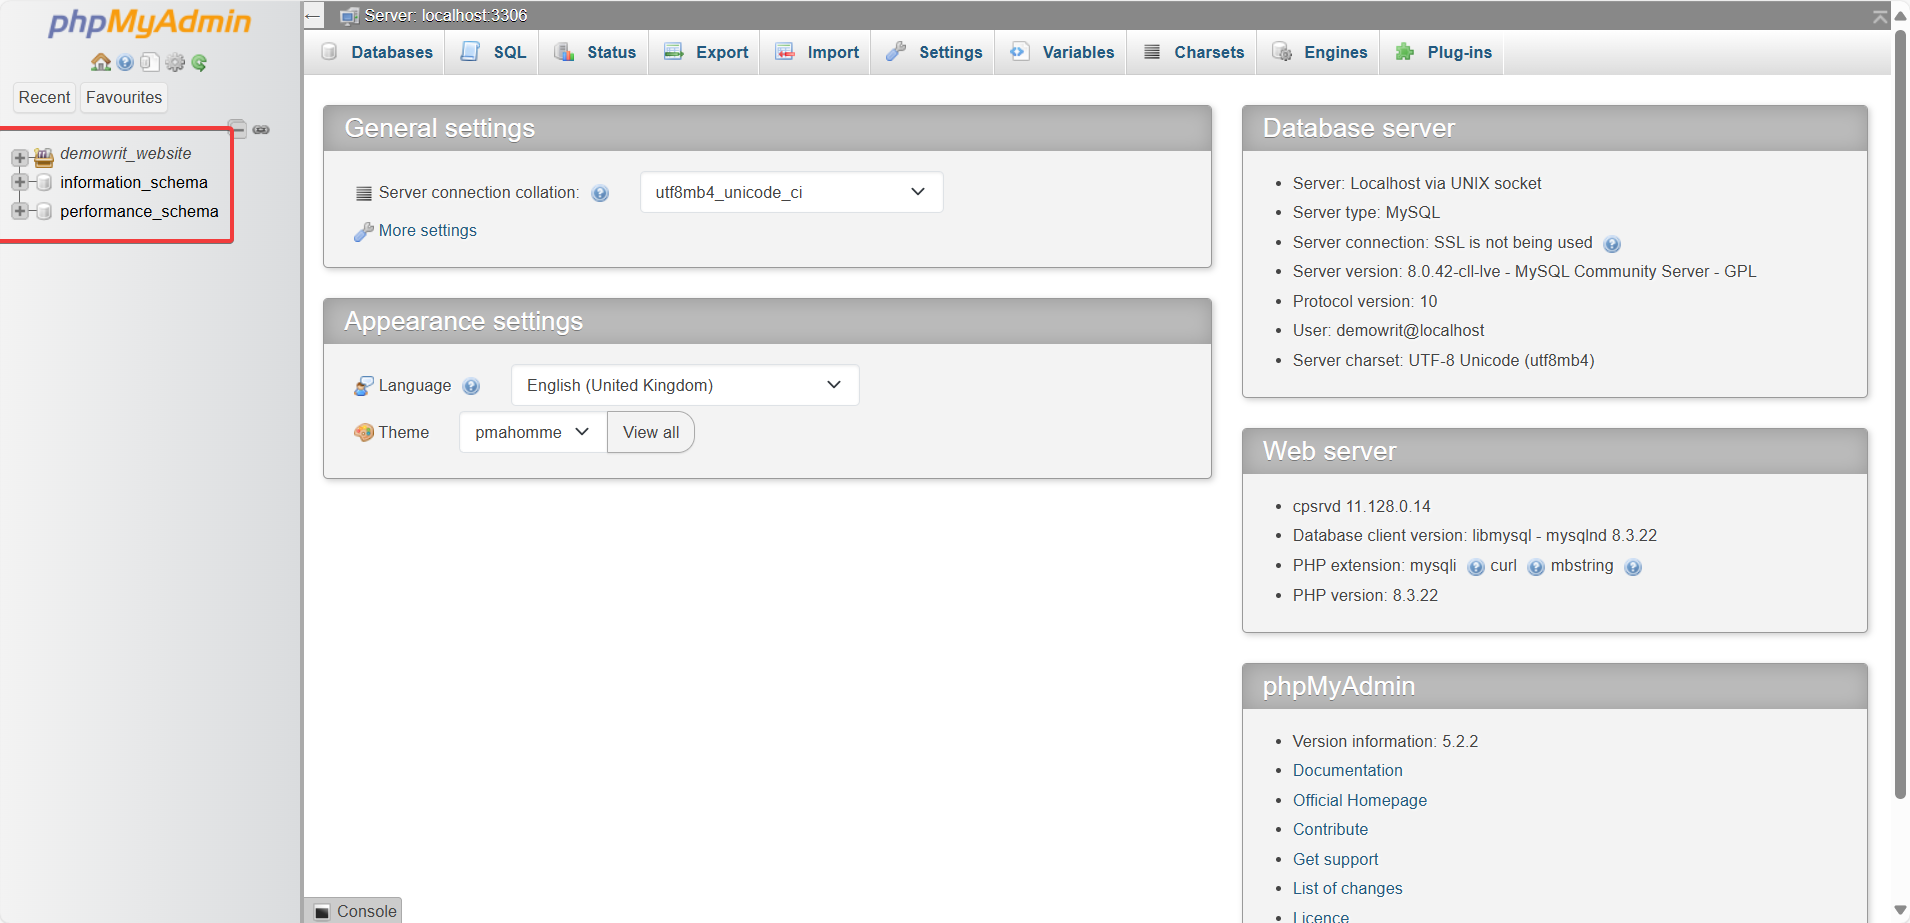
From here, you can:
Create tables
Import/export data
Run SQL queries
Edit rows, fields, etc.
