
Changing your domain’s nameservers is an important step when you want to point your domain to a new hosting provider or DNS service. Nameservers direct web browsers to your website when someone types in your domain name. If your domain is registered with GoHosting, updating the nameservers is simple and can be completed in just a few minutes. This guide walks you through it. Pointing to Shopify of Wix instead? Those use DNS records rather than name servers.
How to change your domain's nameservers
Follow the step-by-step instructions below to change the nameservers on your domain with GoHosting.
1. Log in to your GoHosting account
Go to www.gohosting.com.au and click "Account" in the top-right corner.
Enter your email address and password, then click "Login."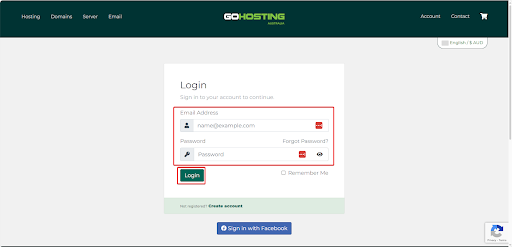
Complete two-factor authentication by entering the one-time password sent to you.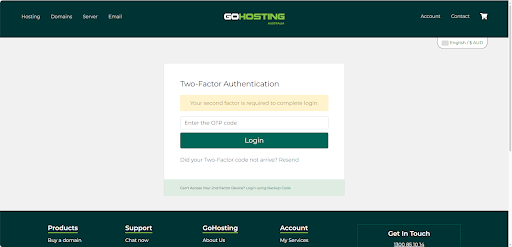
2. Navigate to your domains
Once logged in, click "Domains" in the top menu, then select "My Domains." Alternatively, click the domain count on your client dashboard.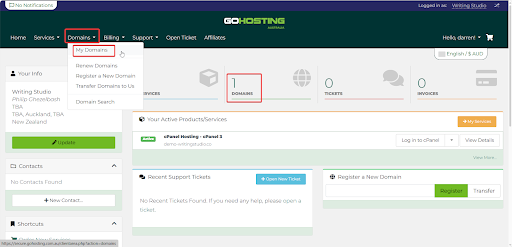
3. Select the domain you want to modify
On the domain management page, you will see a list of all domains registered under your account.
Tick the box next to the domain you want to update, then click "Manage Nameservers".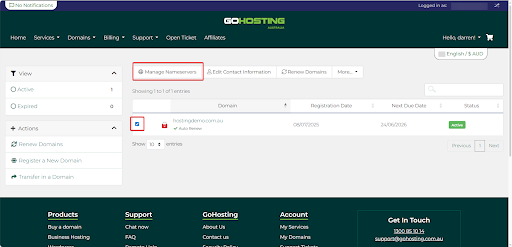
4. Update the nameservers
Verify you’ve selected the correct domain by checking the field labeled "The changes made below will affect the following domains:"
Select the option to use custom nameservers (instead of default nameservers). Then, enter the new nameserver addresses provided by your hosting provider or DNS service. Typically, at least two nameservers are required.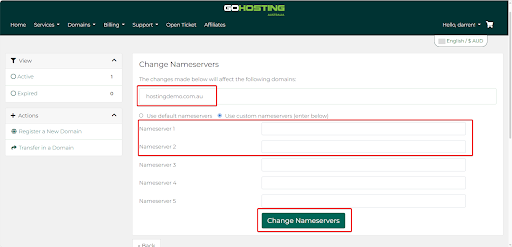
Tip: You can find your new nameserver details by logging into your hosting or DNS provider and checking the DNS settings or Nameservers section.
If you are using GoHosting as a hosting provider, these should automatically be set to:
ns1.gohosting.com.au
ns2.gohosting.com.au
ns3.gohosting.com.au
Double-check for any typos to ensure your domain points to the correct location. When ready, click "Change Nameservers" to save your changes.
A message will appear confirming: "Changes Saved Successfully!"
5. Allow time for DNS propagation
DNS changes can take anywhere from a few minutes up to 48 hours to propagate worldwide. During this time, your domain may intermittently point to either the old or new location.
You can use tools like WhatsMyDNS to monitor the status and verify that your domain is pointing to the new nameservers.
