
WordPress is one of the world's most popular content management systems (CMS), powering millions of websites, from personal blogs and business sites to e-commerce stores.
Installing WordPress on your GoHosting hosting package using cPanel is relatively simple, even if you have little to no technical experience. This step-by-step guide will help you get your WordPress site up and running in no time.
How to install WordPress using cPanel
Here’s how to install WordPress on your GoHosting hosting package for a specific domain using cPanel:
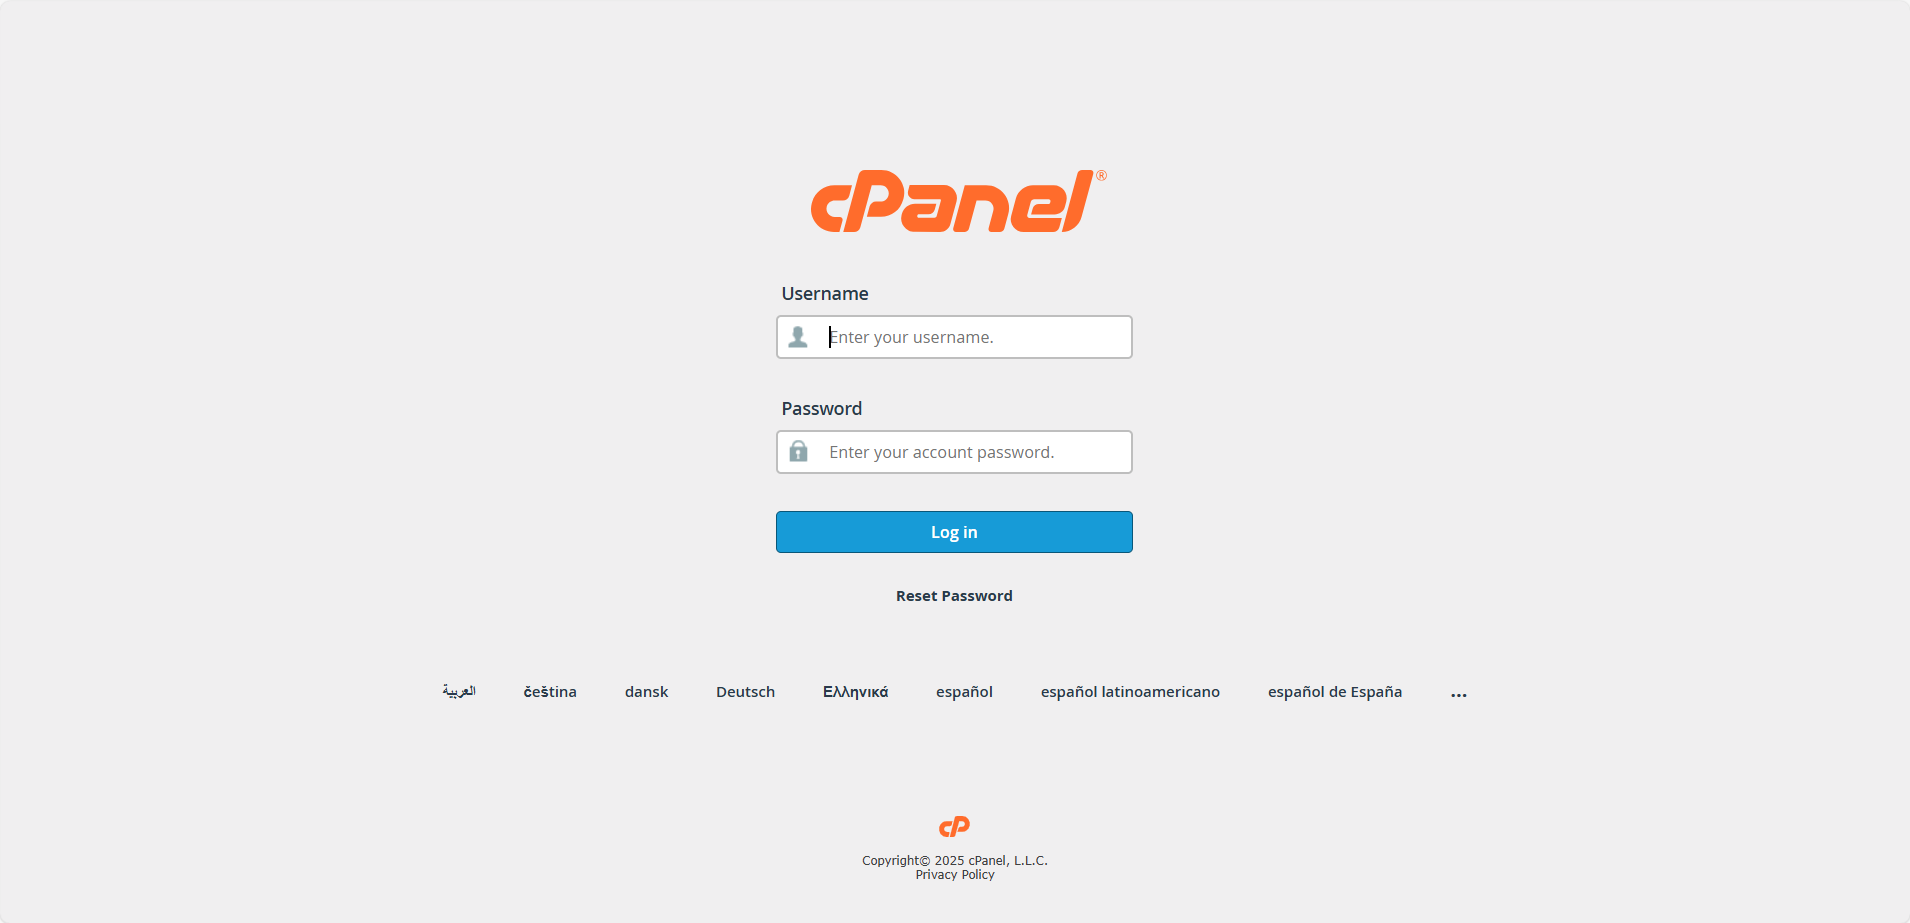
1. Access your GoHosting cPanel
You can log in to your GoHosting cPanel using one of the following methods:
Via your welcome email: Click the cPanel login link provided in the welcome email from GoHosting.
From your GoHosting account: Sign in to your account at gohosting.com.au and click “Log in to cPanel” on the dashboard.
Using your domain name: If your domain’s DNS is pointing to GoHosting, open a browser and go to: {yourdomain}.com/cpanel
2. Go to the "Software" section
Once logged in, navigate to the "Software" section on the main cPanel dashboard.
You will see two tools in this section that you can use to install WordPress:
WordPress Manager by Softaculous
Softaculous Apps Installer
The process is virtually identical, regardless of which one you use.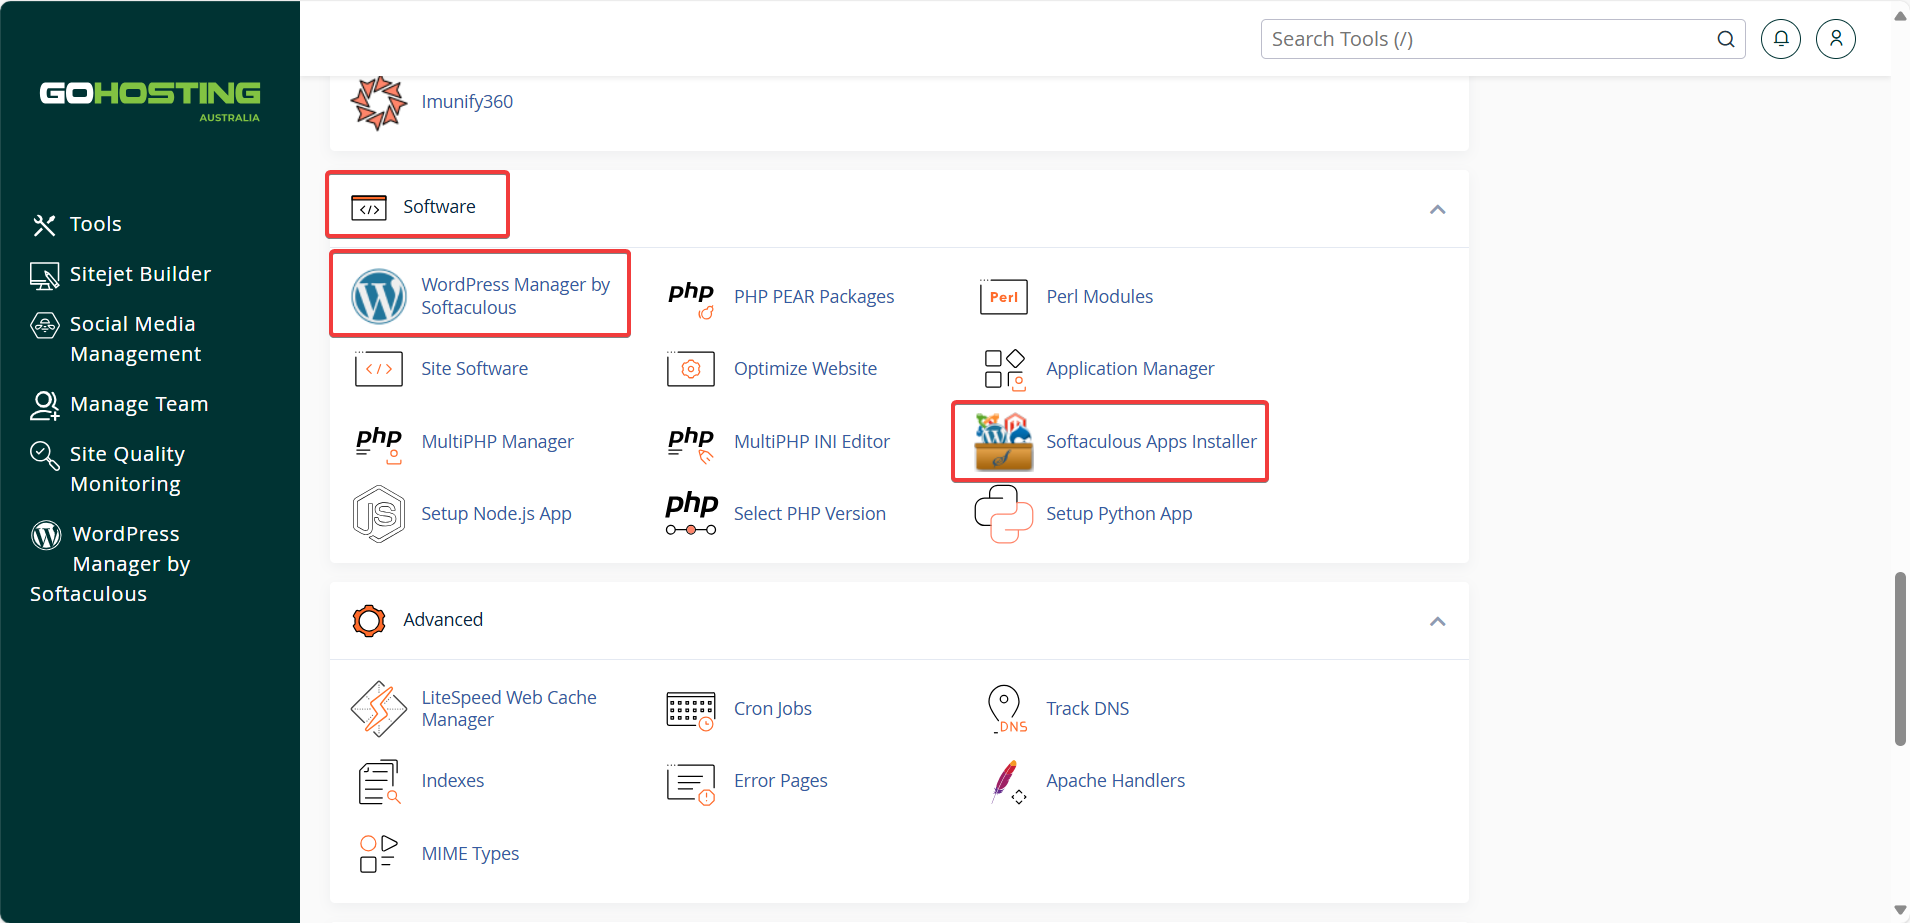
3. Initiate WordPress installation
If you're using “WordPress Manager by Softaculous”, you’ll see a screen displaying which of your existing websites (if any) already have WordPress installed on your GoHosting account.
To install a fresh copy of WordPress, simply click the "Install" button.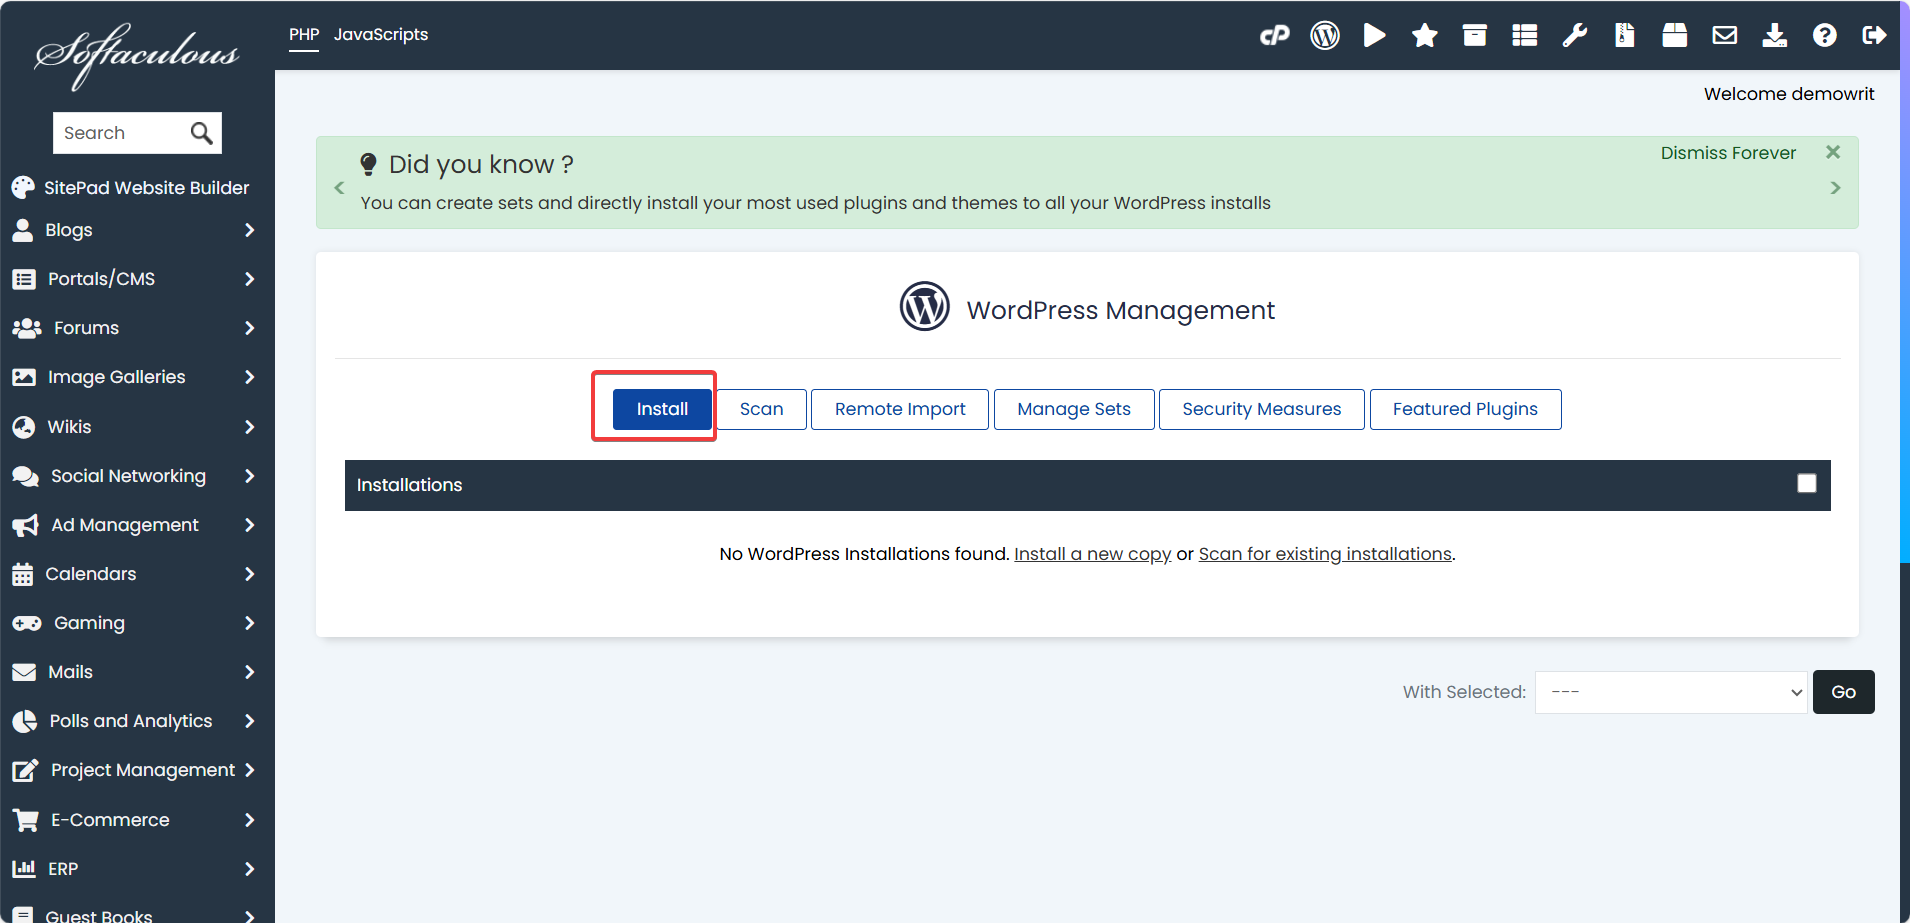
If you're using the Softaculous Apps Installer instead, you’ll be presented with a screen showcasing a selection of apps you can demo, install, or explore.
Find the WordPress app and click "Install".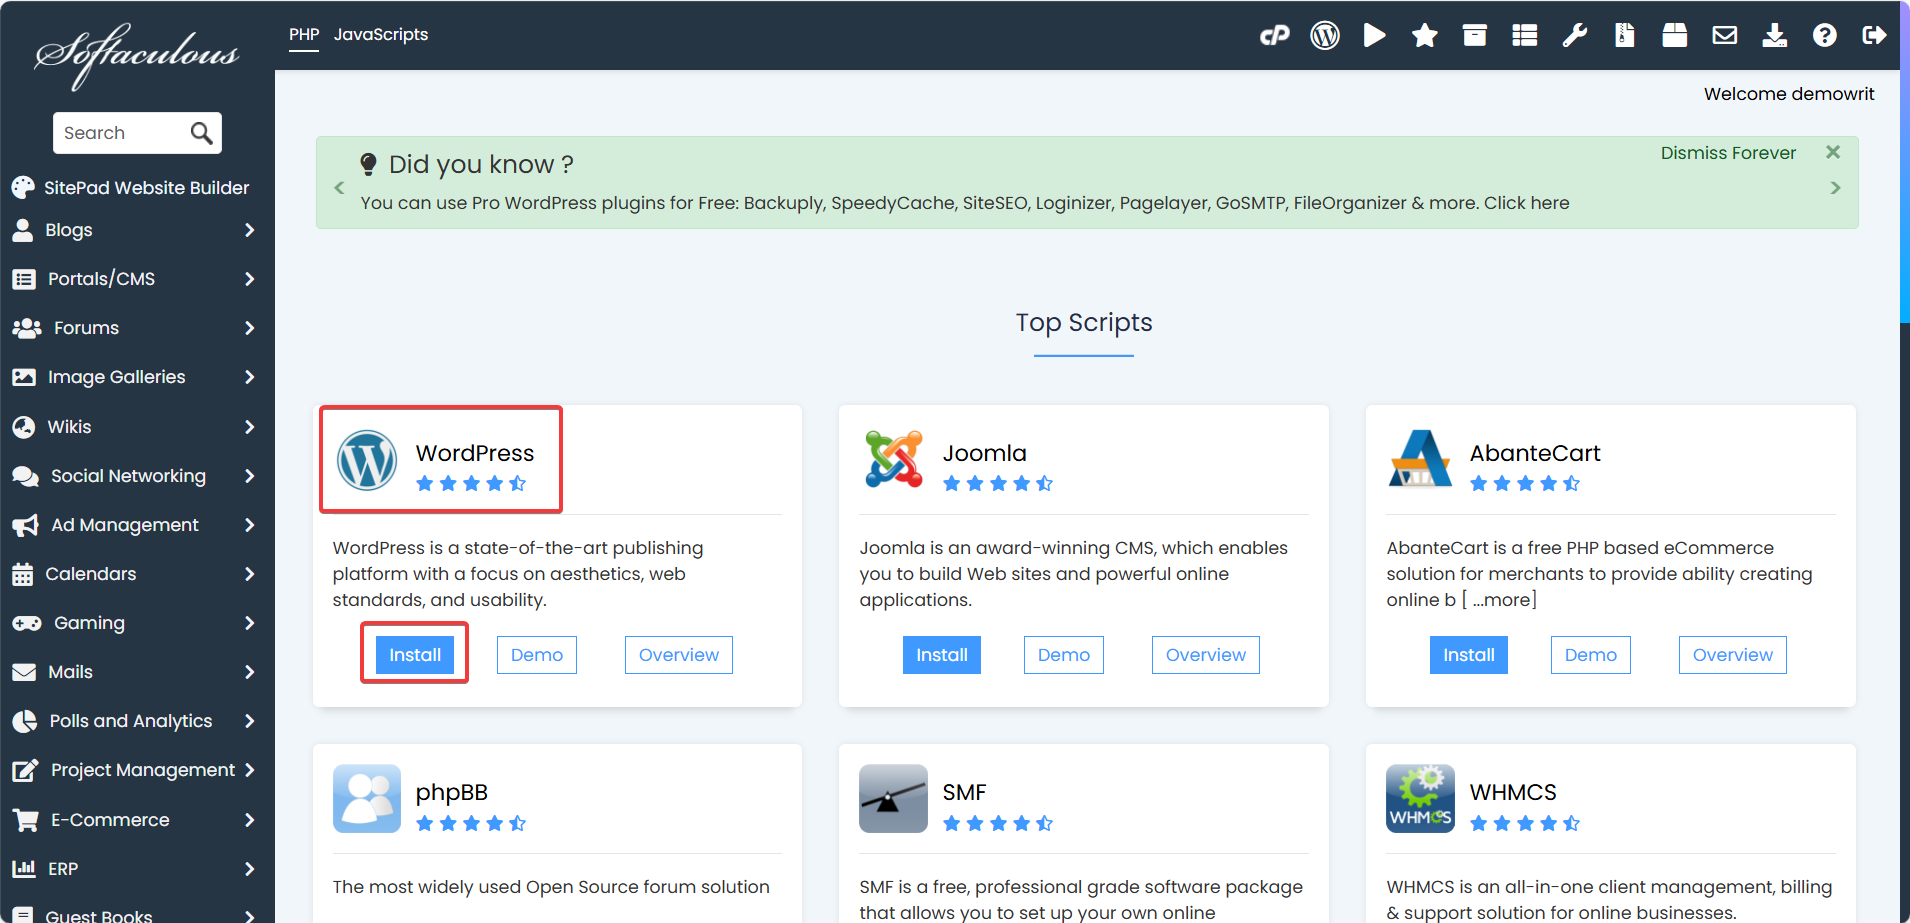
Regardless of which tool you use, clicking "Install" will take you to the same place—the Softaculous WordPress installation setup screen.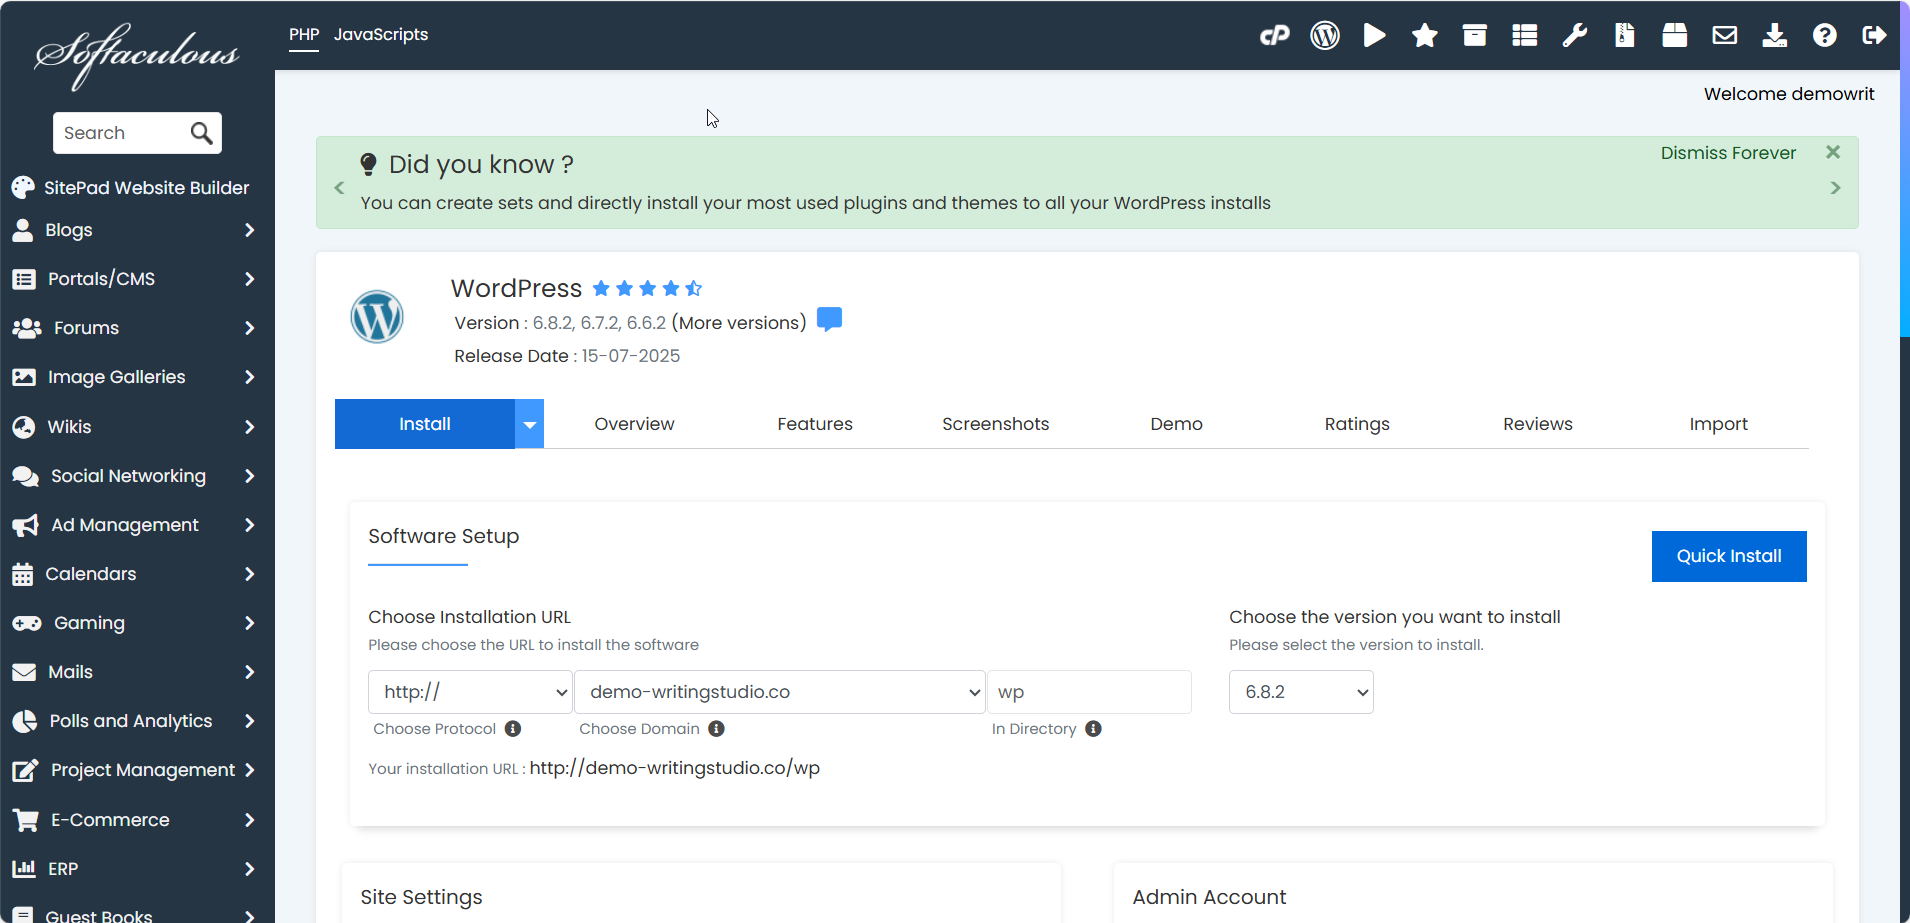
4. Fill in the installation details
Here, you'll need to provide some basic information for your WordPress installation.
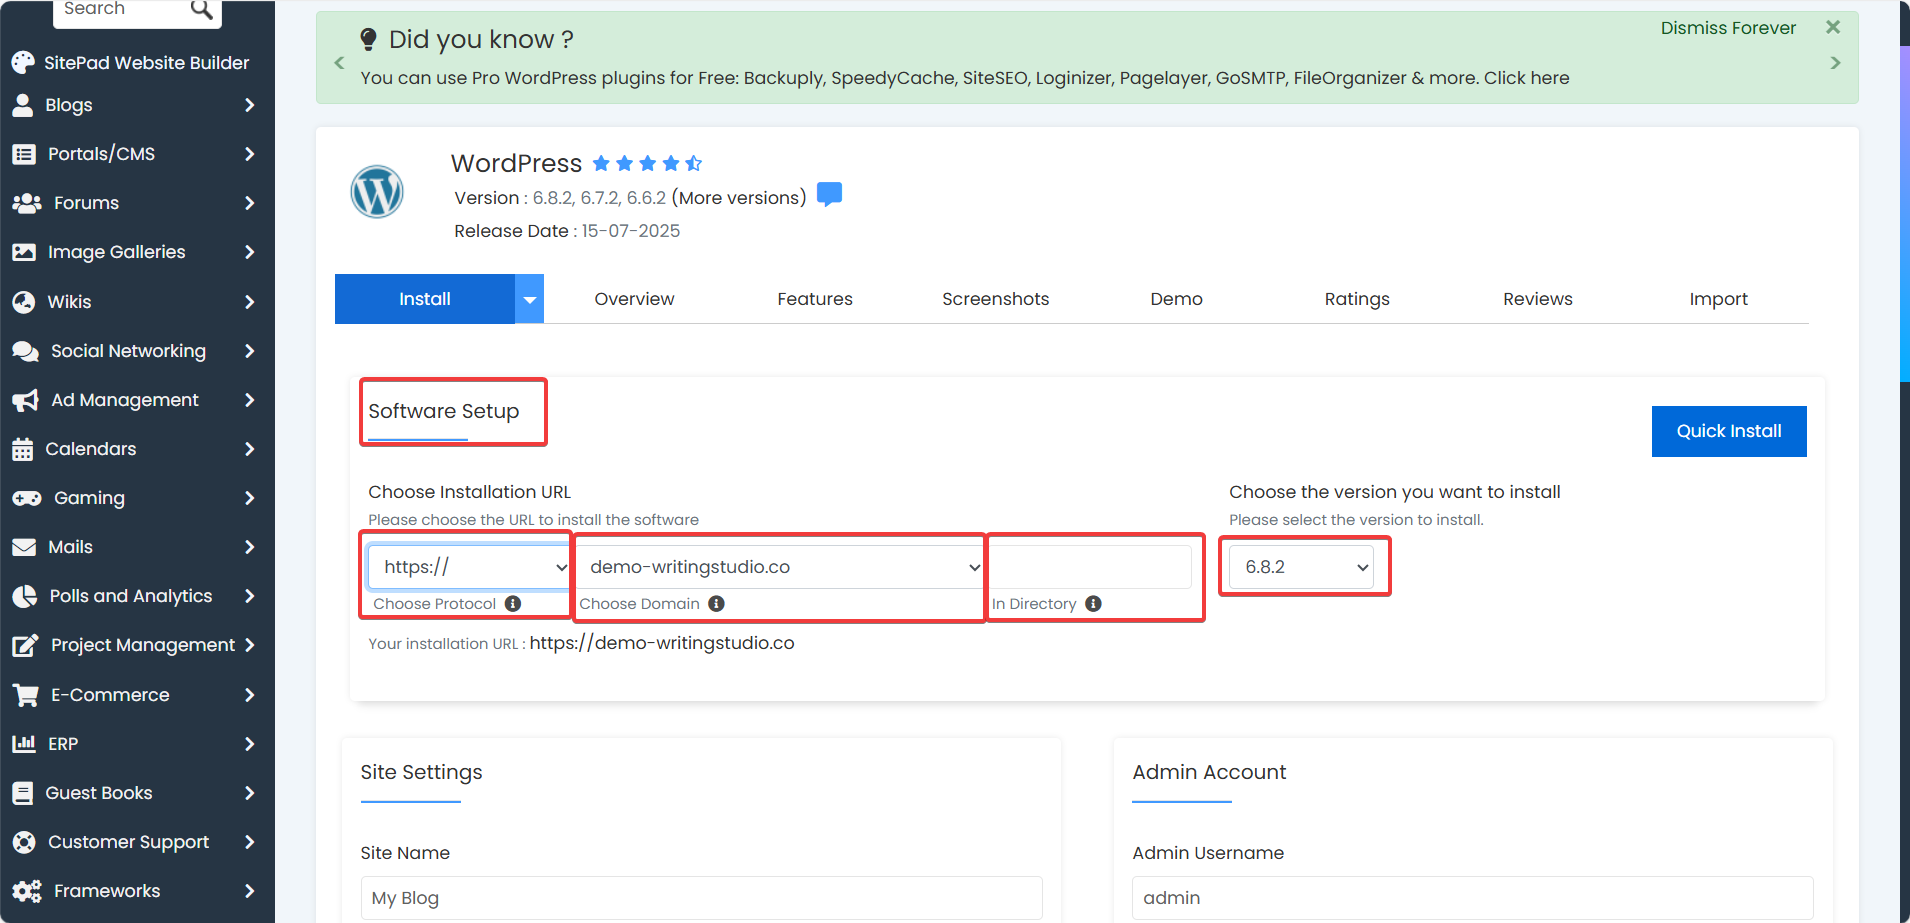
First, in the "Software Setup" section, complete the following fields:
Choose Protocol: Select https:// if your domain has an SSL certificate (recommended). Otherwise, choose http://.
Choose Domain: Select the domain on which you want WordPress installed from the dropdown.
In Directory: Leave this blank to install directly on your domain (usually recommended). If you prefer WordPress in a subfolder, enter the folder name here (e.g., "blog").
Choose the version you want to install: This will likely be set to the latest version by default. Leave it as is unless you have a specific reason to change it.
Next, in the "Site Settings" section, enter a name and a short description or tagline for your site.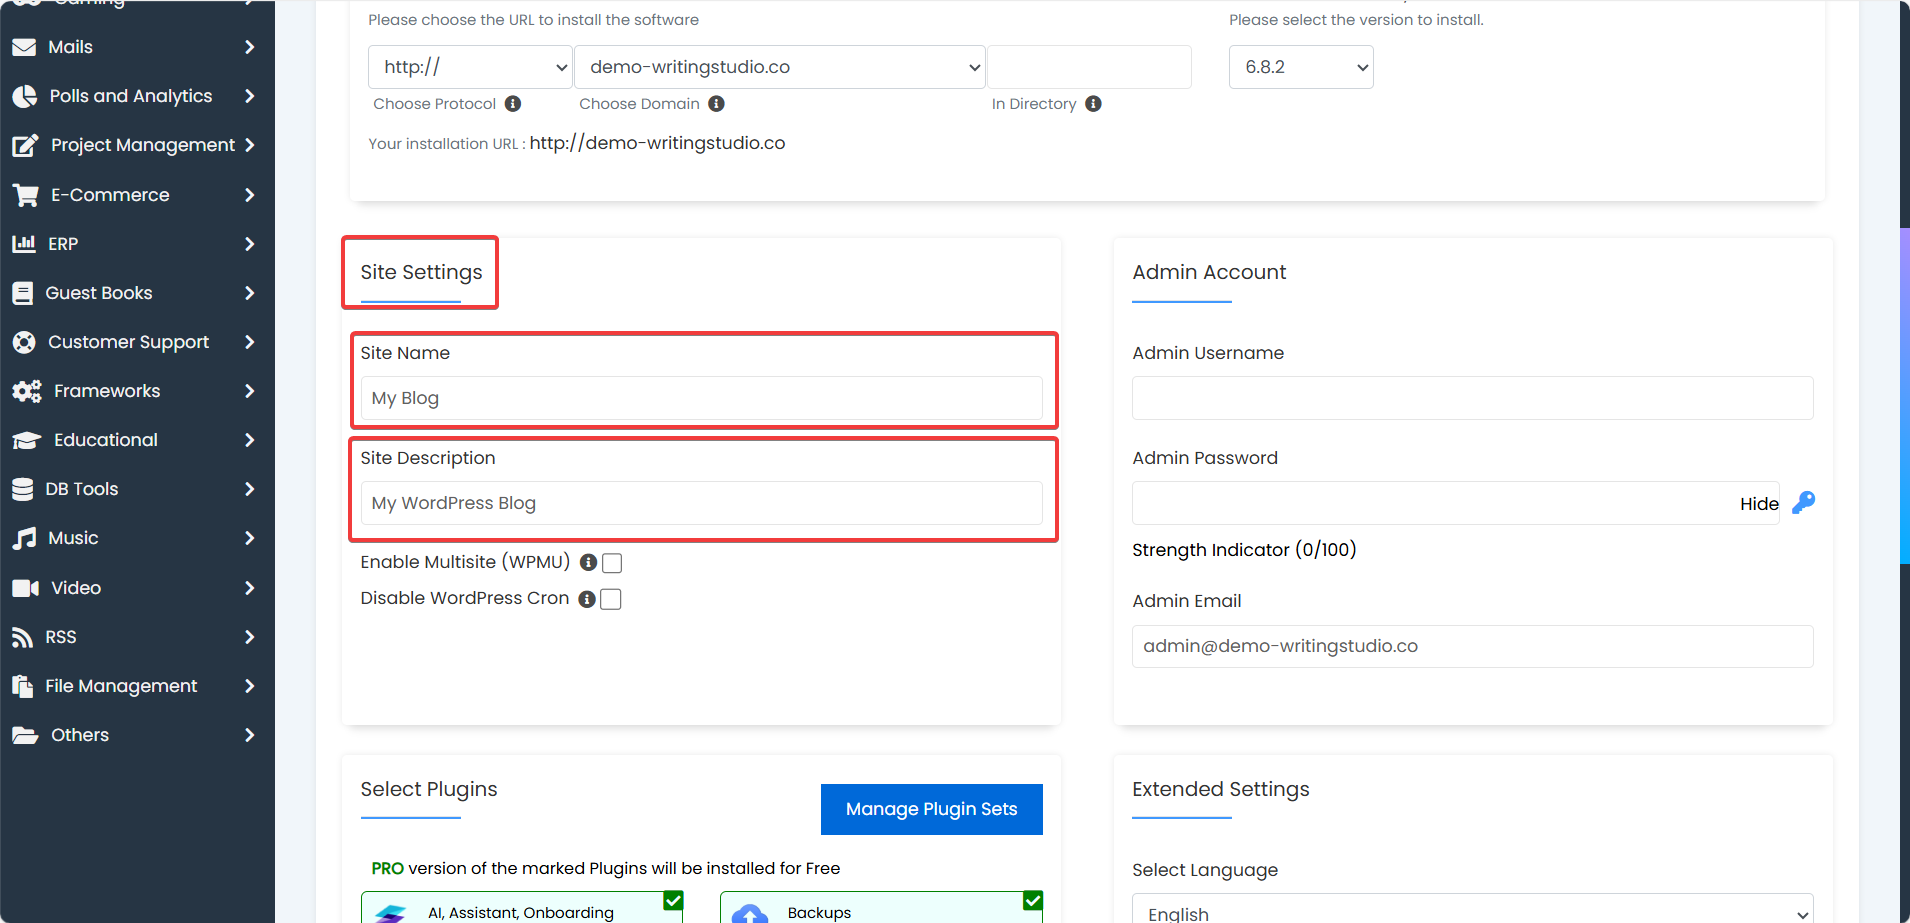
Then, in the "Admin Account" section, set a username and a strong password for your WordPress dashboard login, along with a valid email address to receive site-related notifications. You can click the key icon to generate a strong password.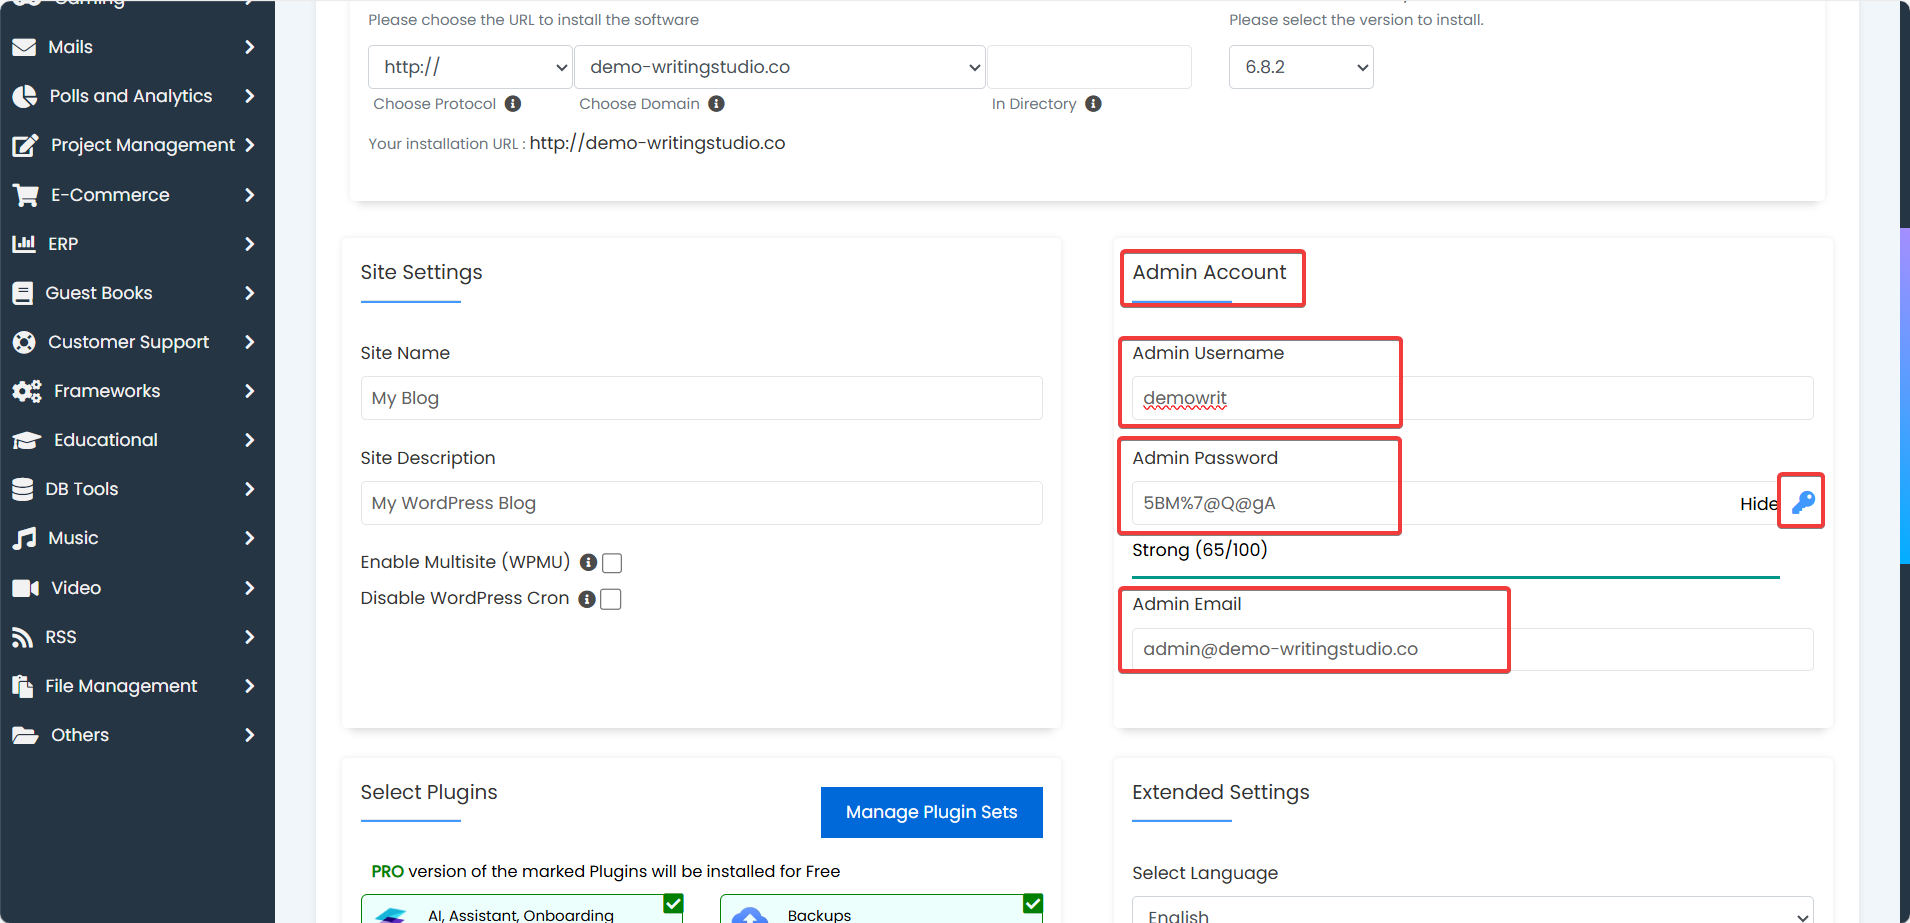
Finally, select or deselect any plugins you'd like to install according to your needs, and choose your preferred language for the WordPress dashboard.
5. Click “Install”
Double-check your settings and then scroll down and click "Install" at the bottom of the page.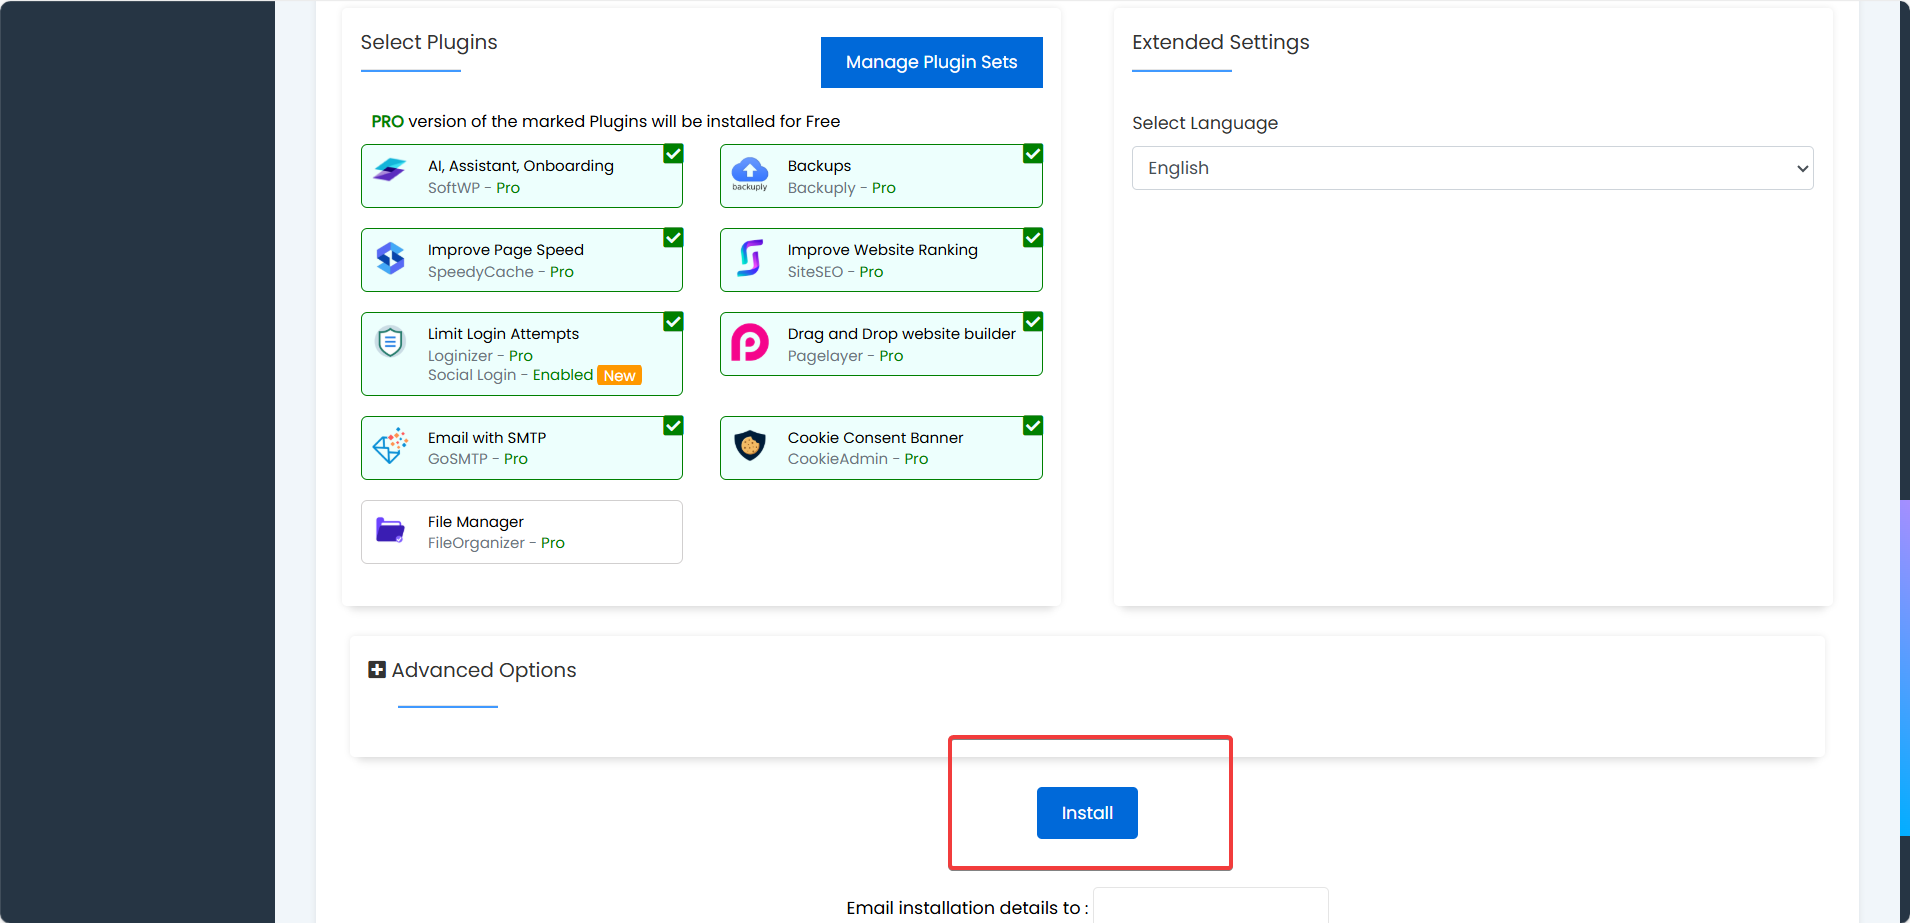
Softaculous will install WordPress on your chosen domain. This usually takes under a minute. Avoid closing the browser or navigating away during this process.
6. Log in to your new WordPress website
Once the installation is complete, return to cPanel and select the "WordPress Manager by Softaculous" tool in the Software section.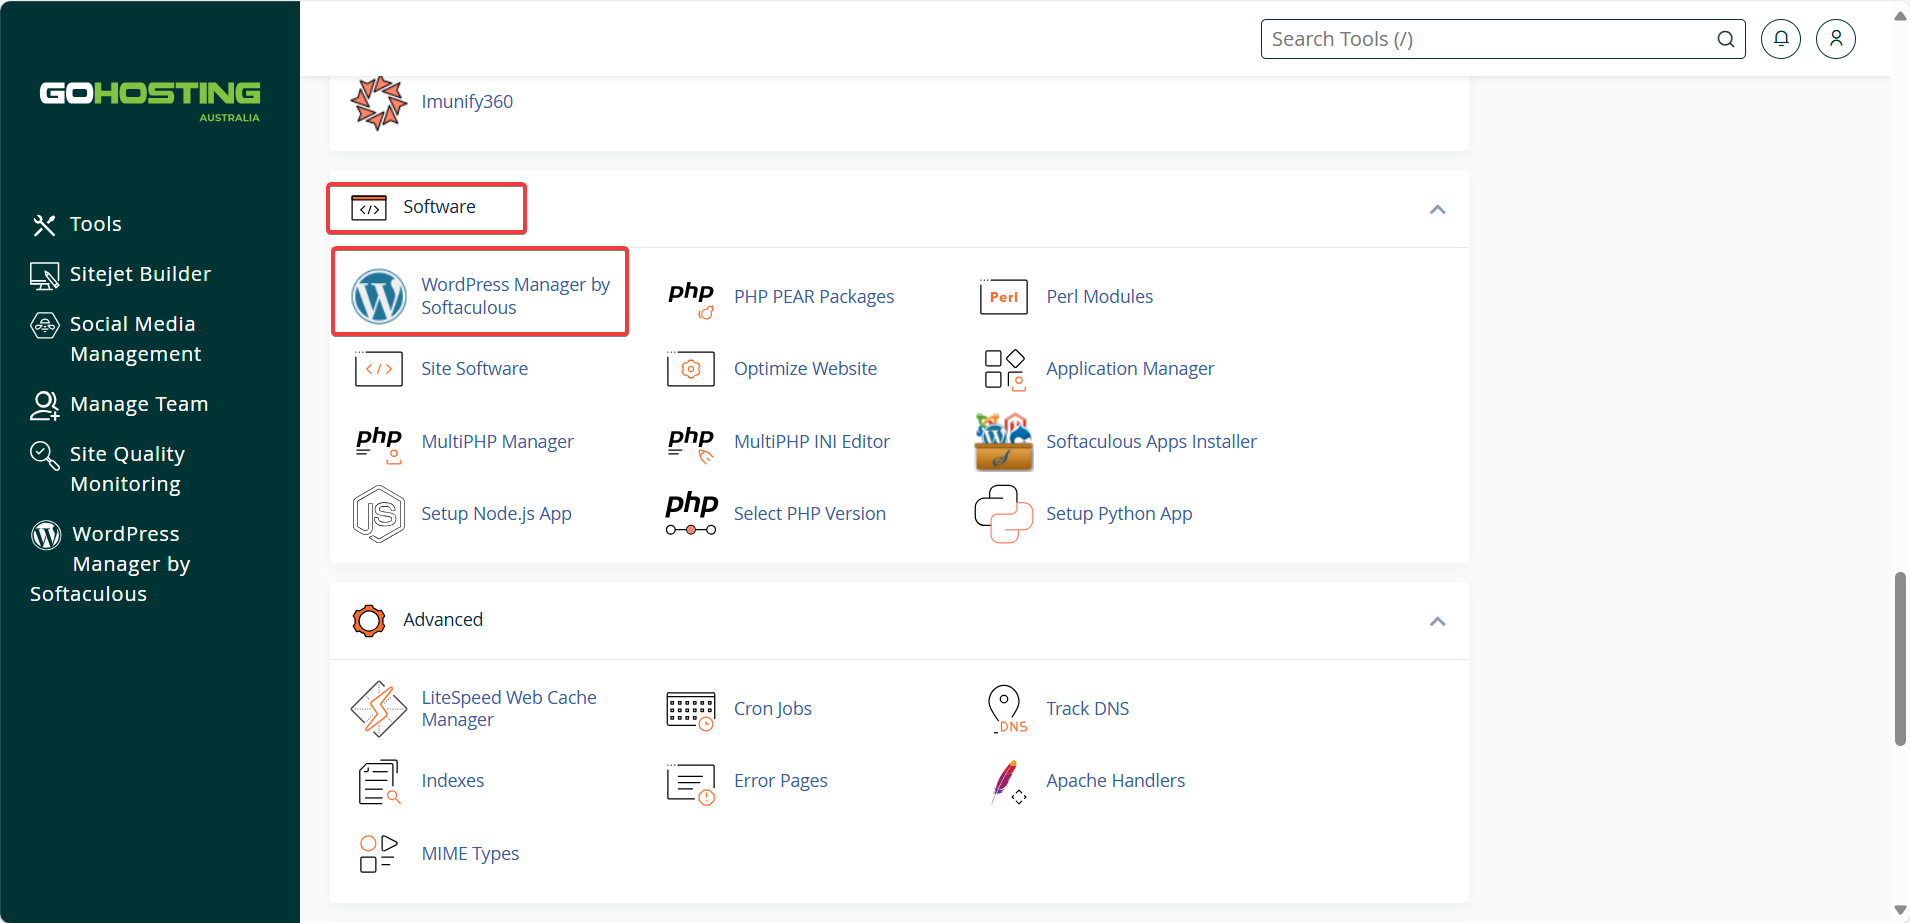
You’ll see your website listed under the Installations section, indicating that it has been successfully installed.
Click the "Login" button to access your WordPress dashboard using the credentials you set earlier.
Alternatively, you can log in by visiting https://yourdomain.com/wp-admin and entering the same credentials.
Once you're logged in to your WordPress dashboard, you can begin building your site. Here are a few things you can start with:
Choose a theme
Install plugins
Create and publish pages and blog posts
Customise your site's settings and appearance
You may also set up a mailbox on your domain
