
If your domain name is registered with GoHosting but you’ve built your website on Wix, you’ll need to update your DNS settings to connect the two. This guide walks you through the process step by step.
This will ensure that when someone types your domain into a browser, they will see your Wix website. The process only takes about five minutes, but it may take up to 48 hours for the domain to fully connect.
Note: You’ll need a Wix Premium Plan for this to work, as Wix does not allow domain pointing on free plans.
Step-by-step instructions
Follow these steps to ensure your domain correctly points to your Wix site.
1. Add the domain to your Wix account
If you haven’t already, start by adding your domain to your Wix account:
Go to Wix.com and log in to your account.
In your account settings, navigate to the "Domains" section.
Click "Connect a domain you already own."
Select the site you want to connect, enter your domain details, and click "Let’s go".
Click "Yes, I own this domain".
Wix will confirm that your domain is managed at GoHosting.
2. Gather your Wix DNS records
Click "Start" on the screen that appears, then click "connect via pointing", and then select "Switch to pointing instructions."
Wix will display the DNS records you need to update:
A Record: Points your root domain to Wix’s IP address.
CNAME Record: Points your www subdomain to Wix’s designated hostname.
Keep this page open, as you’ll need to copy and paste the values provided shortly.
3. Log in to your GoHosting cPanel
Go to the cPanel login page using the link provided in your GoHosting welcome email, and enter your username and password.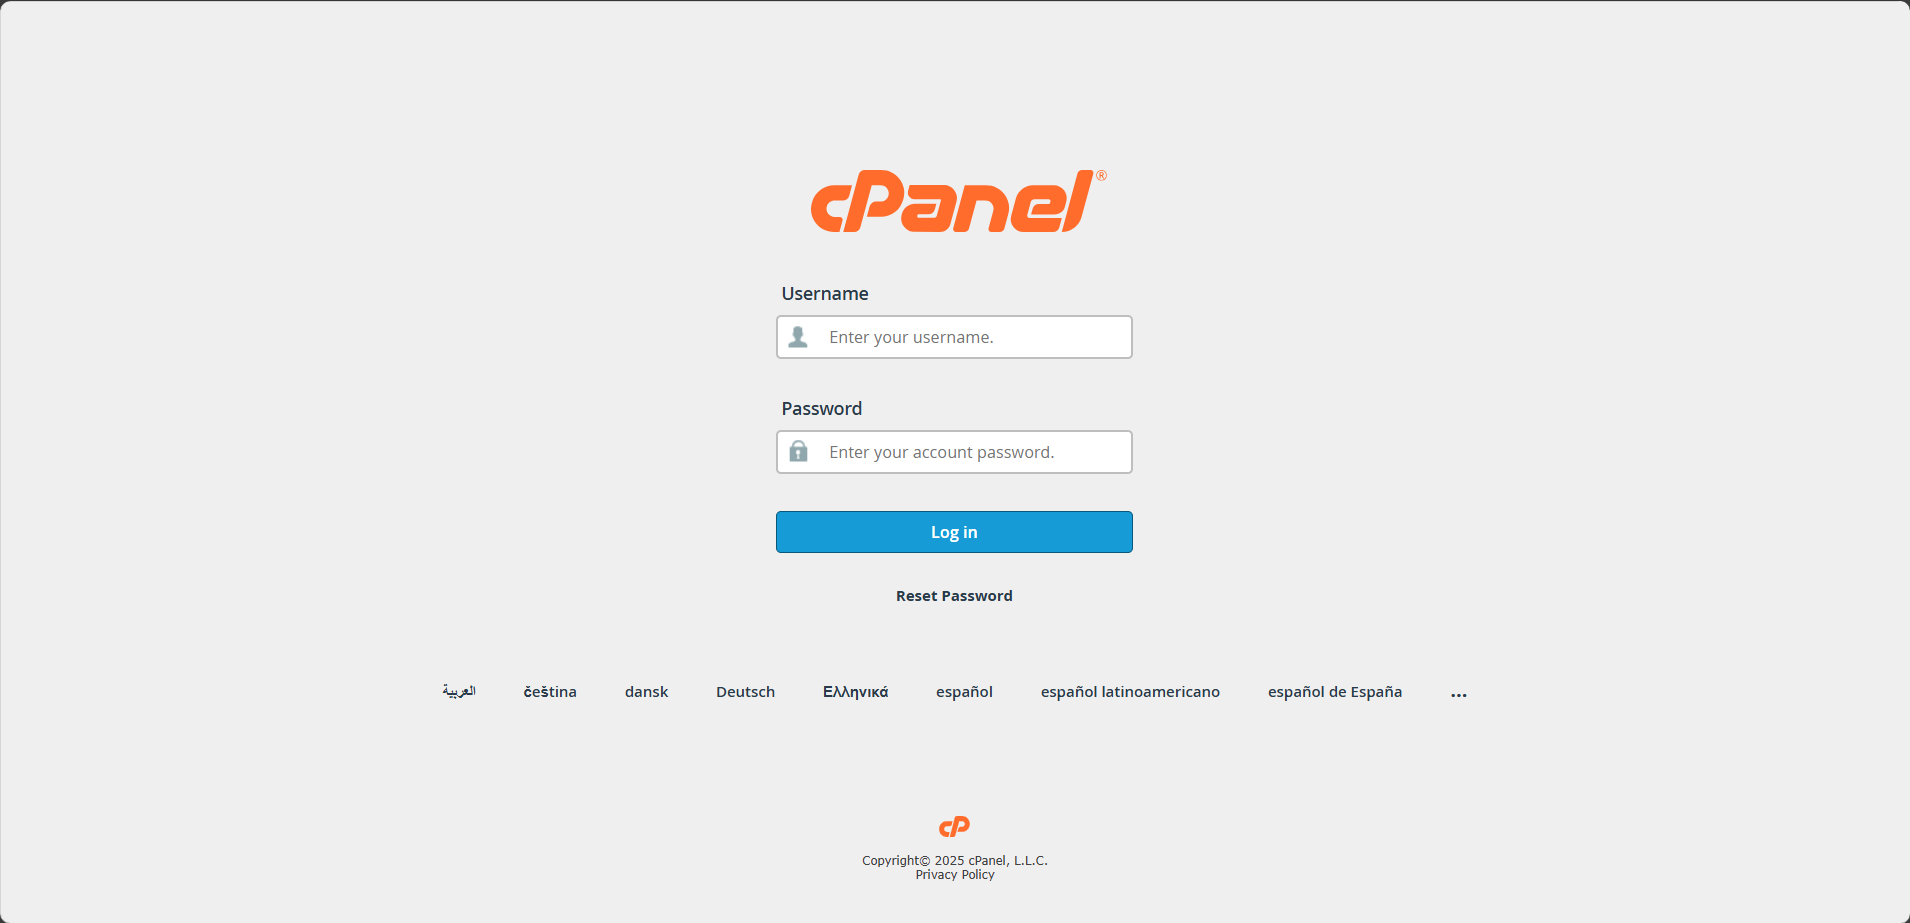
Alternatively, visit gohosting.com.au, log in to your account, and click "Log in to cPanel" on your client dashboard.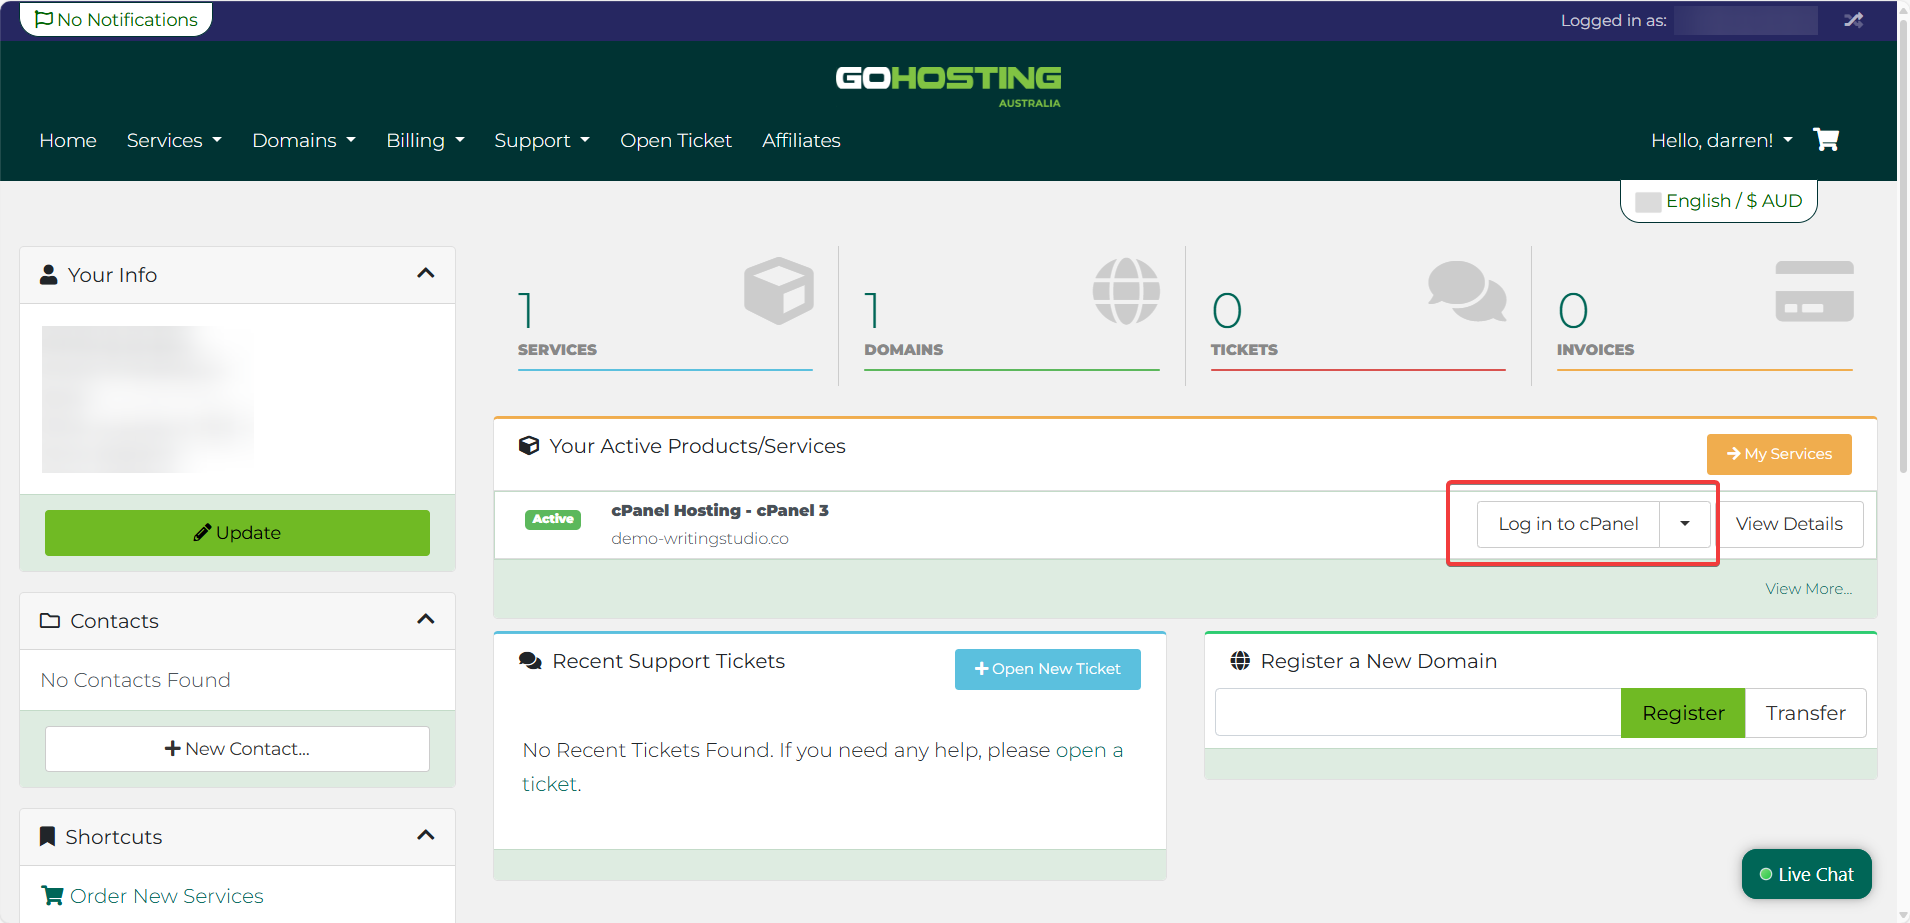
4. Navigate to the Zone Editor
On the cPanel dashboard, scroll down to the “Domains” section, then click the “Zone Editor” icon.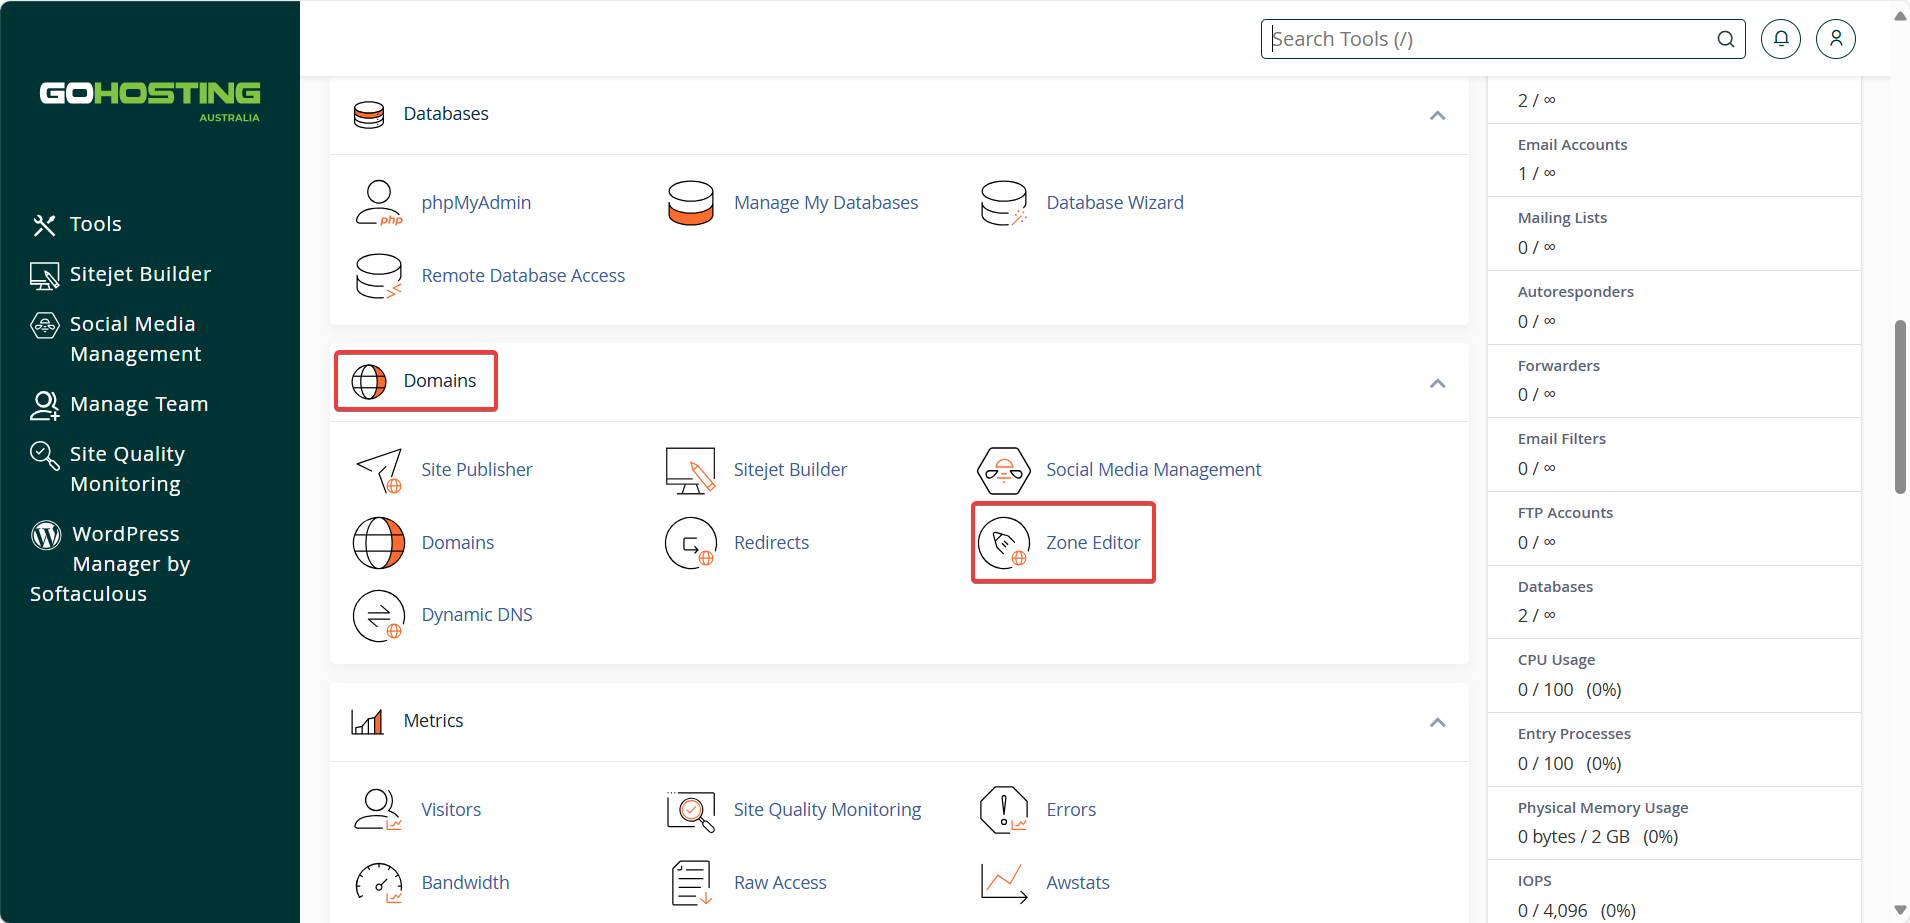
5. Update DNS records
On the Zone Editor page, you will see a list of your domains. Click "Manage" next to the domain you want to point to your Wix site.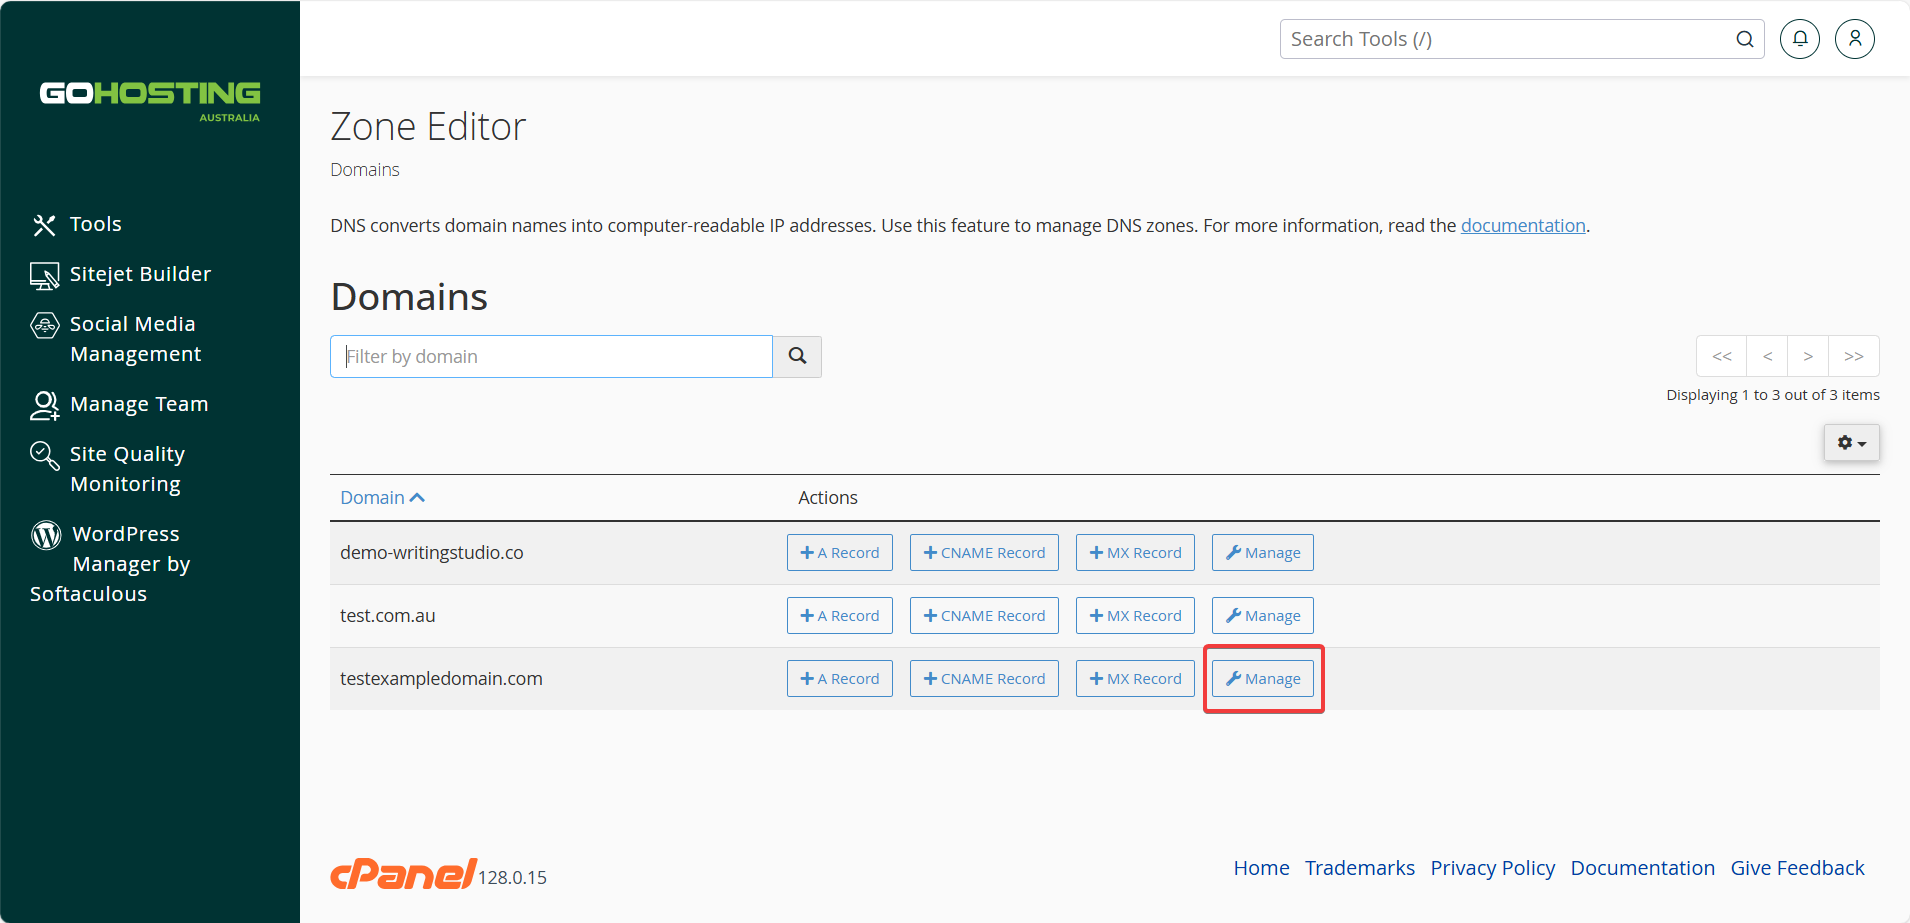
Locate the A Record (for the root domain) and the CNAME Record (for the www subdomain).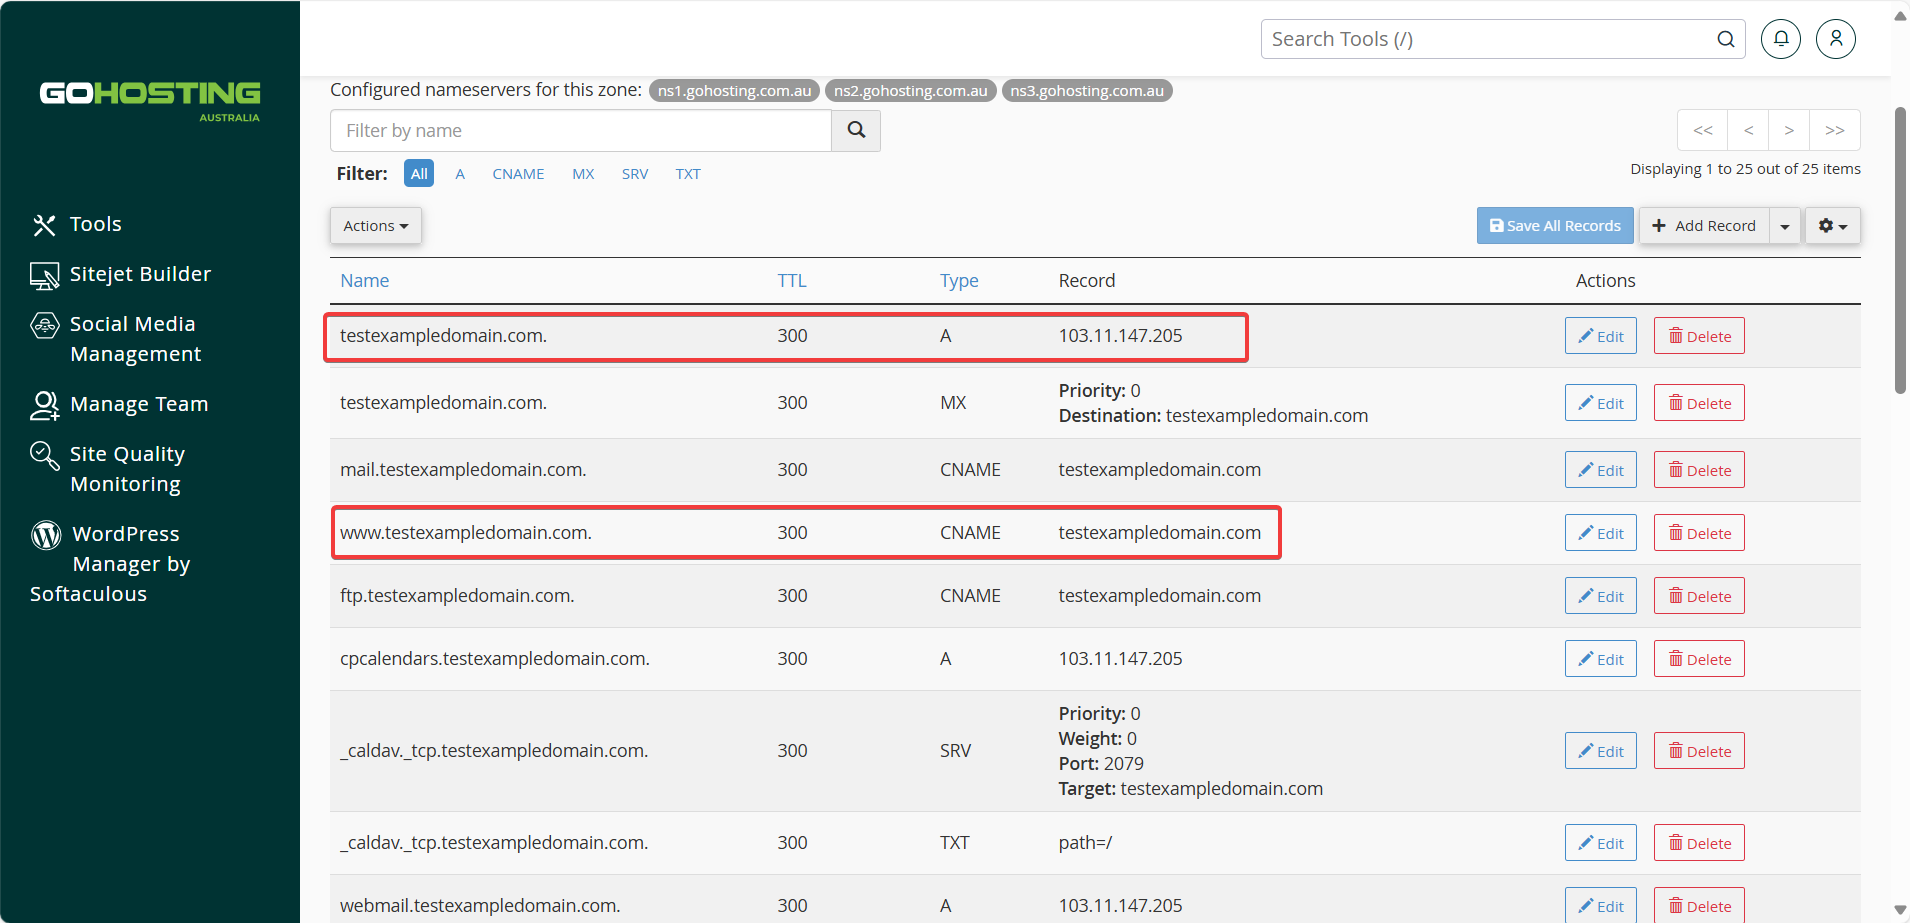
Click "Edit" next to the A Record.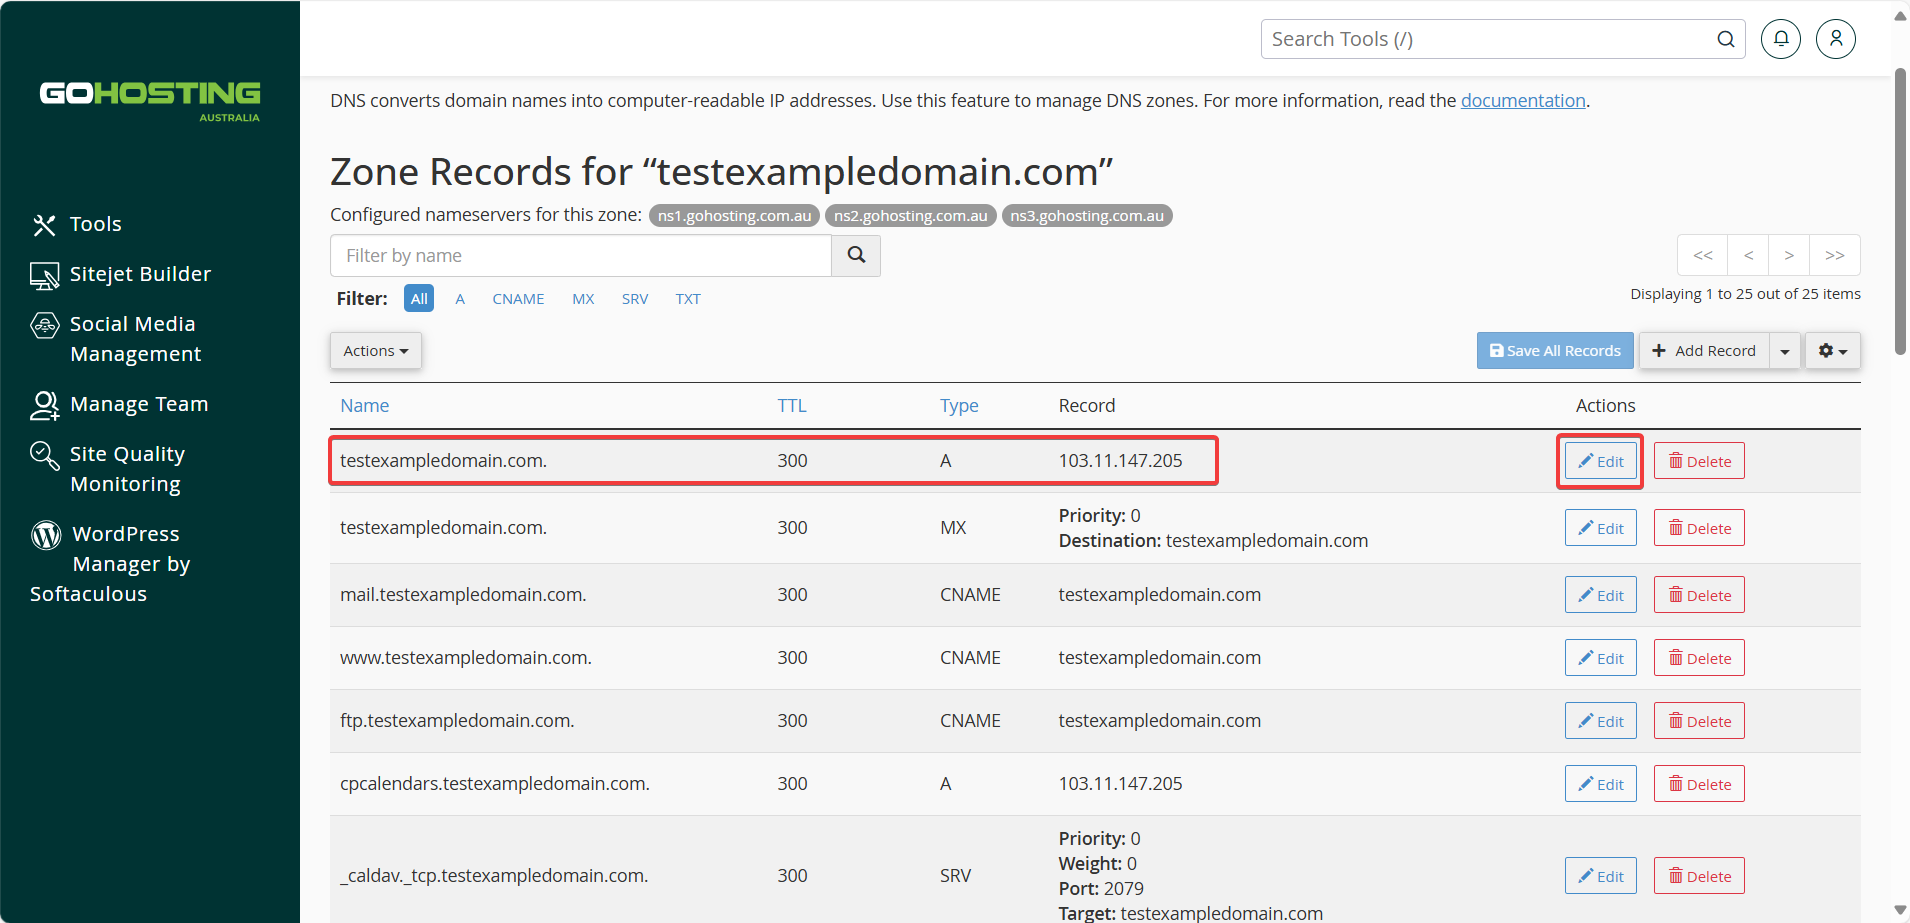
Return to the Wix page you left open earlier, copy the A Record IP address, and paste it into the "Record" field in cPanel.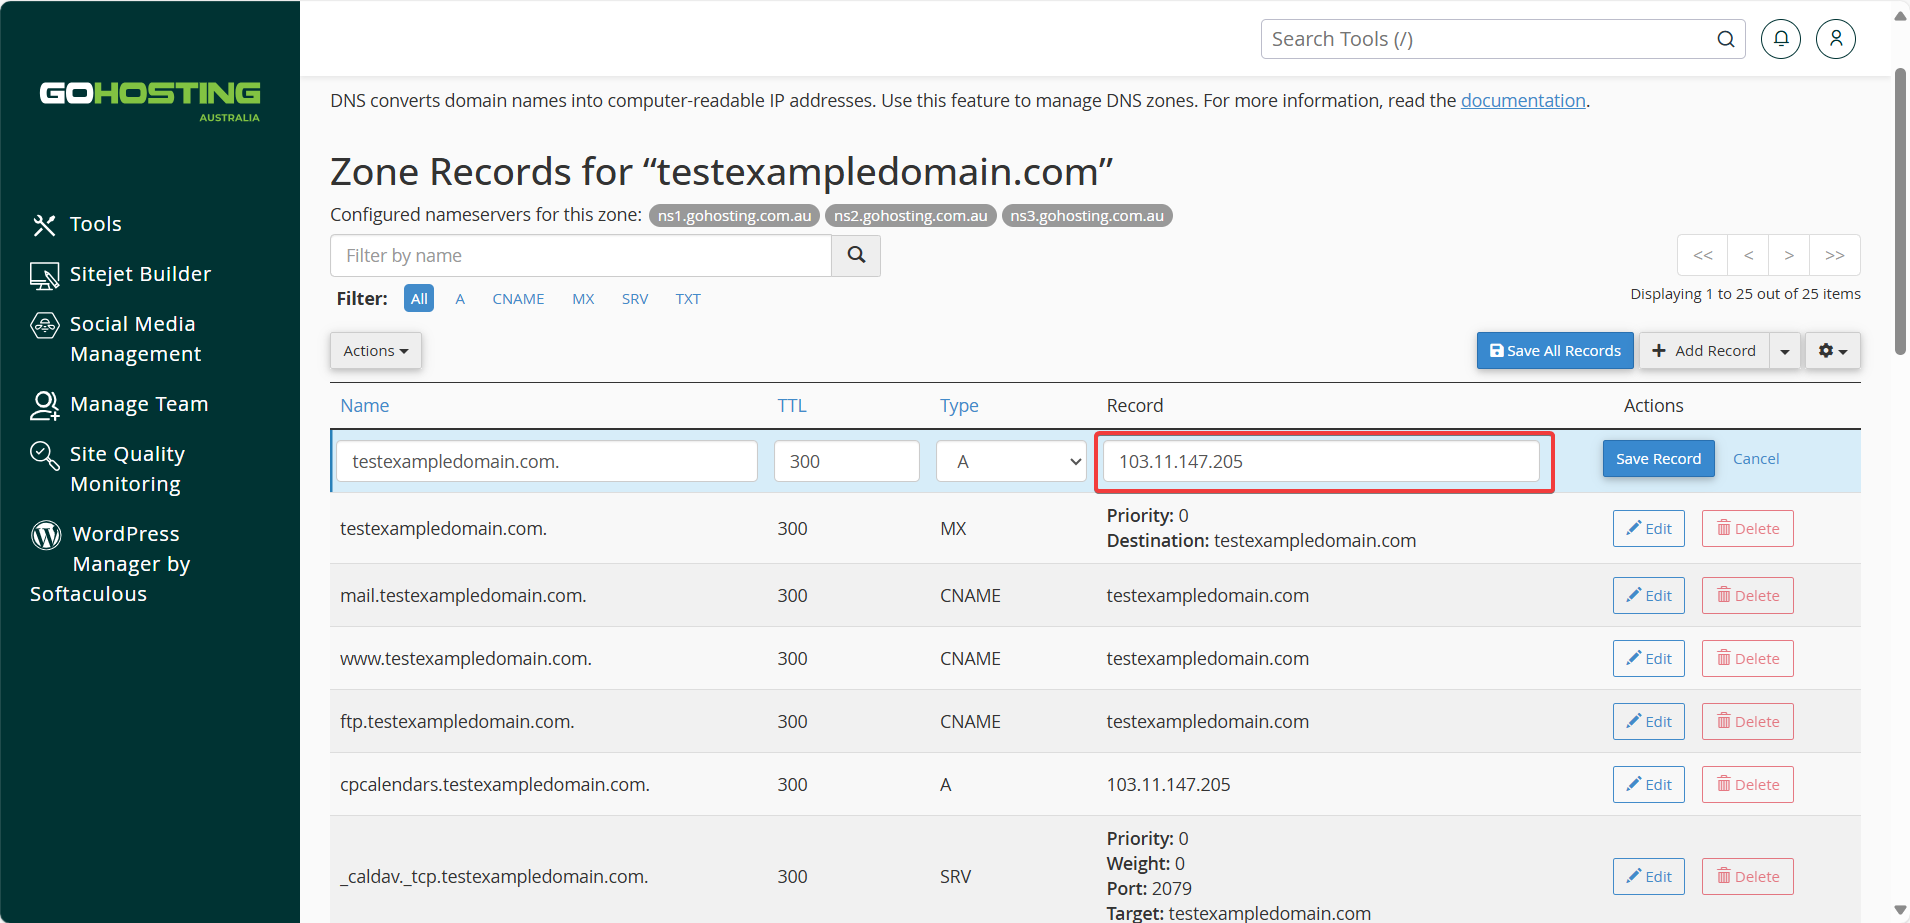
Next, click "Edit" next to the CNAME Record.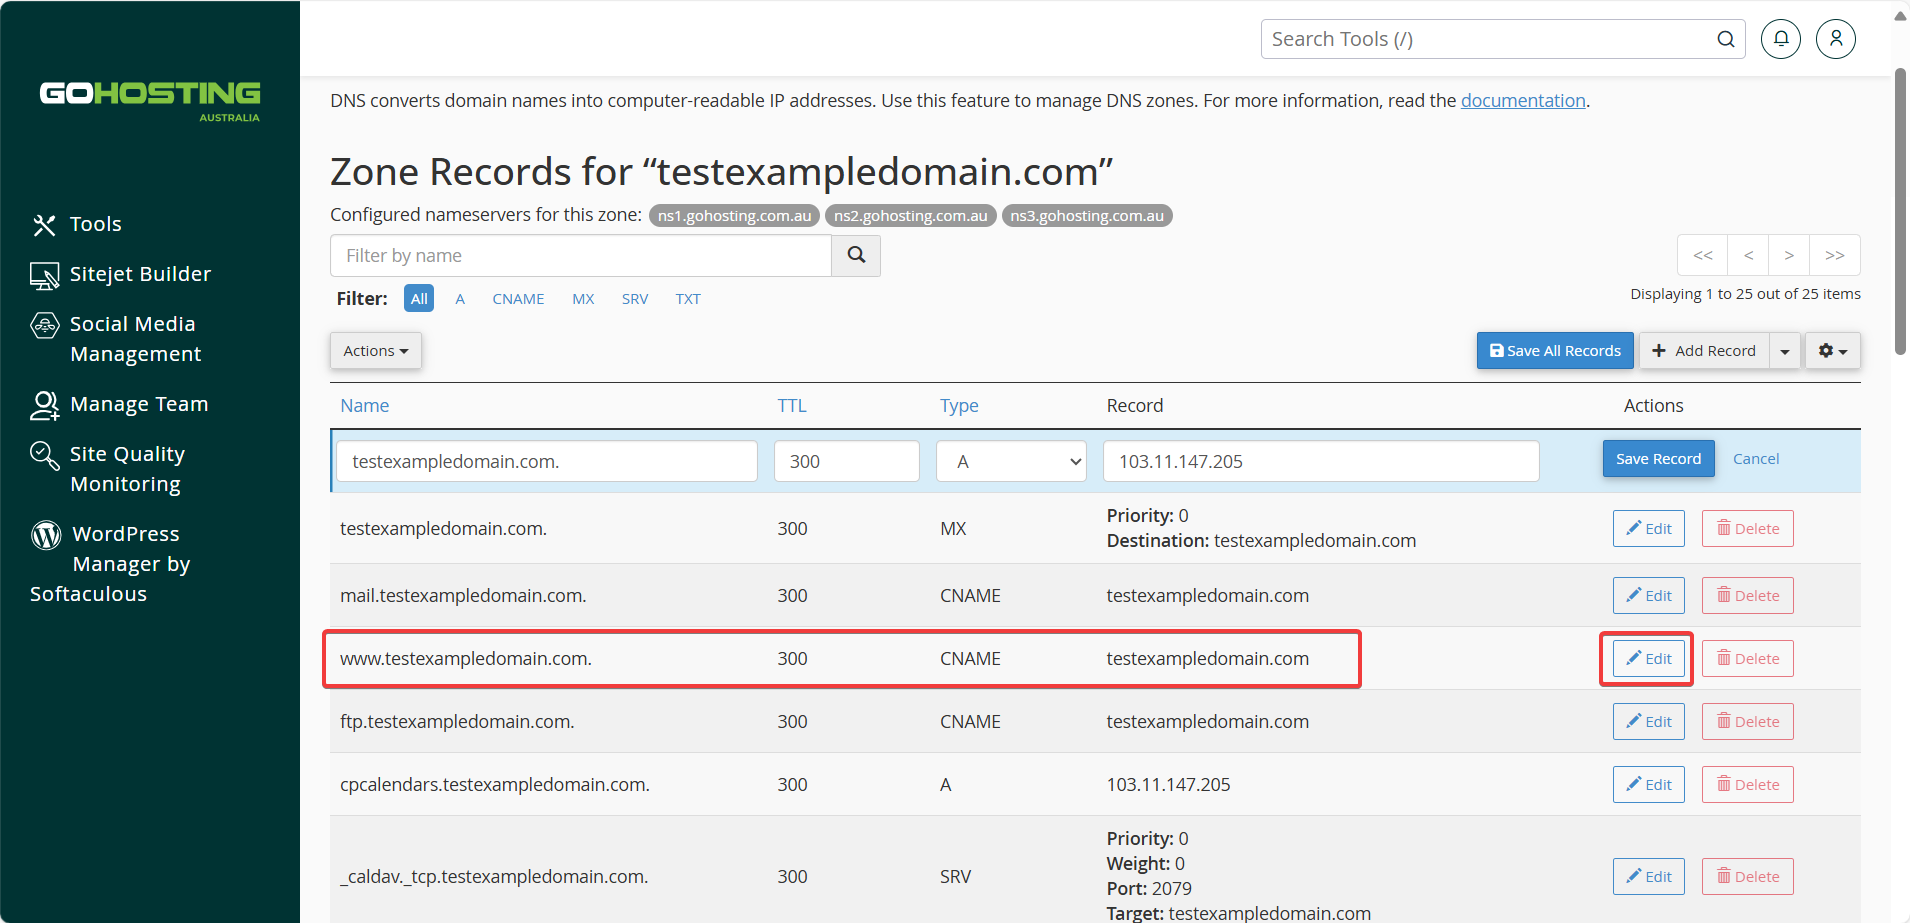
Copy the CNAME value from Wix and paste it into the "Record" field in cPanel.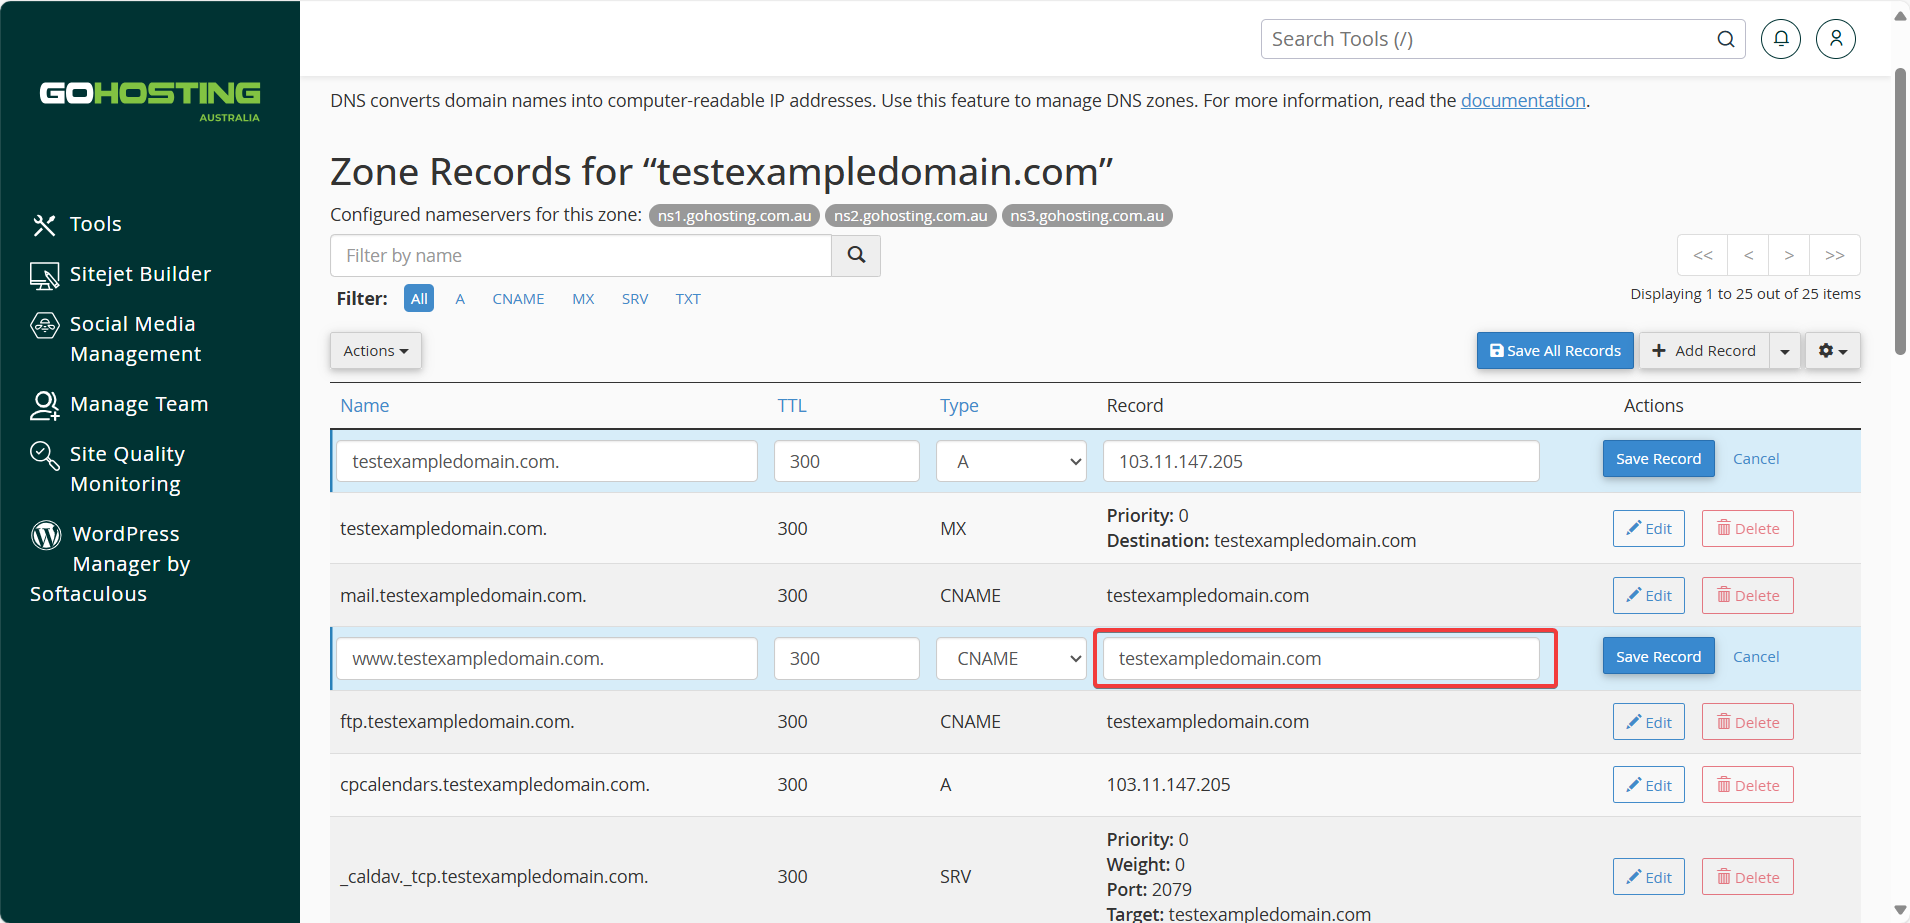
Double-check that both the A and CNAME records exactly match the values provided by Wix, then click "Save Record" for each.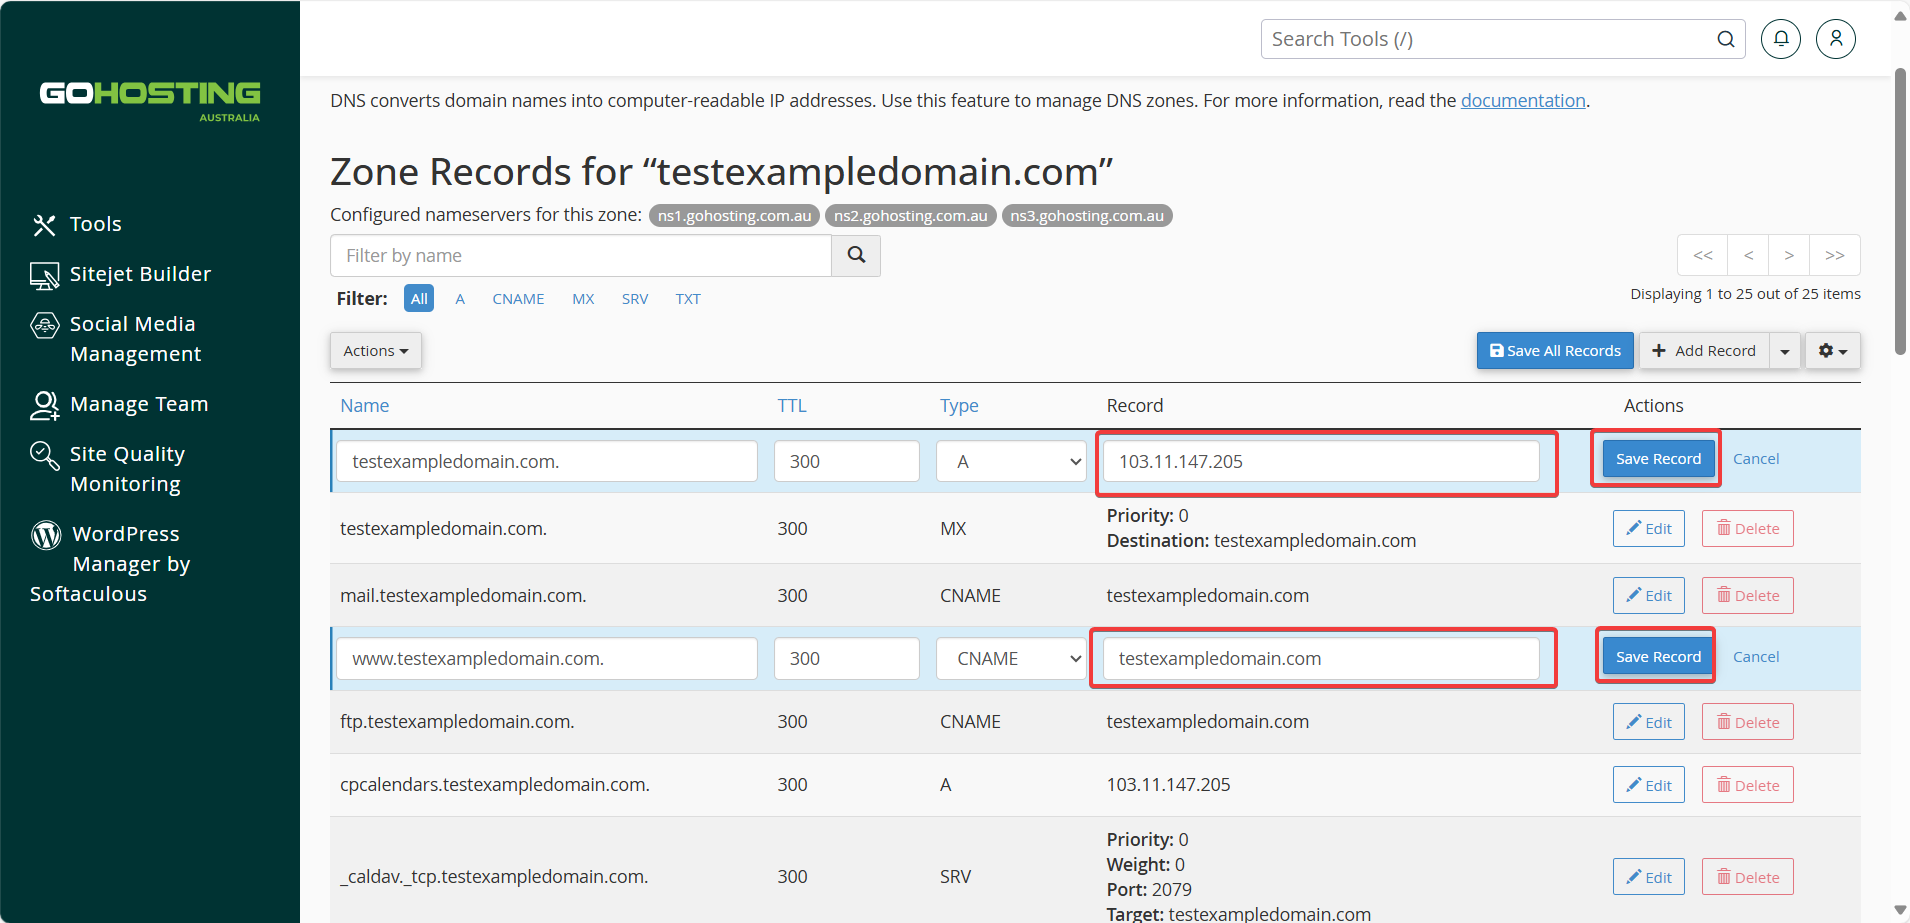
Keep the Wix page open, and leave all other DNS records unchanged to avoid disrupting email or other services.
Alternatively, if the A record or CNAME record doesn’t exist (meaning you cannot edit them), you can create them using the "+ A Record" and "+ CNAME Record" buttons in the Zone Editor.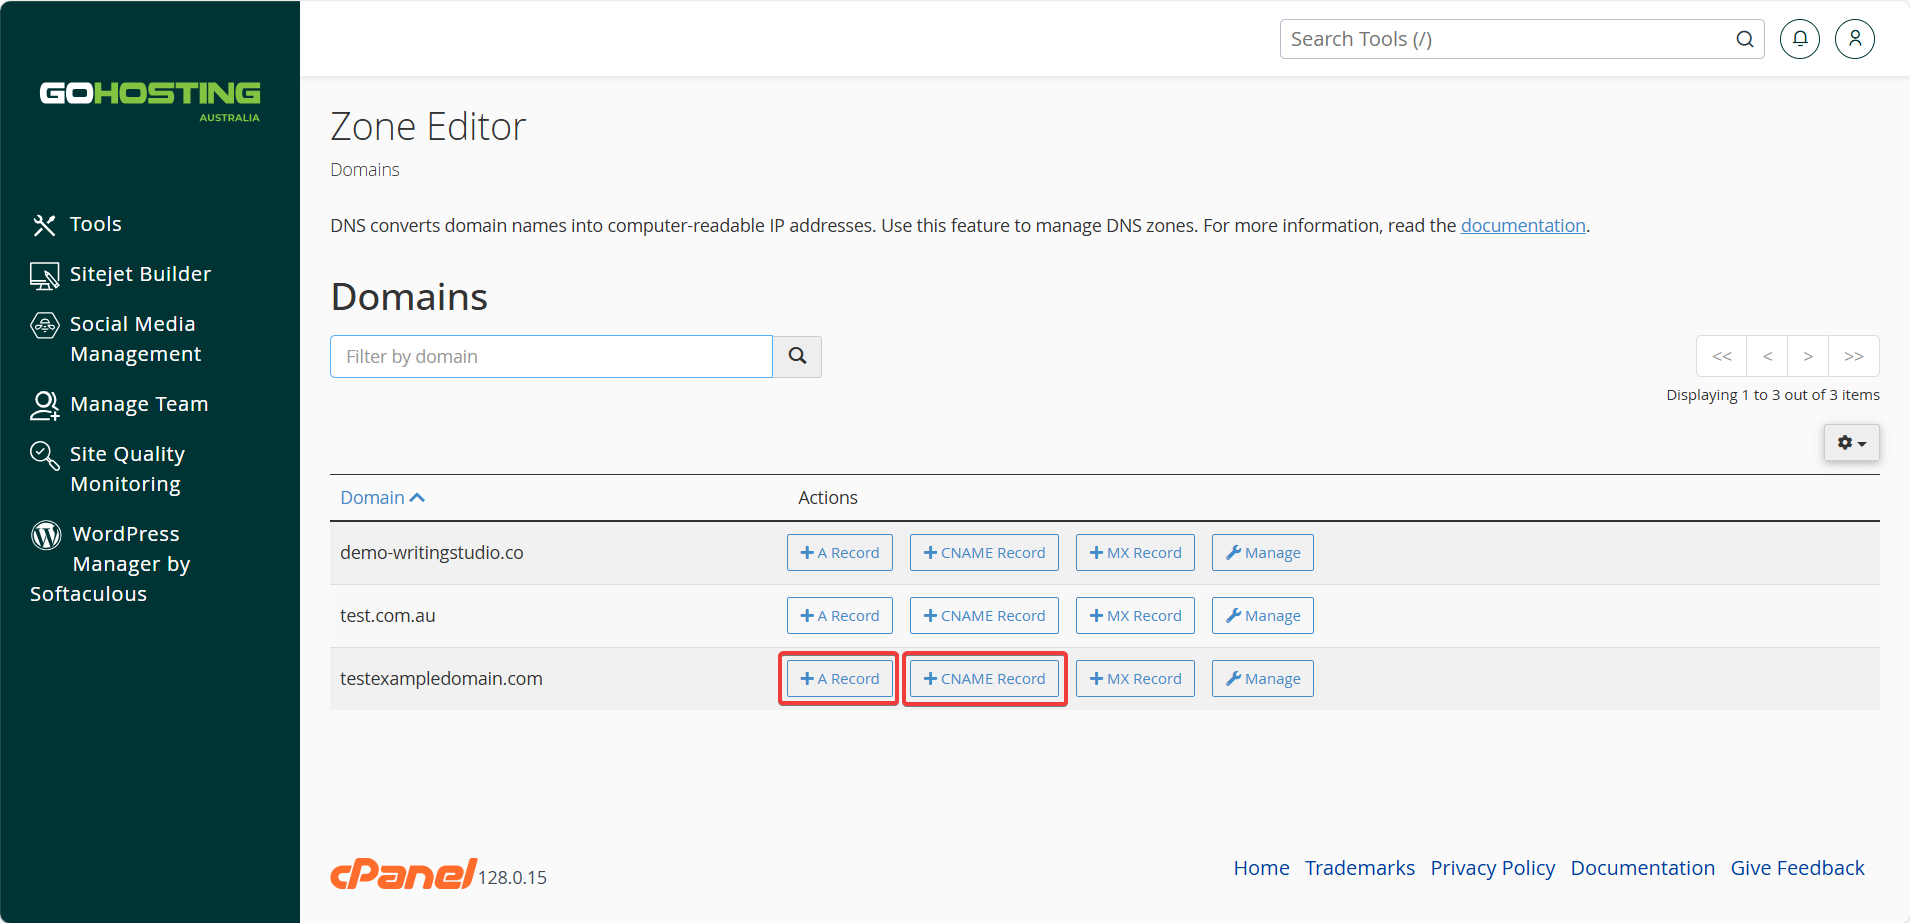
However, only add new records if A and CNAME records do not already exist to avoid conflicts.
6. Verify connection in Wix
Once you’ve updated the DNS records in cPanel, return to Wix and click "Verify Connection".
That’s it! Now you just need to wait. It may take 24–48 hours for your DNS changes to propagate fully, though it’s often faster.
You can track the connection status in your Wix dashboard. Once the changes have propagated, your Wix website will appear when someone visits your domain.
