
If you’ve set up your online store on Shopify but your domain is registered with GoHosting, you’ll need to update your DNS settings to link them. This guide will show you exactly how to do it, step by step, ensuring visitors are sent to your Shopify store when they enter your domain in their browser.
The process should only take a few minutes, and the domain changes usually take effect within a couple of hours, but can take up to 48 hours.
Steps to point your GoHosting domain to Shopify
Follow these steps to update your GoHosting DNS settings to point your domain to Shopify.
1. Log in to your GoHosting cPanel
Go to gohosting.com.au, log in to your account, and click “Log in to cPanel” on your client dashboard.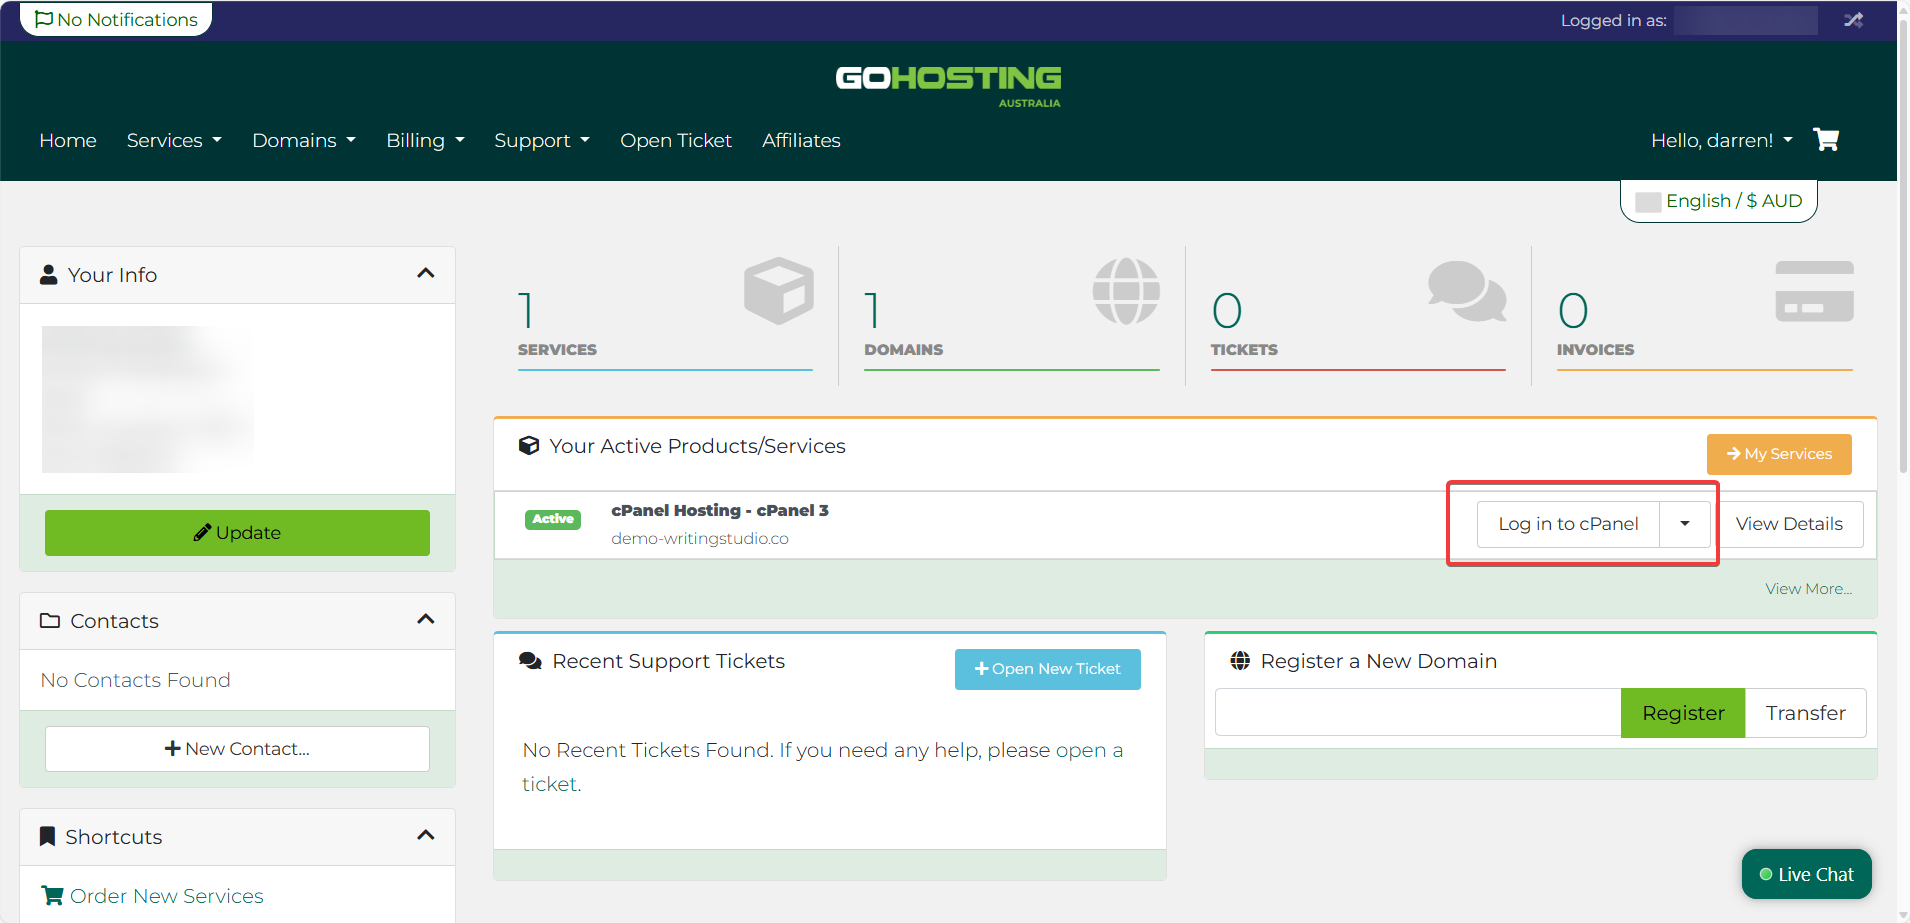
Alternatively, you can use the cPanel login link provided in your GoHosting welcome email. Just enter your username and password to access cPanel.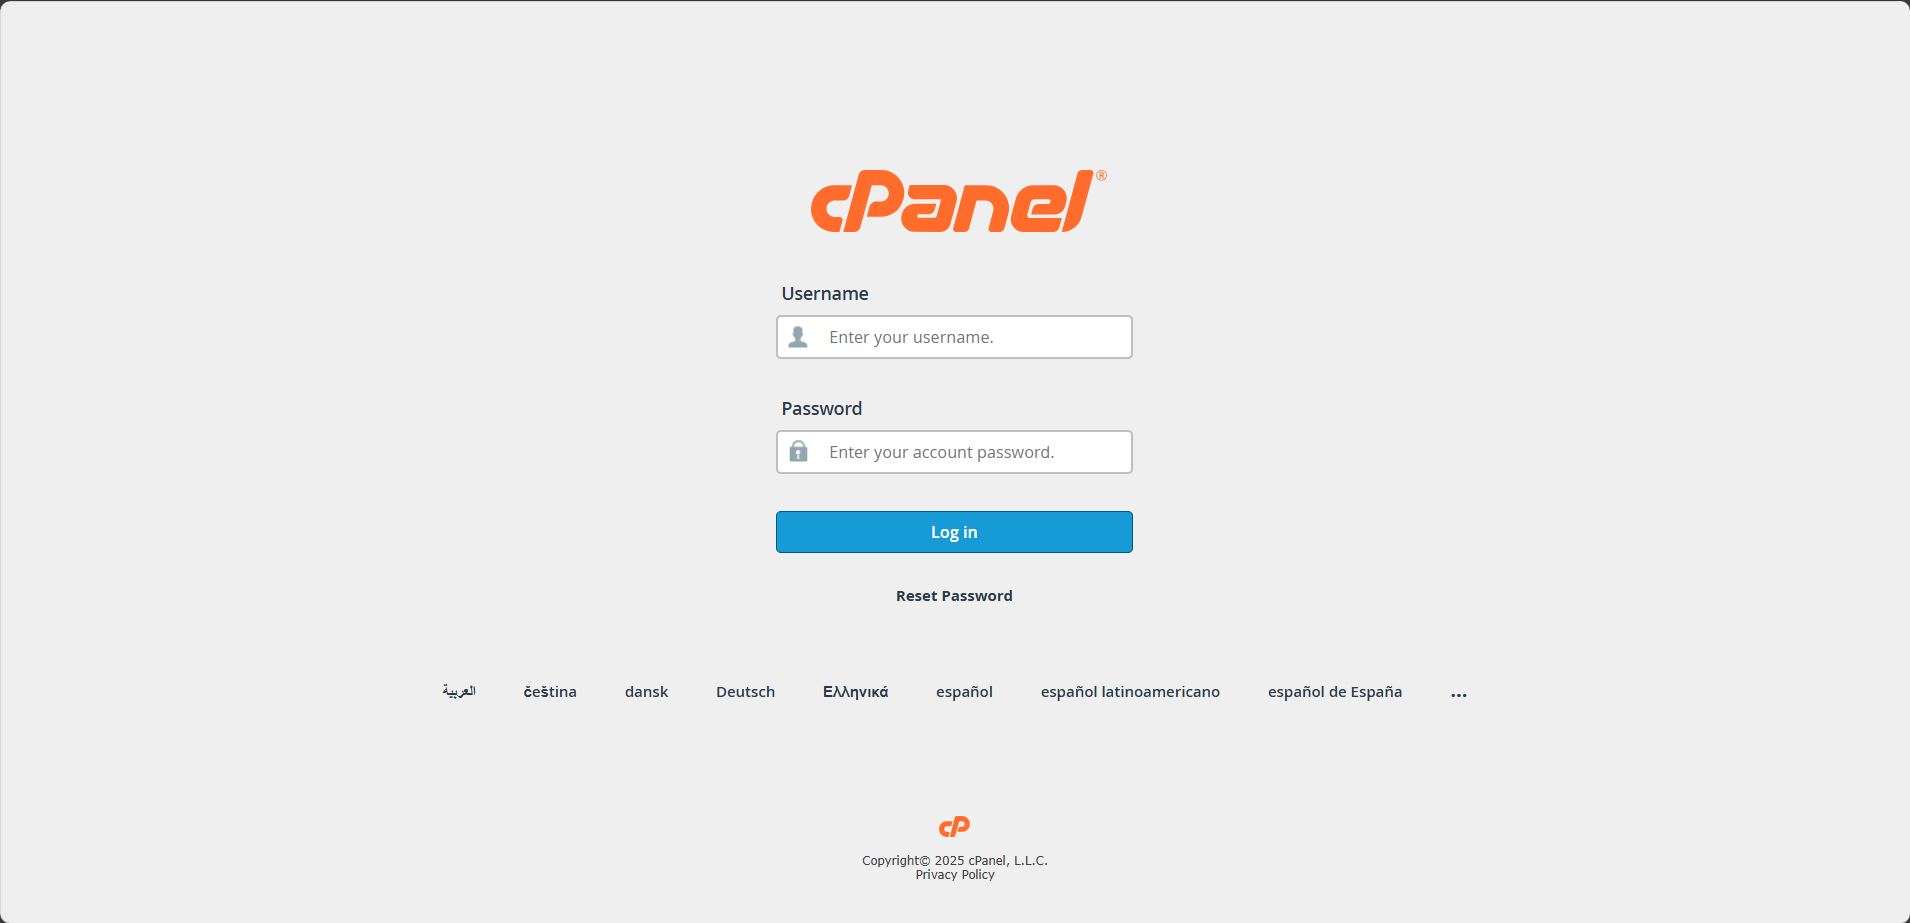
2. Go to the Zone Editor
In cPanel, scroll down to the “Domains” section and click “Zone Editor”.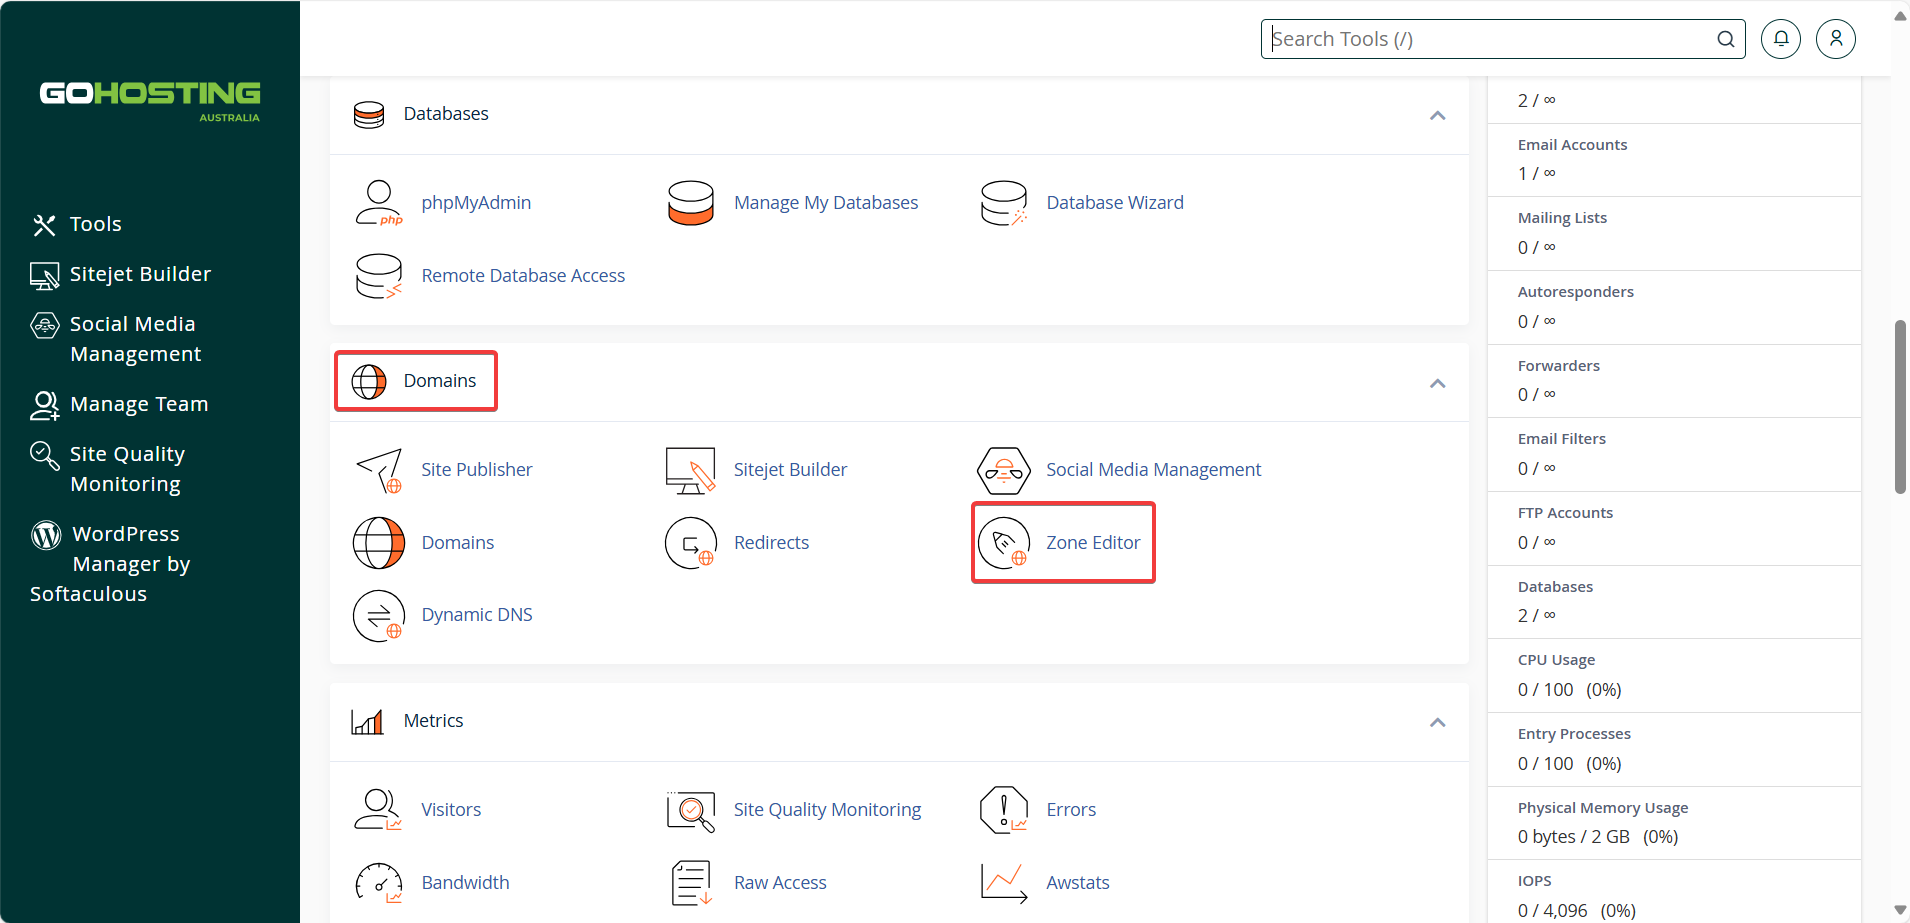
On the Zone Editor page, find the domain you want to point to Shopify and click "Manage" next to it.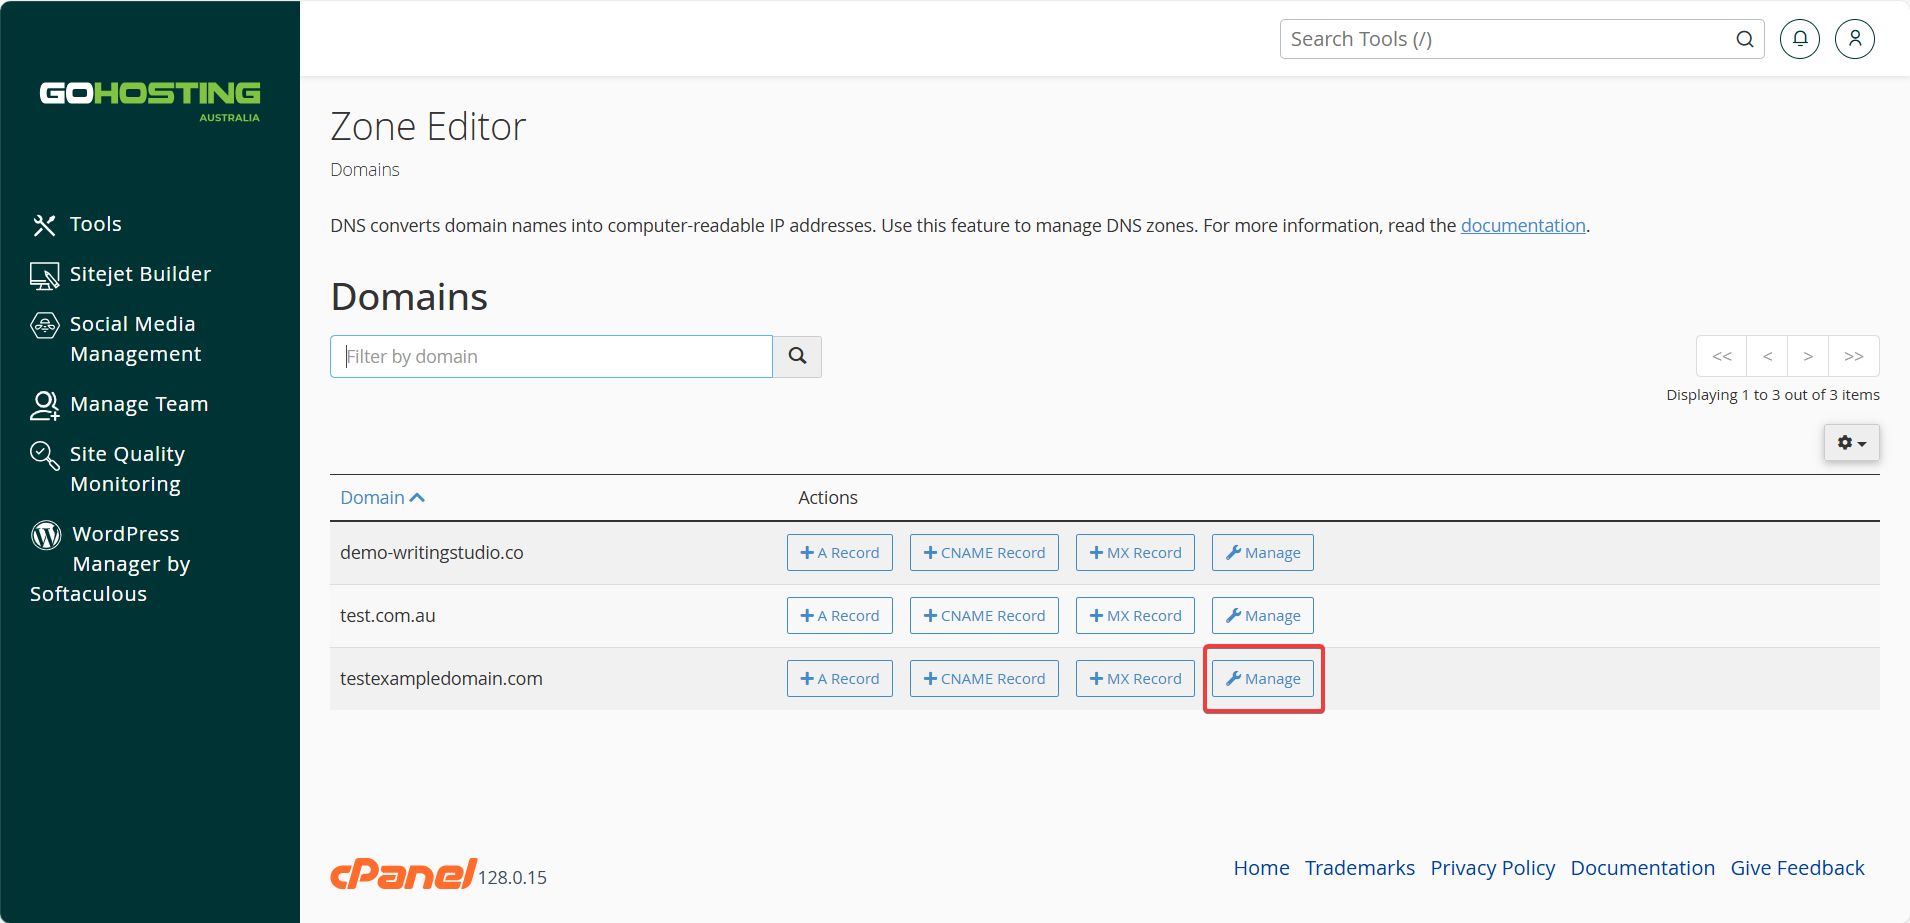
3. Update the A Record
Find the existing A Record for your root domain in the list of zone records, then click "Edit" next to it.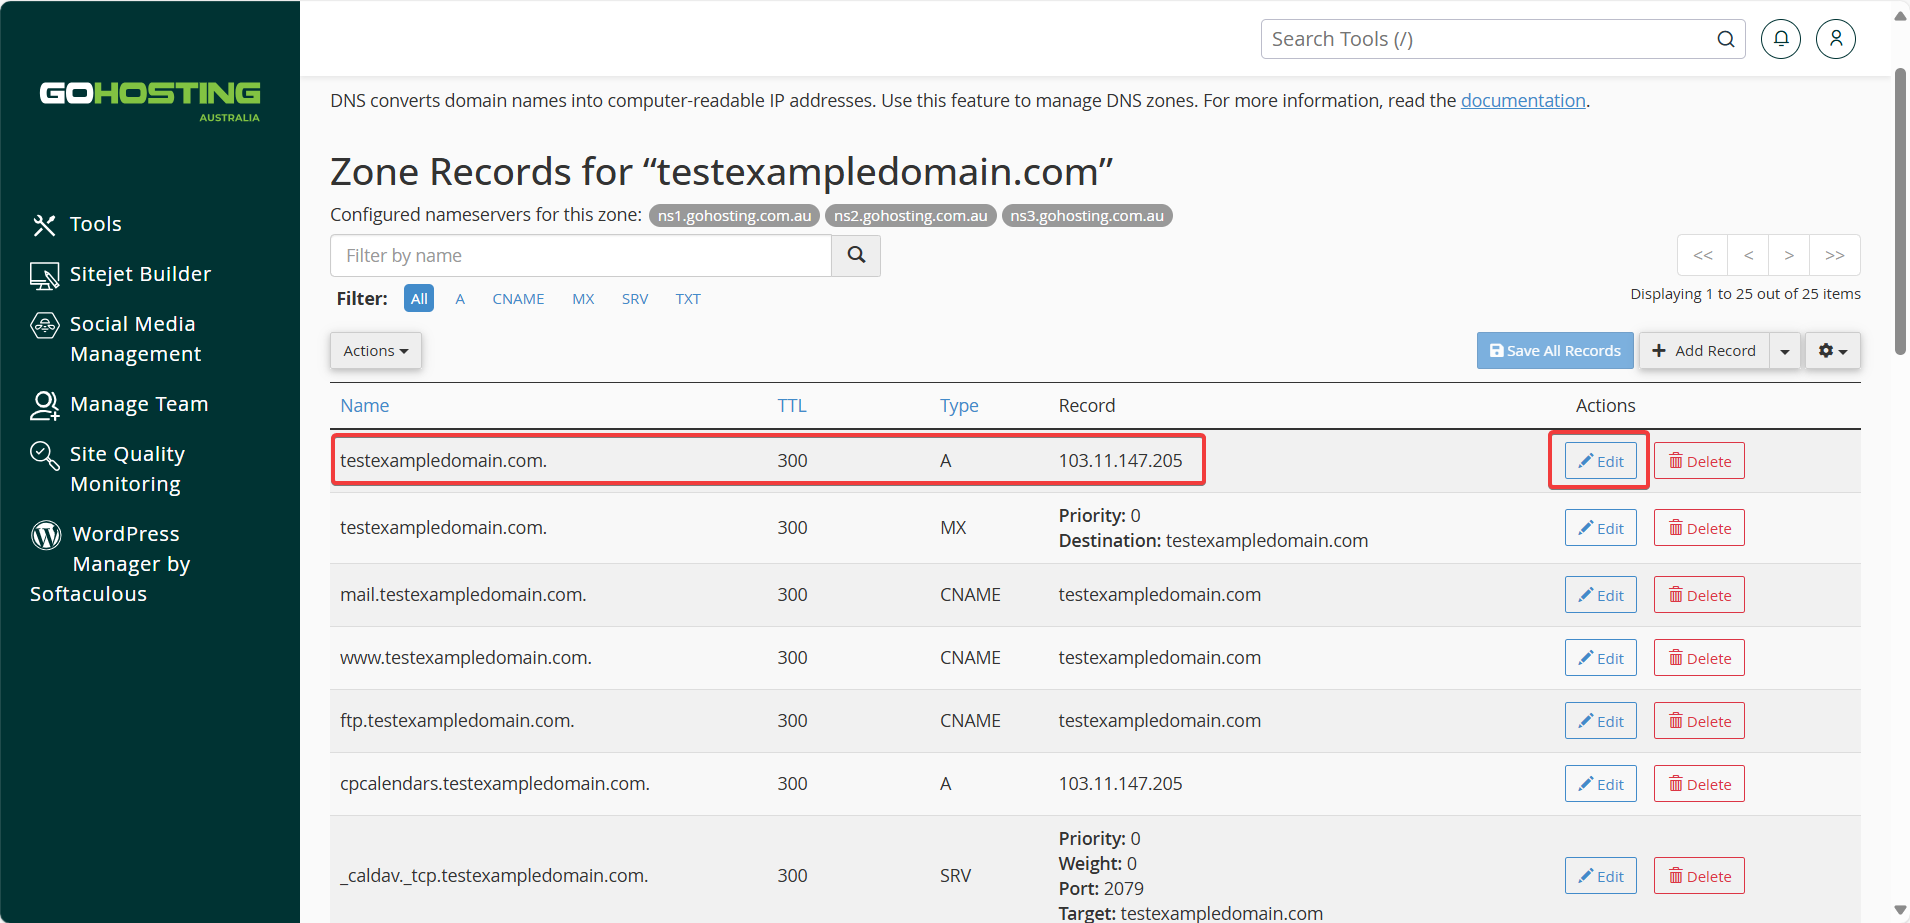
In the "Record" field, set the IP address to: 23.227.38.65
Then, click "Save Record".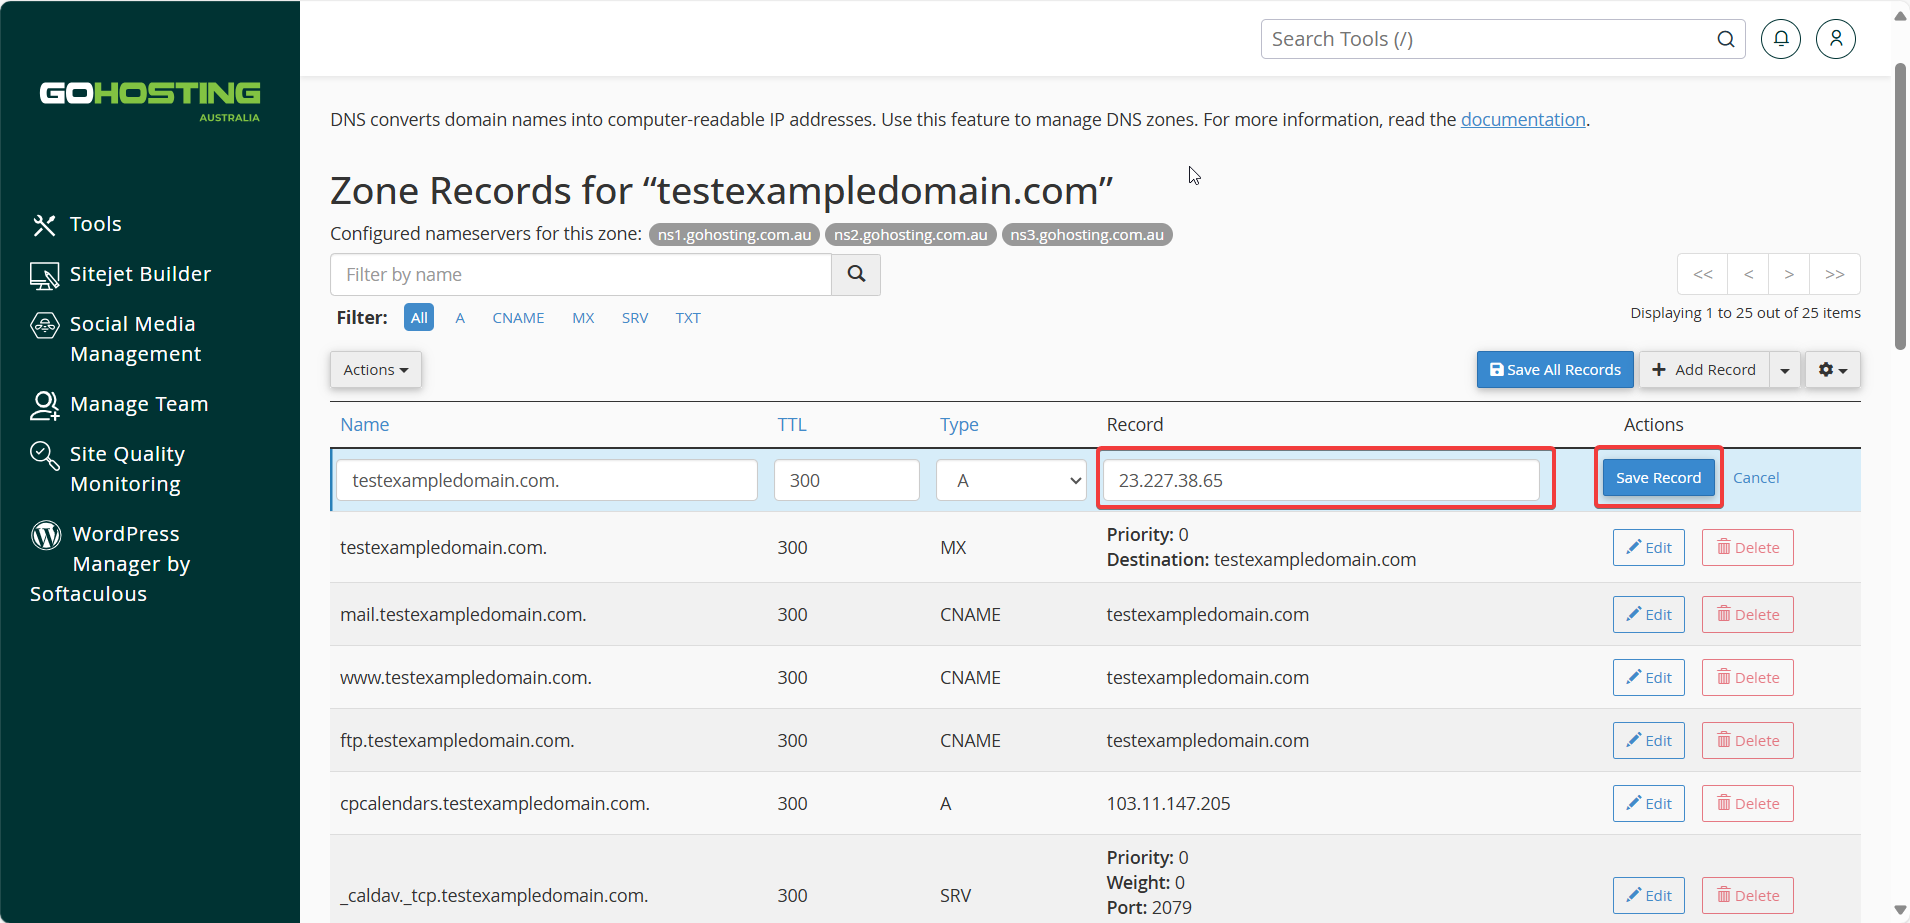
If no A record exists, add a new one by clicking the "+ A Record" button in the Zone Editor. 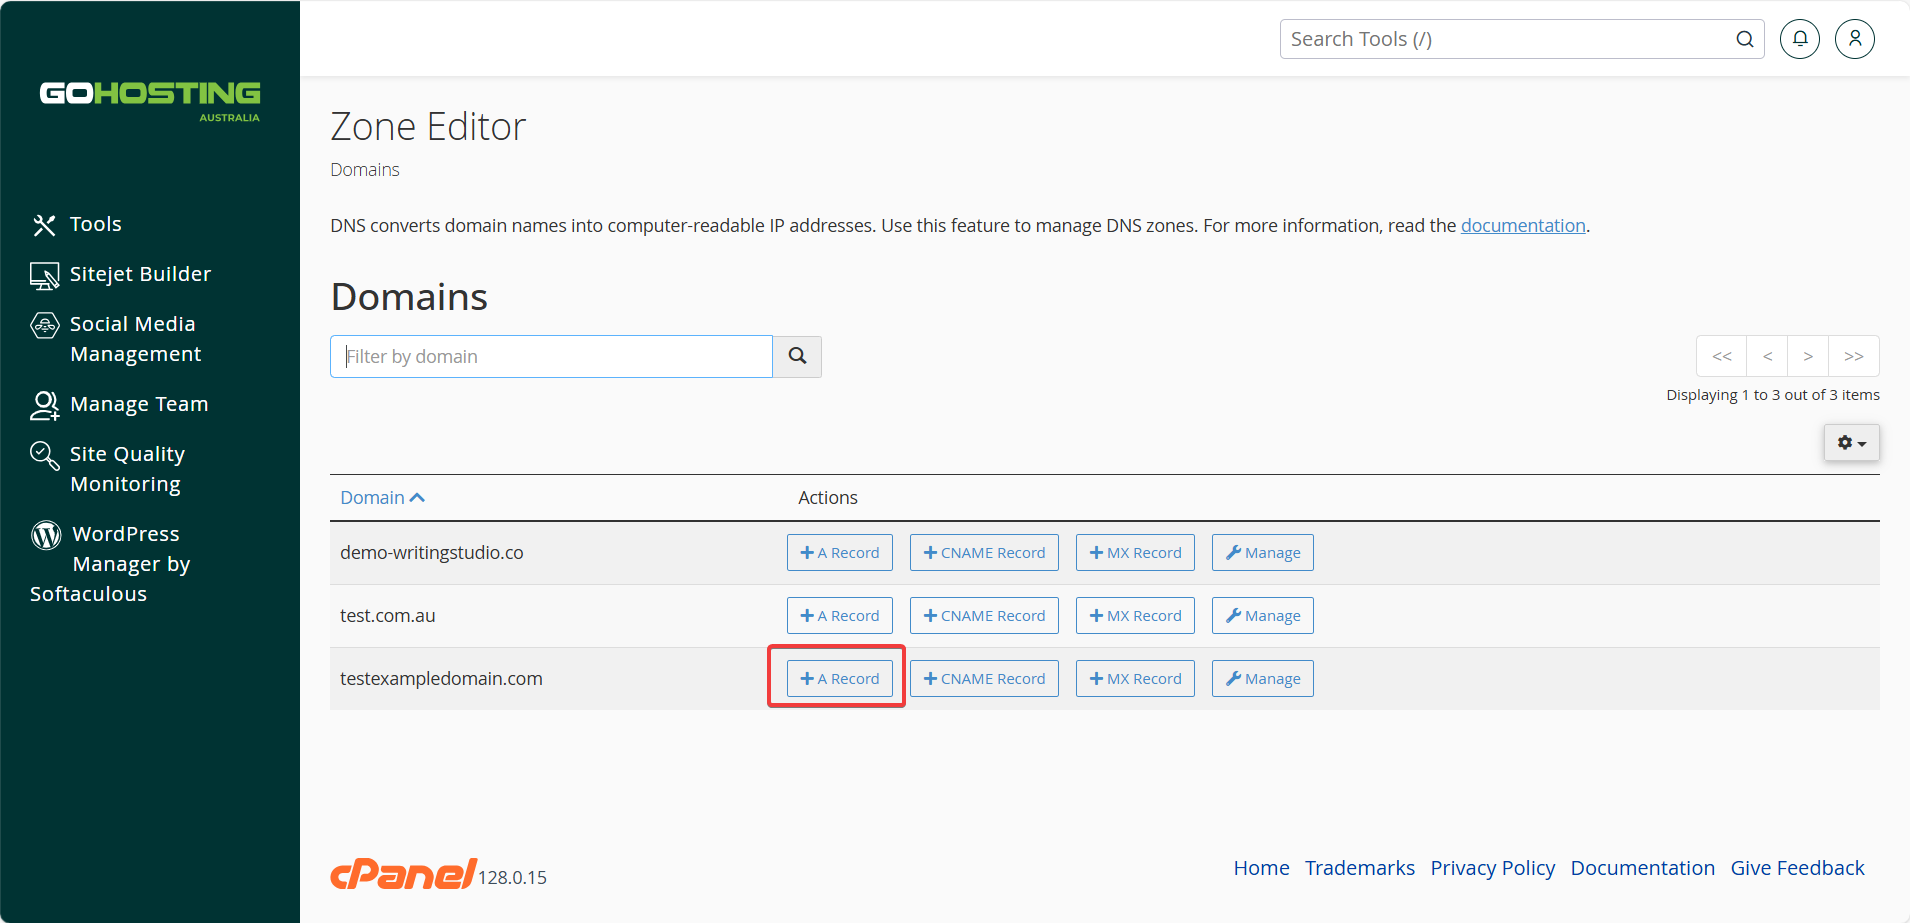
Set the name to your root domain and the address to 23.227.38.65, then click "Add An A Record".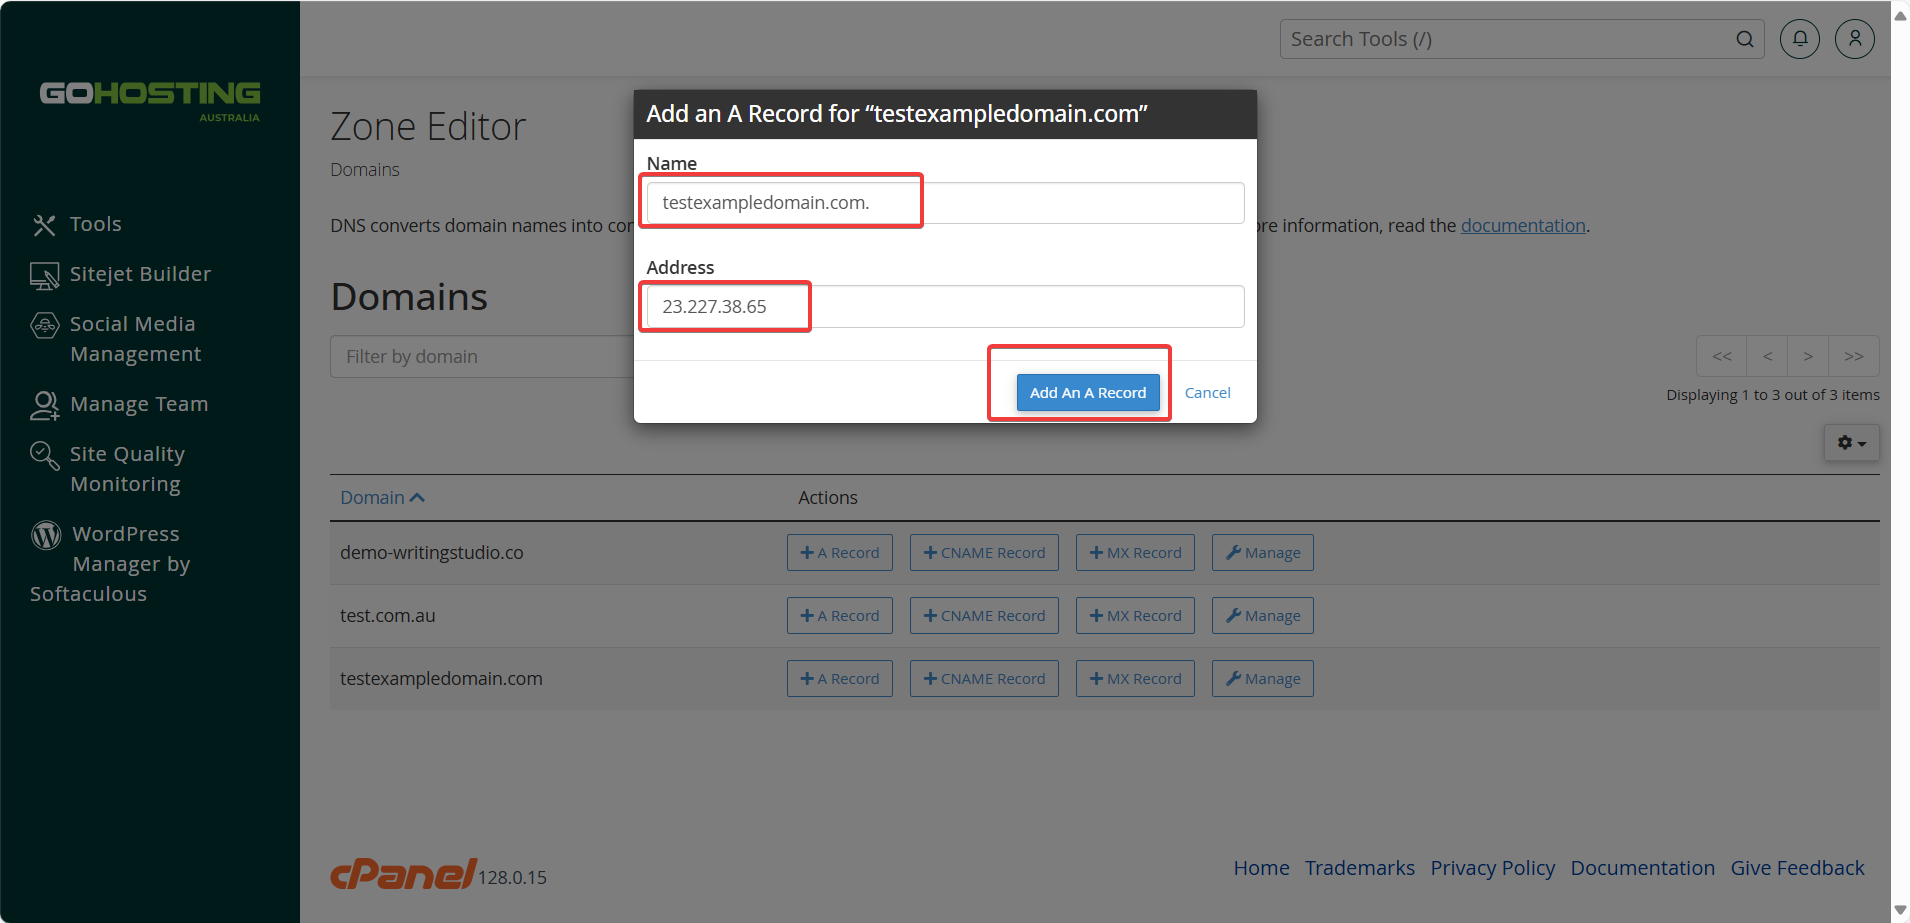
Only do this if no A record already exists to avoid conflicts.
4. Update the CNAME Record for www
Find the CNAME Record for www in the list of zone records, then click "Edit" next to it.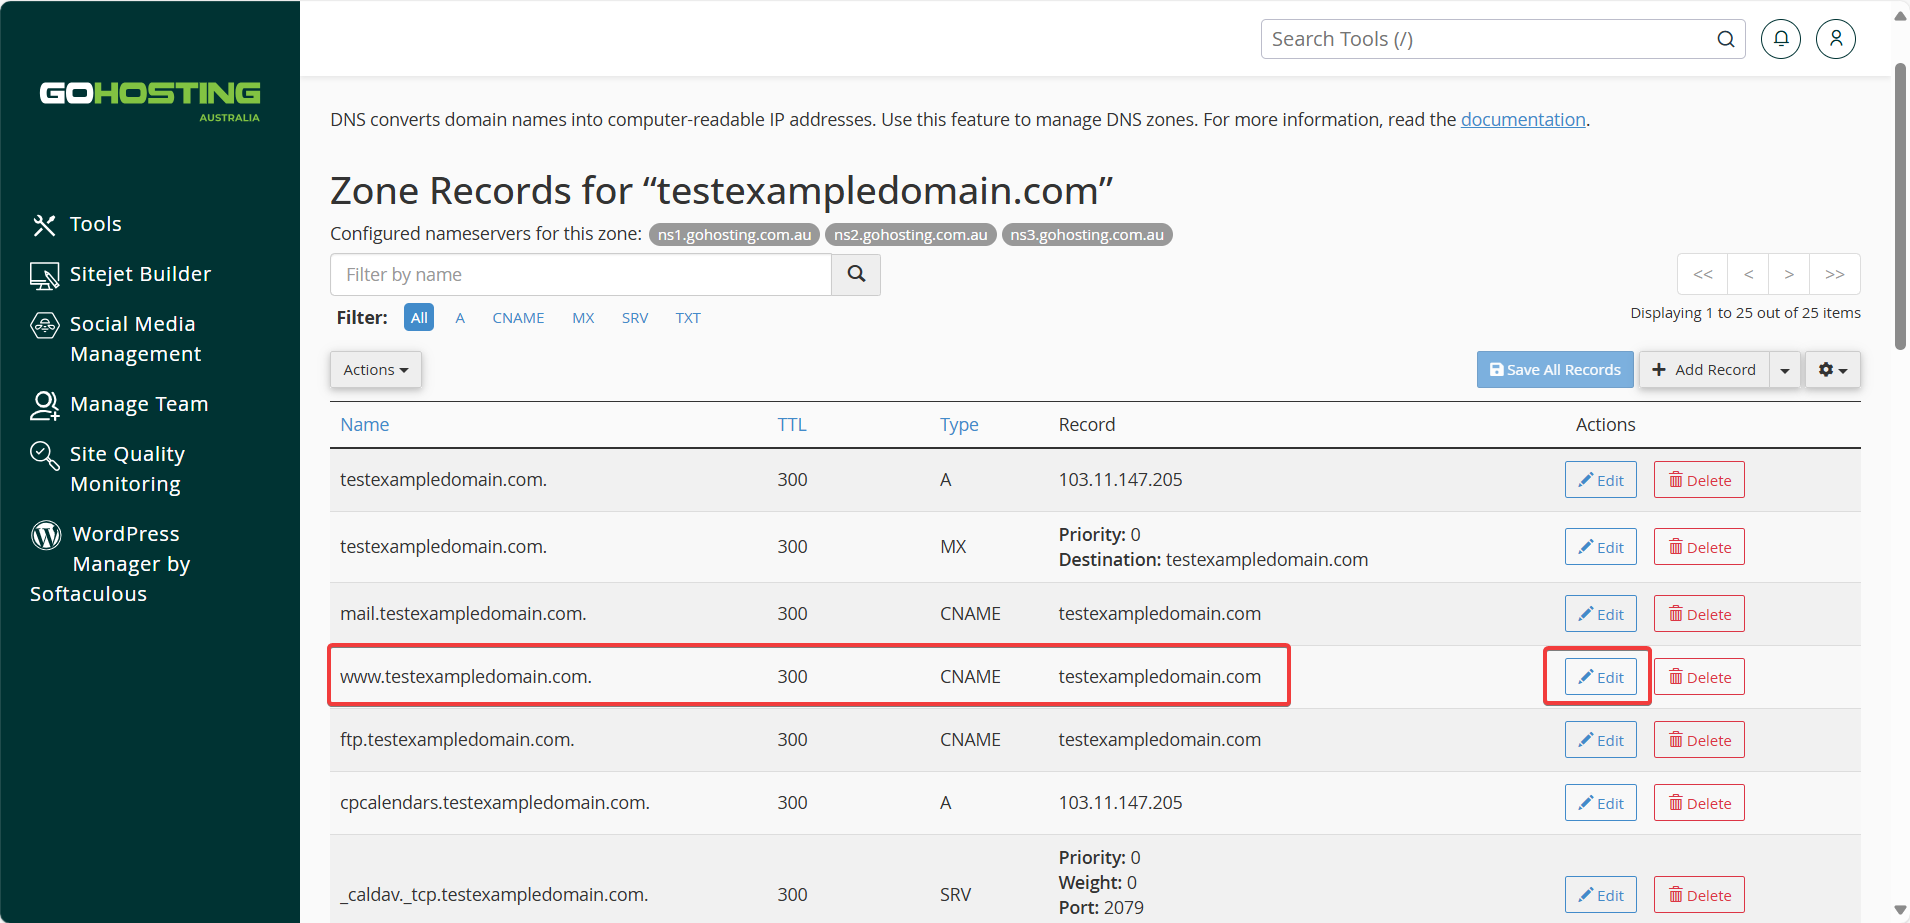
In the "Record" field, set the value to: shops.myshopify.com.
Ensure that you include the period at the end of the domain.
Then, click "Save Record".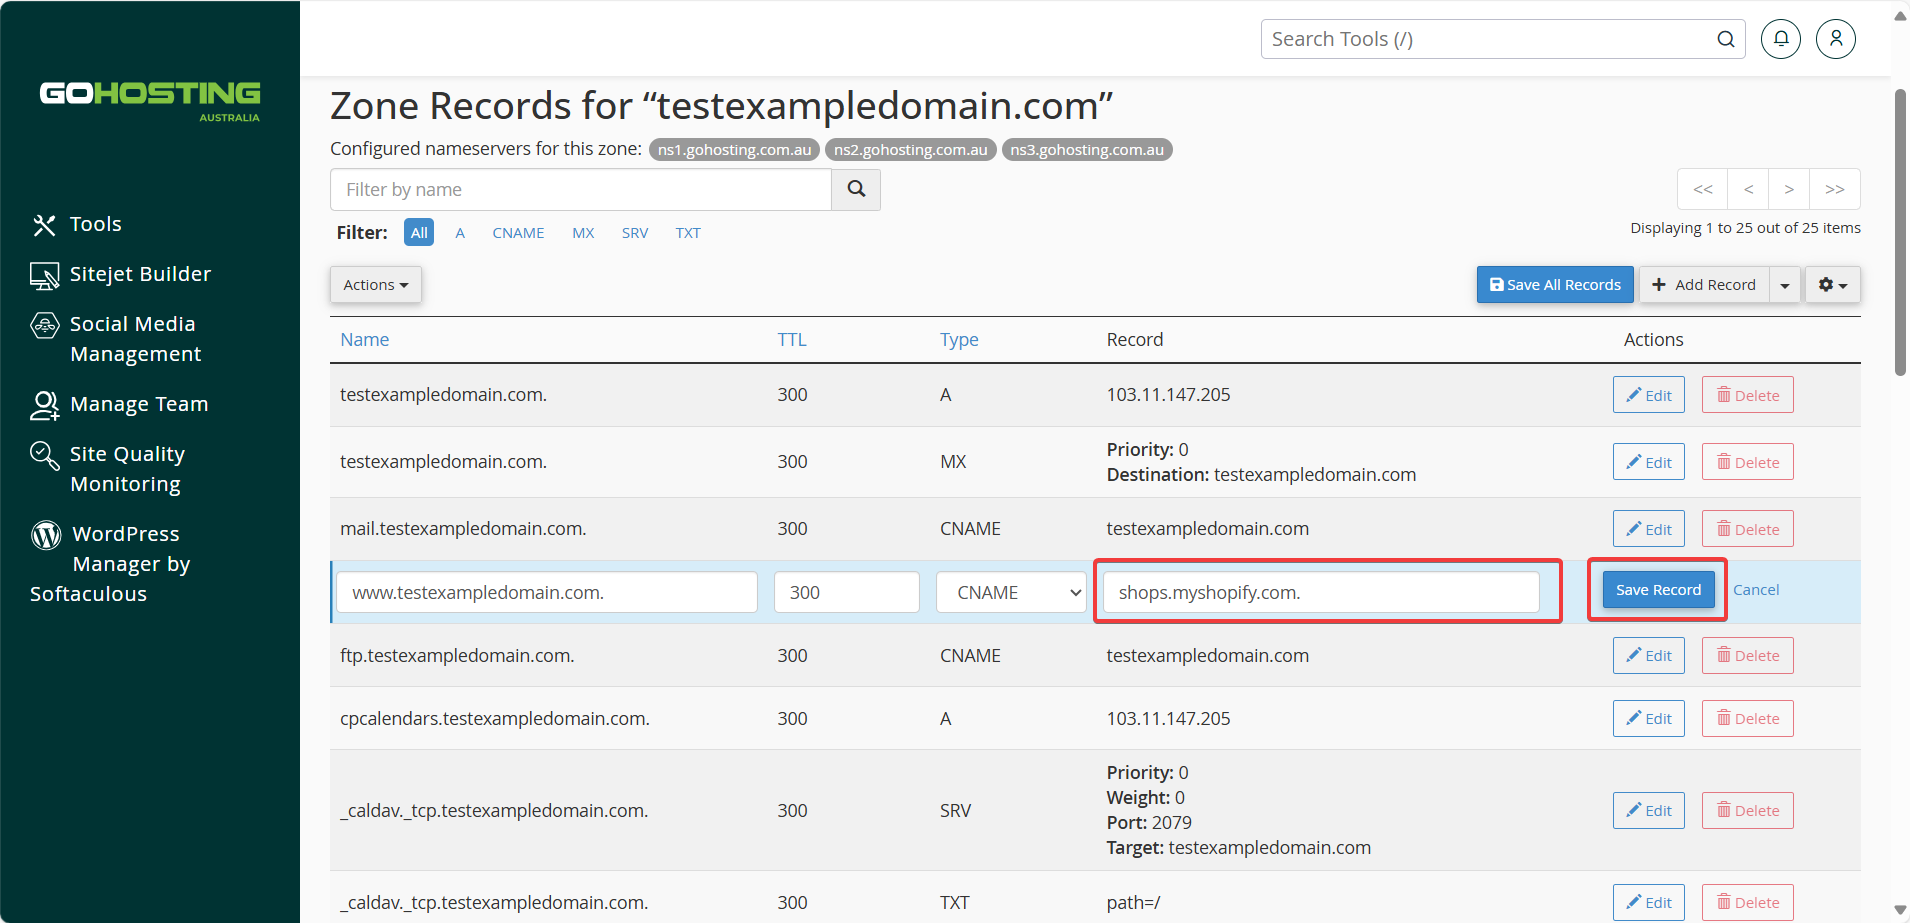
If no CNAME exists, add a new one by clicking the "+ CNAME Record" button in the Zone Editor.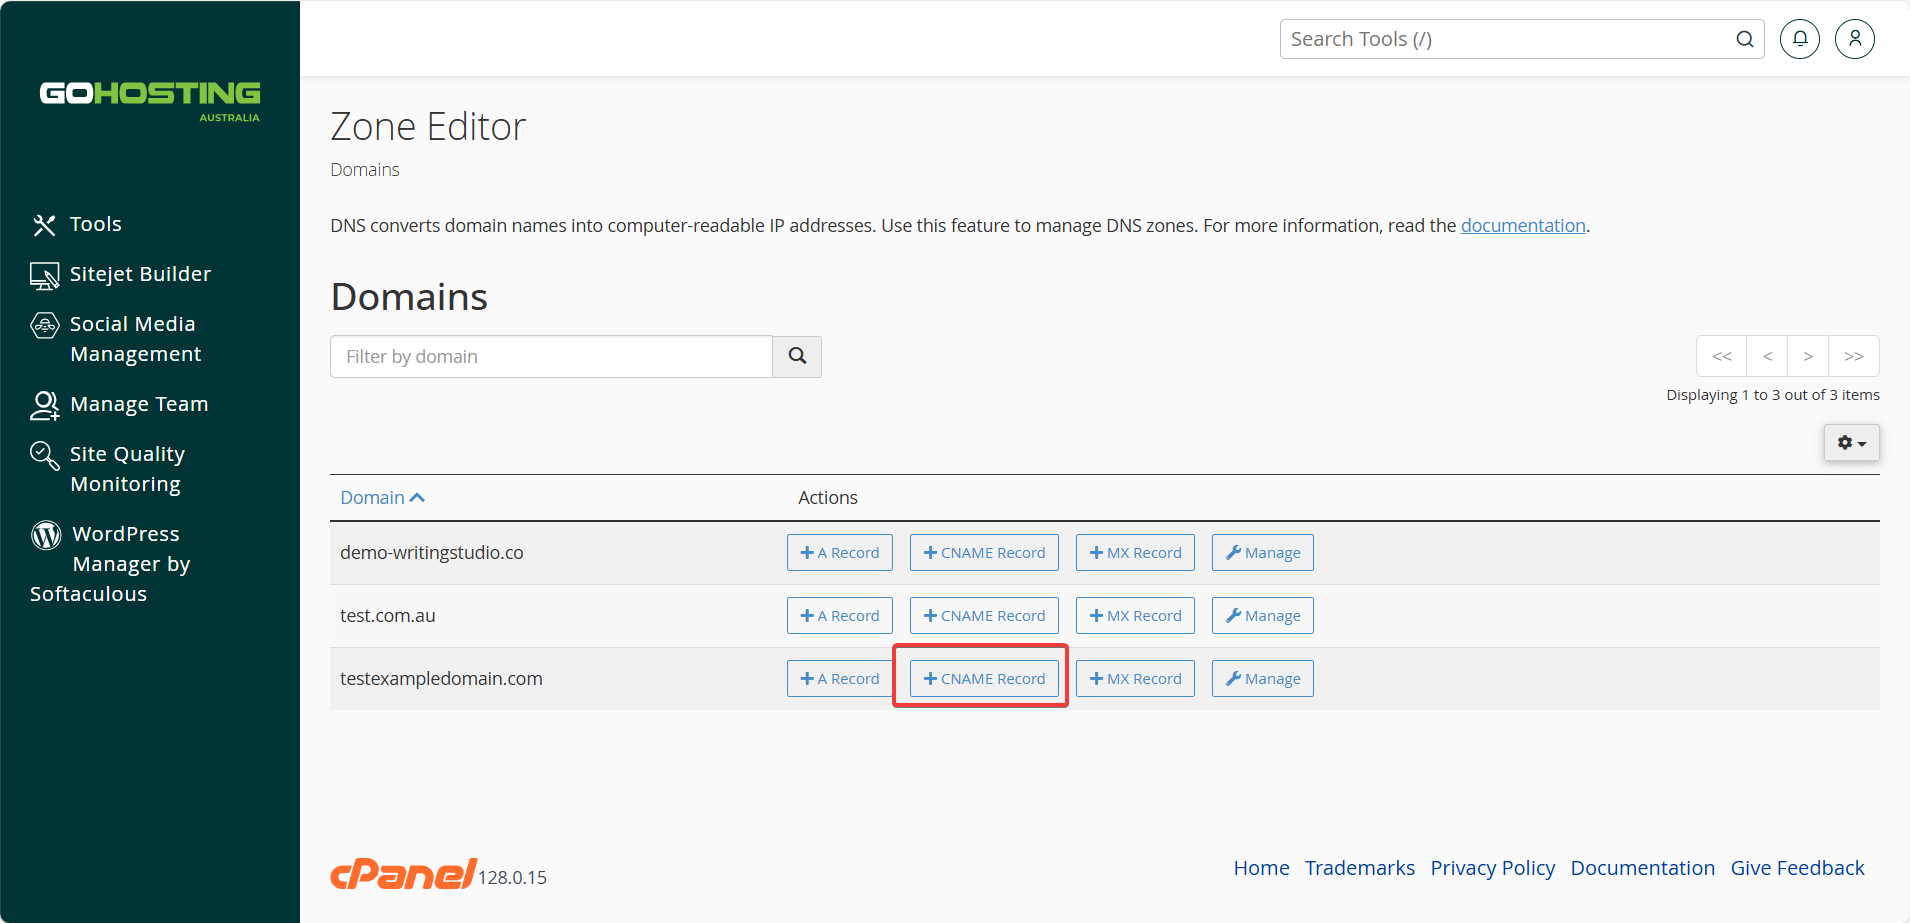
Set the name to www (it will autofill the rest), set the CNAME to shops.myshopify.com., then click "Add An A Record".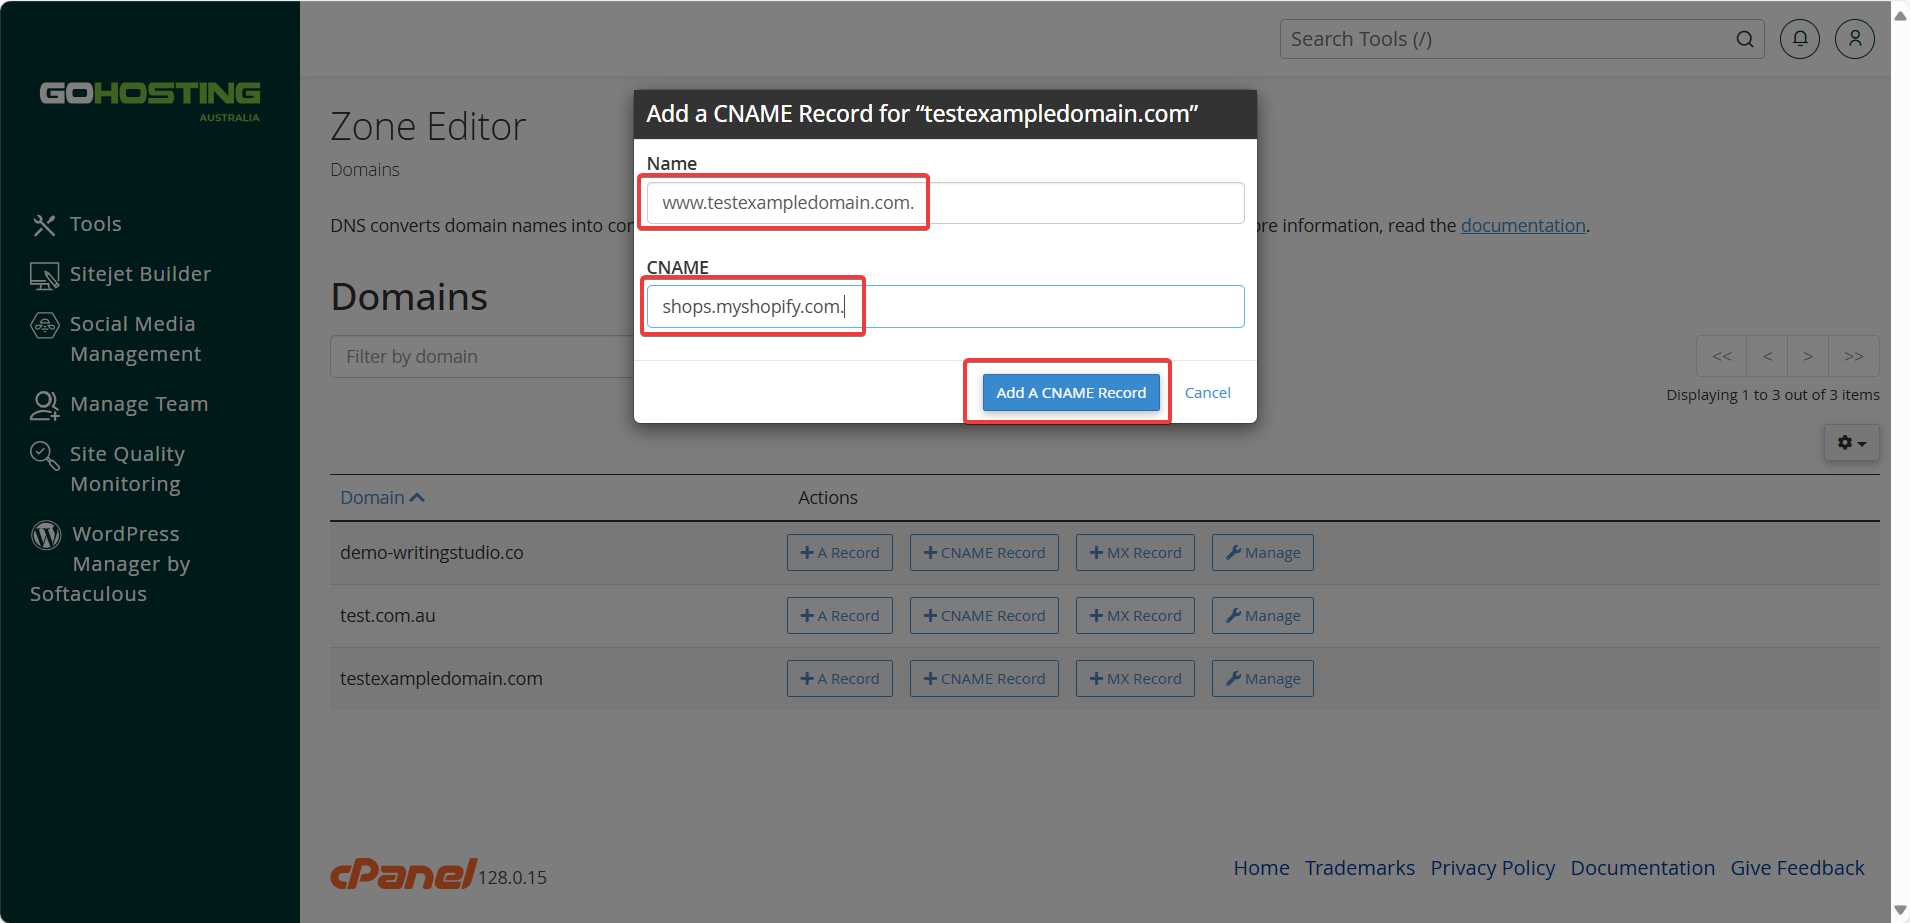
Only do this if a CNAME does not already exist, to avoid conflicts.
Important: Avoid modifying any other DNS records to prevent disruption of email or other services.
5. Connect your domain to Shopify
Go to Shopify.com and log in to your account, then connect your domain by:
Go to your account settings, then navigate to "Domains".
Click "Connect existing domain".
Enter your domain name (e.g., yourdomain.com) and click "Next". Don't include a subdomain.
Click "Connect domain".
6. Wait for DNS propagation
It usually takes only a few hours for your domain to become fully live, although it may sometimes take up to 24–48 hours to complete.
You can track the connection status under "Domains" in your Shopify admin. Shopify will confirm once it’s successfully connected and active.
Visit your domain to ensure it directs to your Shopify store.
