
Sender Policy Framework (SPF) records help confirm that emails sent from your domain are genuine. They protect you by preventing others from sending fake emails using your domain name.
In this guide, we’ll show you how to set up an SPF record for your domain using your GoHosting cPanel account.
Steps to set up an SPF record with GoHosting DNS
Follow these steps to add or update an SPF record in your GoHosting DNS.
1. Log in to your GoHosting cPanel
Go to gohosting.com.au and log in to your account. #lightbox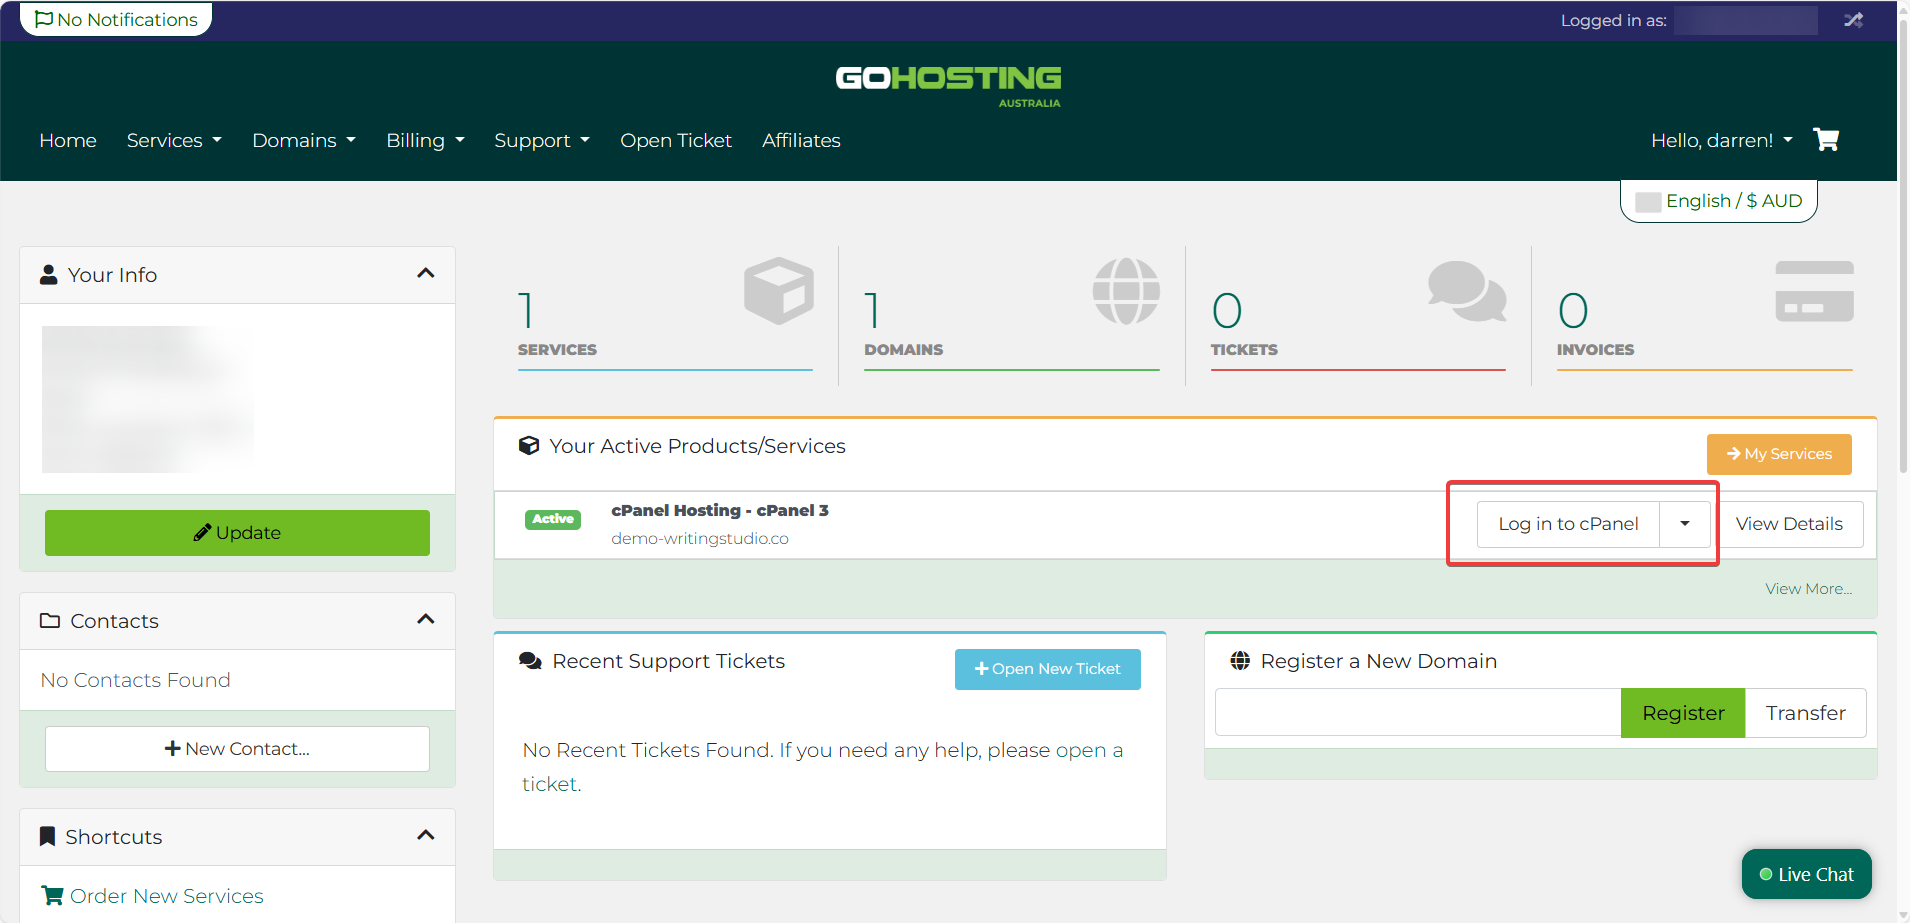
Alternatively, you can use the cPanel login link from your GoHosting welcome email. Just enter your username and password to sign in.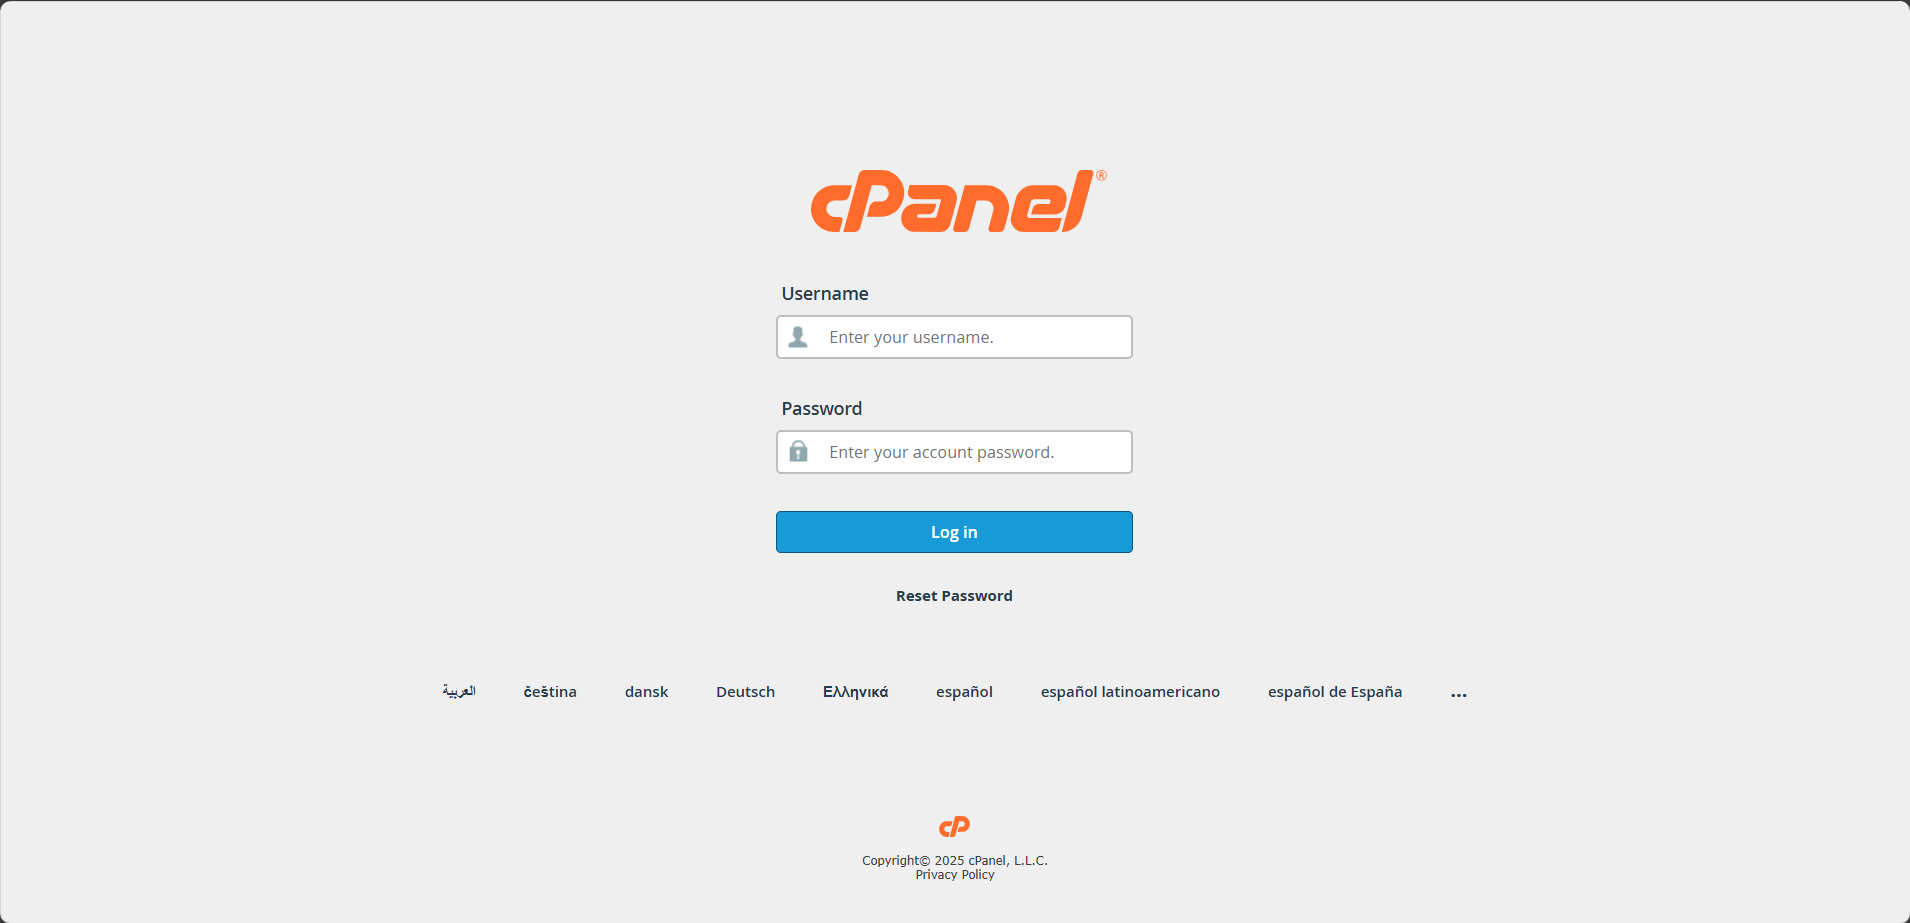
2. Open the Zone Editor
In cPanel, scroll down to the "Domains" section and click on "Zone Editor".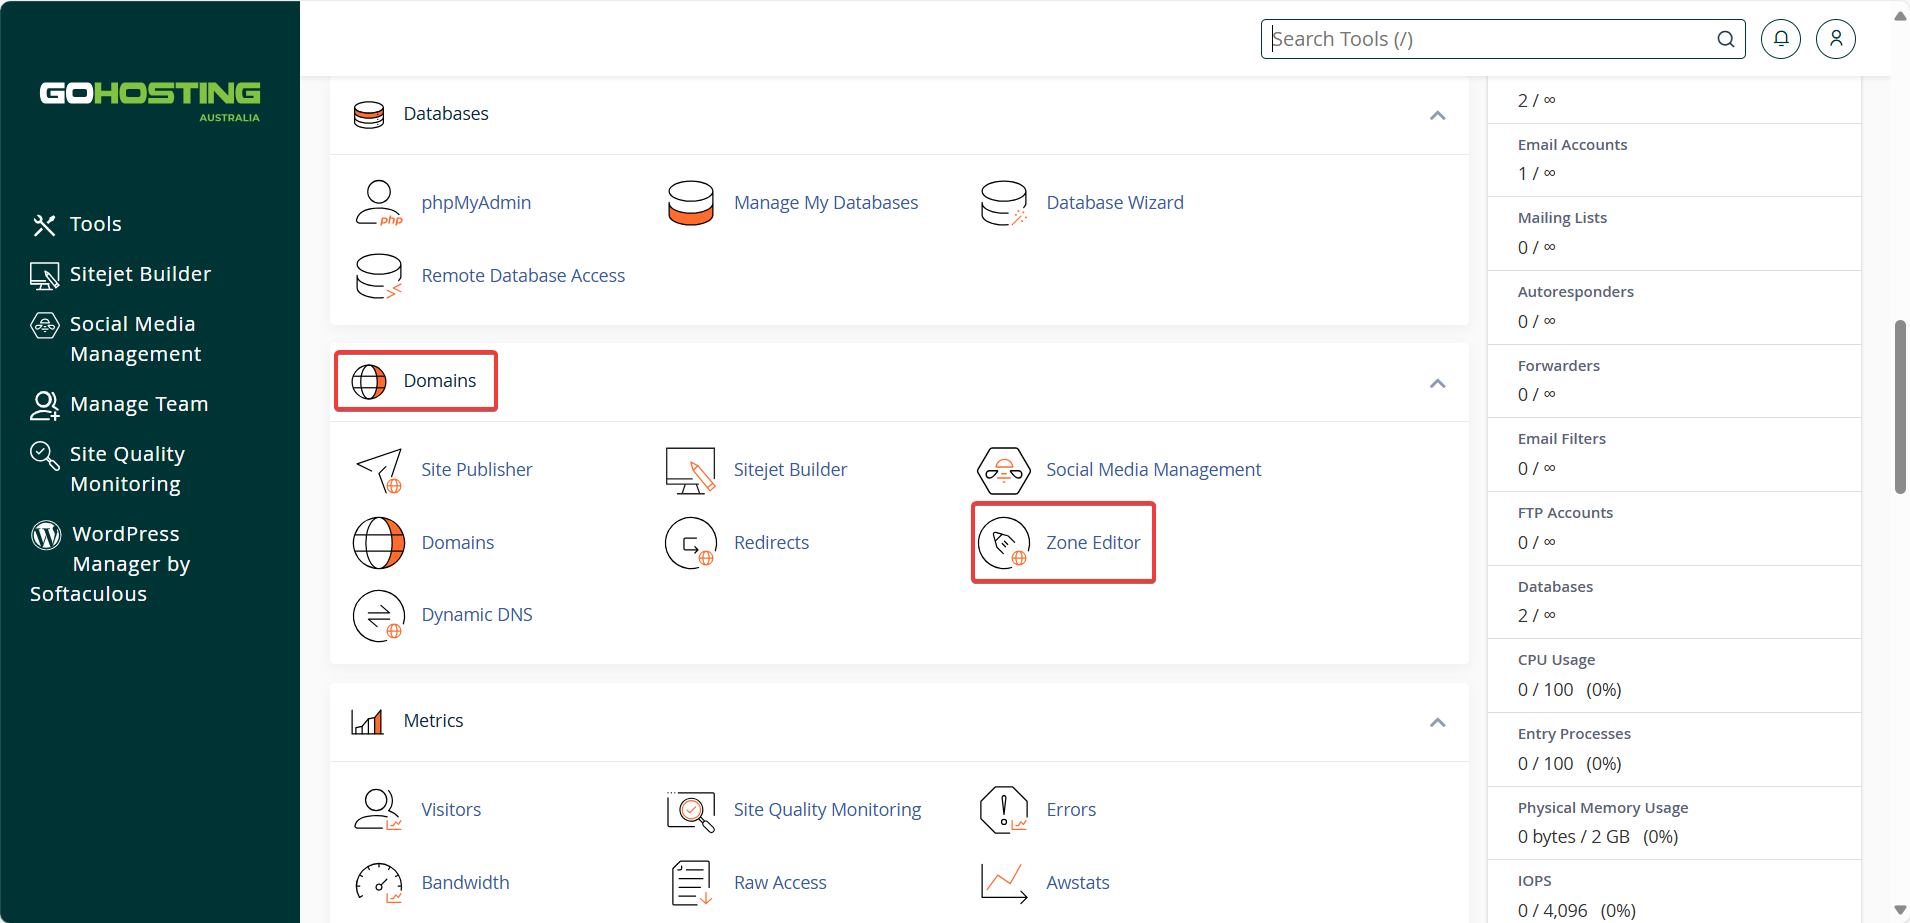
On the Zone Editor page, find the domain you want to create an SPF record for and click "Manage".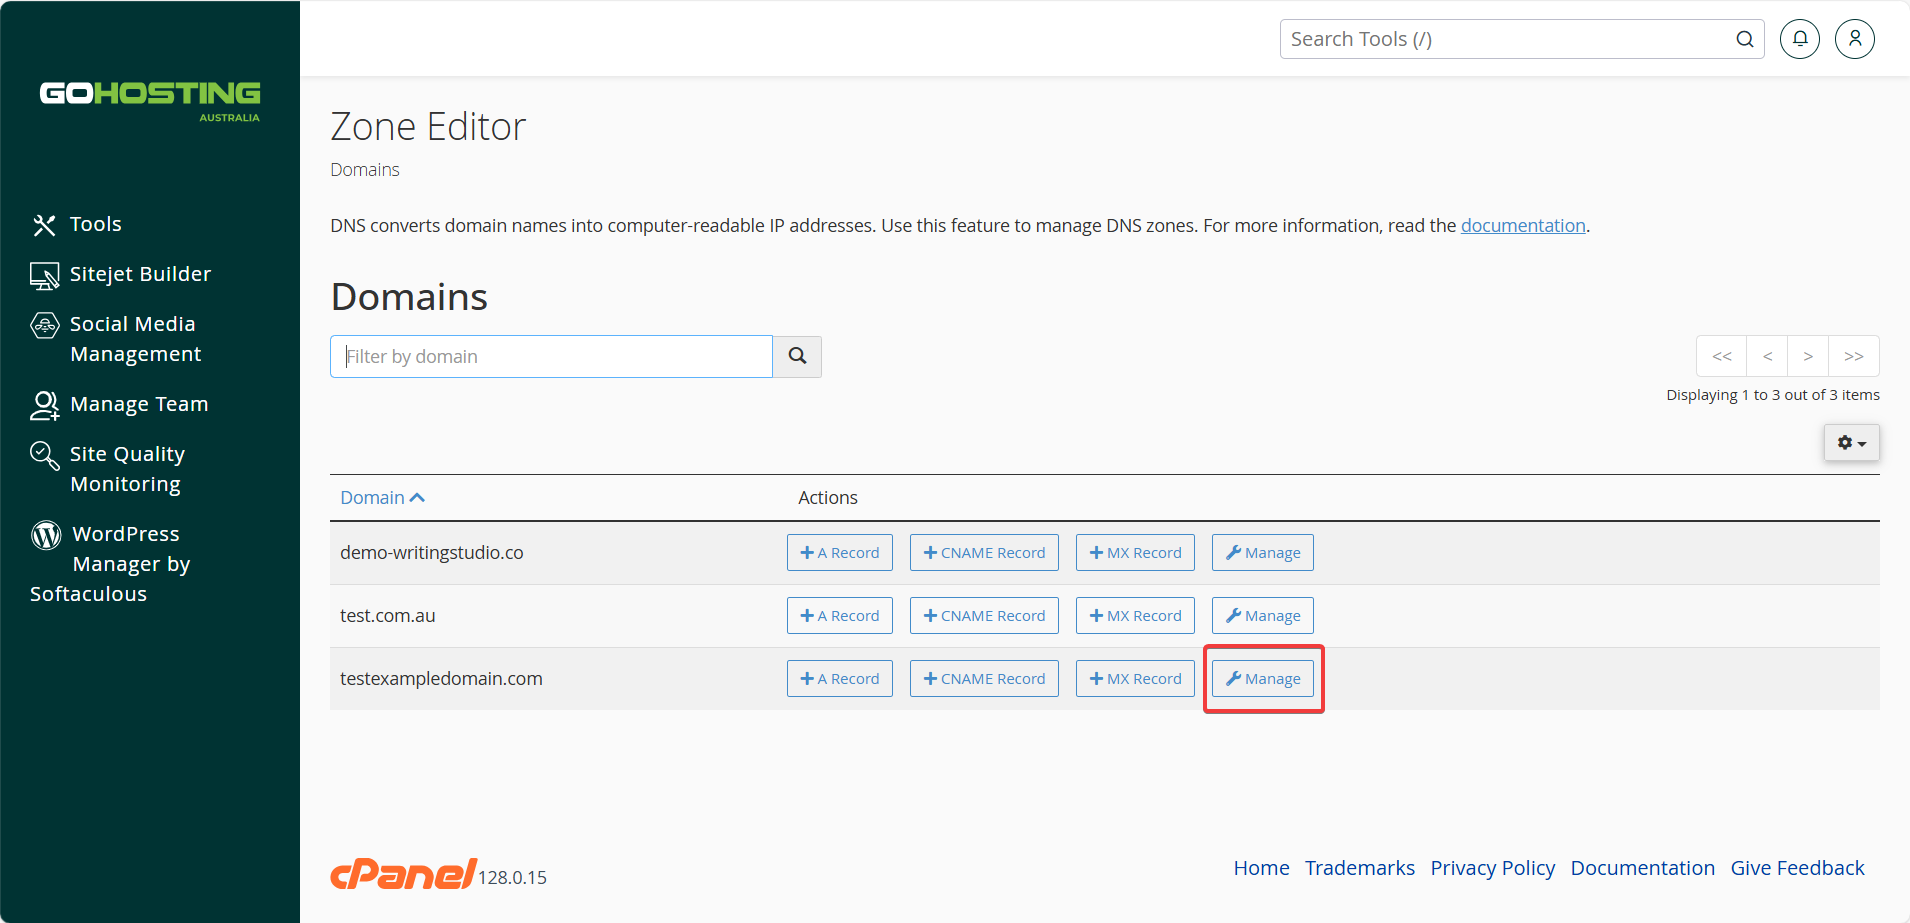
3. Check if an SPF record already exists
SPF records are stored as TXT records in your DNS zone. In the list of Zone Records, look for an existing TXT record where the "Name" matches your domain and the "Value" starts with v=spf1.
If you find one, you’ll edit it; if not, you’ll add a new one.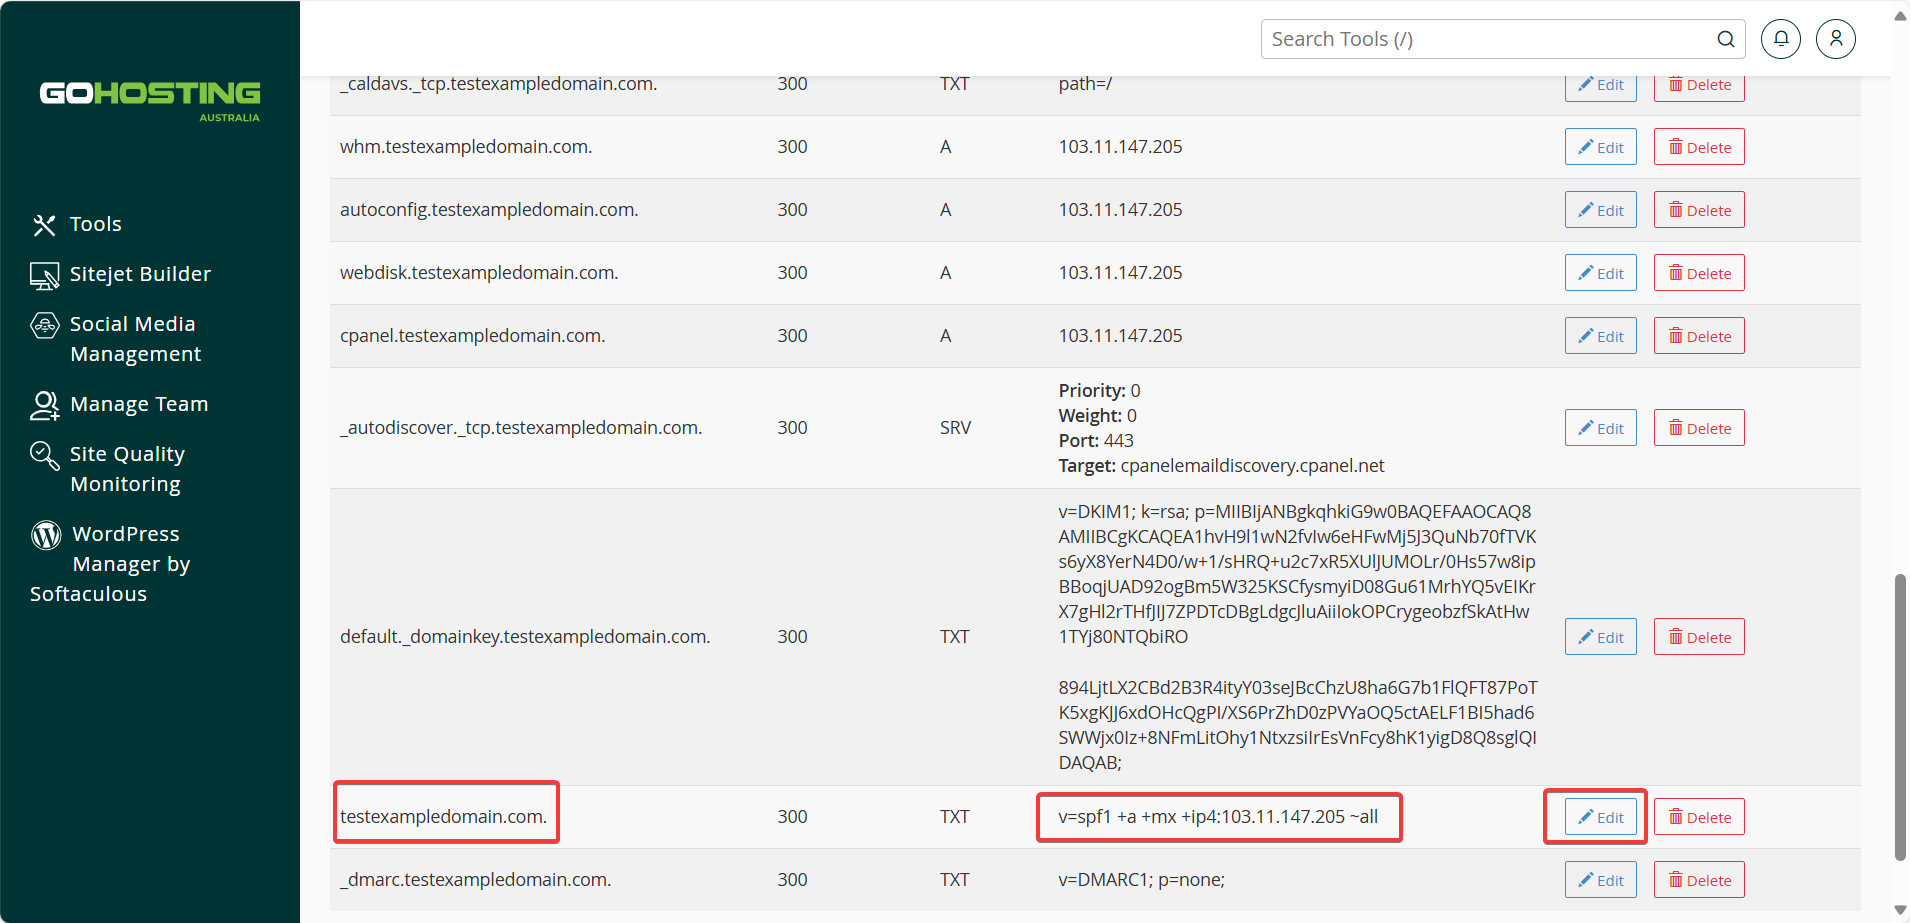
4. Edit an existing SPF record
To modify an existing SPF record, click the "Edit" button next to it and update the "Record" field as needed.
For example, if your existing SPF record is:
v=spf1 +a +mx +ip4:103.11.147.205 ~all
and you want to authorise Google Workspace (Gmail) to send emails using your domain, you would update it to:
v=spf1 +a +mx +ip4:103.11.147.205 include:_spf.google.com ~all
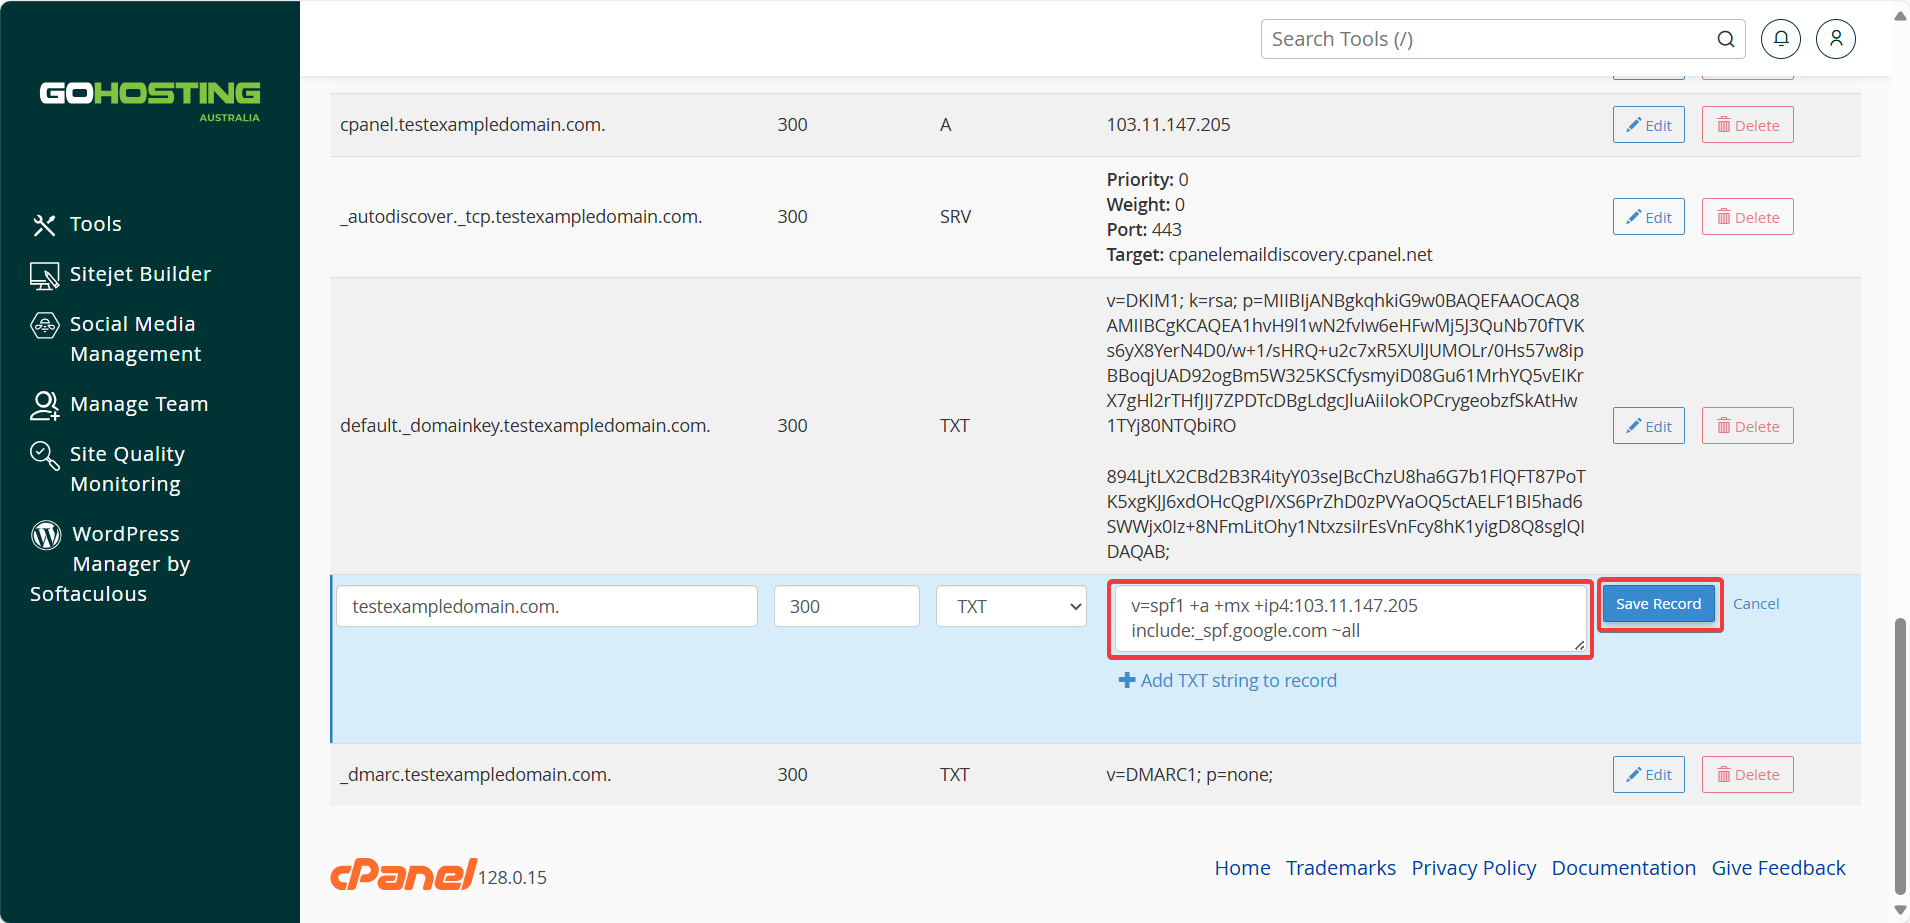
If you use multiple services, you need to add multiple include entries. For example, to allow both Google Workspace and Microsoft 365, the record in this example would look like:
v=spf1 +a +mx +ip4:103.11.147.205 include:_spf.google.com include:spf.protection.outlook.com ~all
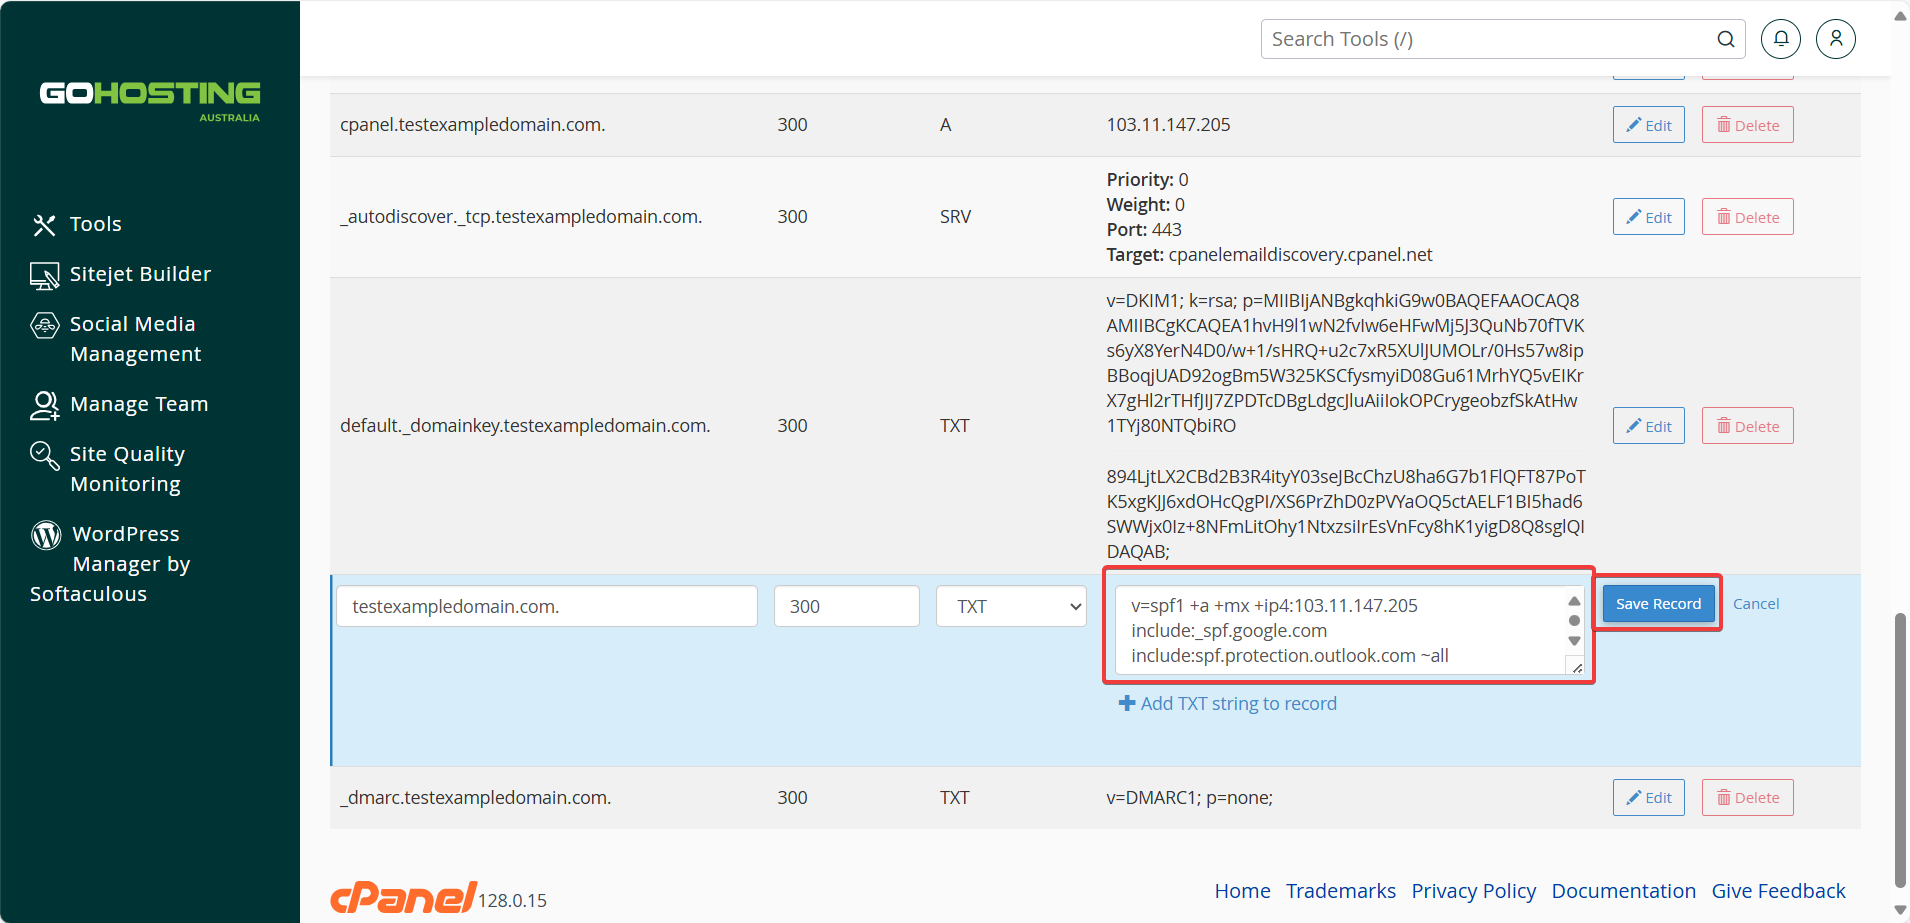
It’s good practice to place the include: mechanisms before the ~all or -all at the end, as shown in the examples above.
If you're using another email service provider, you may need to contact them or check their documentation to get the correct SPF value.
After making your changes, click "Save Record".
Important: Each domain can have only one SPF record. Ensure you combine all mechanisms (like +a, +mx, ip4:, include:) into a single TXT record. Creating multiple TXT records with v=spf1 will break SPF checks.
5. Add an SPF record (if you don't have an existing one)
If you don’t find an existing SPF record, you can add one by clicking "Add Record." 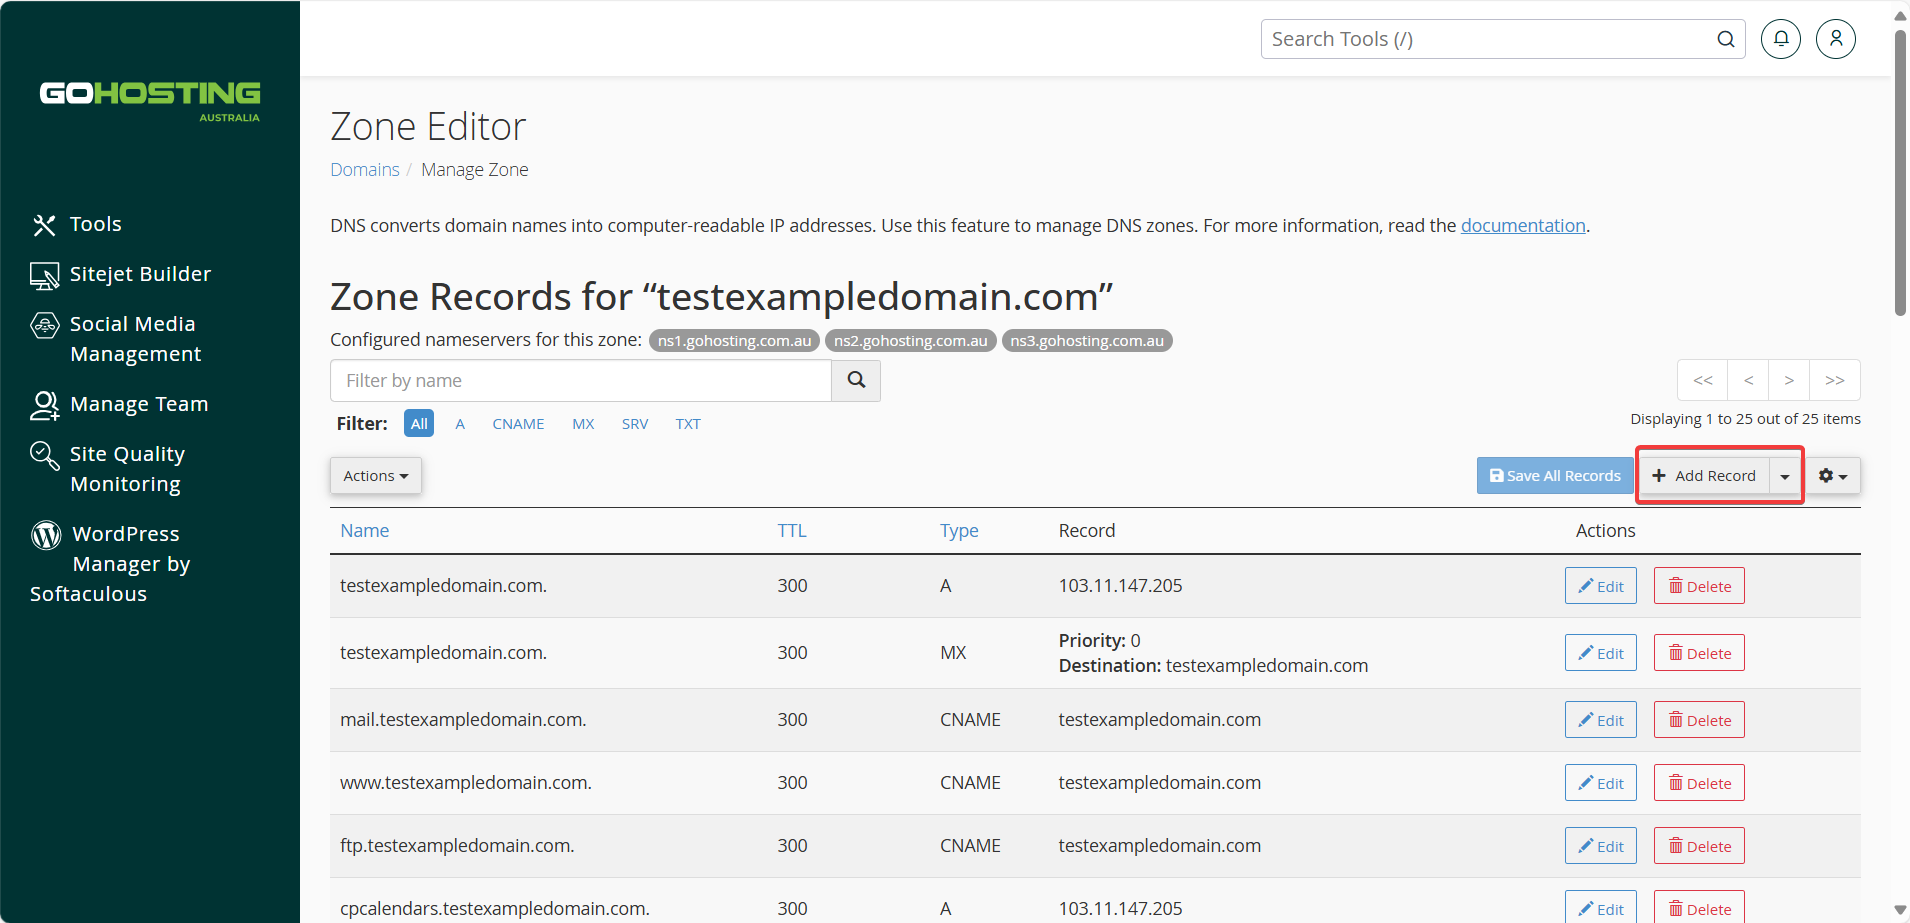
Follow these steps:
In the "Name" field, enter your root domain.
Leave "TTL" as the default.
Select "TXT" from the drop-down menu for the "Type" field.
In the "Record" field, enter your SPF record.
Most SPF records start with v=spf1, include your mail server information (e.g., include:spf.protection.outlook.com), and use ~all (soft fail) or -all (hard fail) at the end.
As an example, if you're using only Microsoft 365, the "Record" field might look like:
v=spf1 include:spf.protection.outlook.com ~all
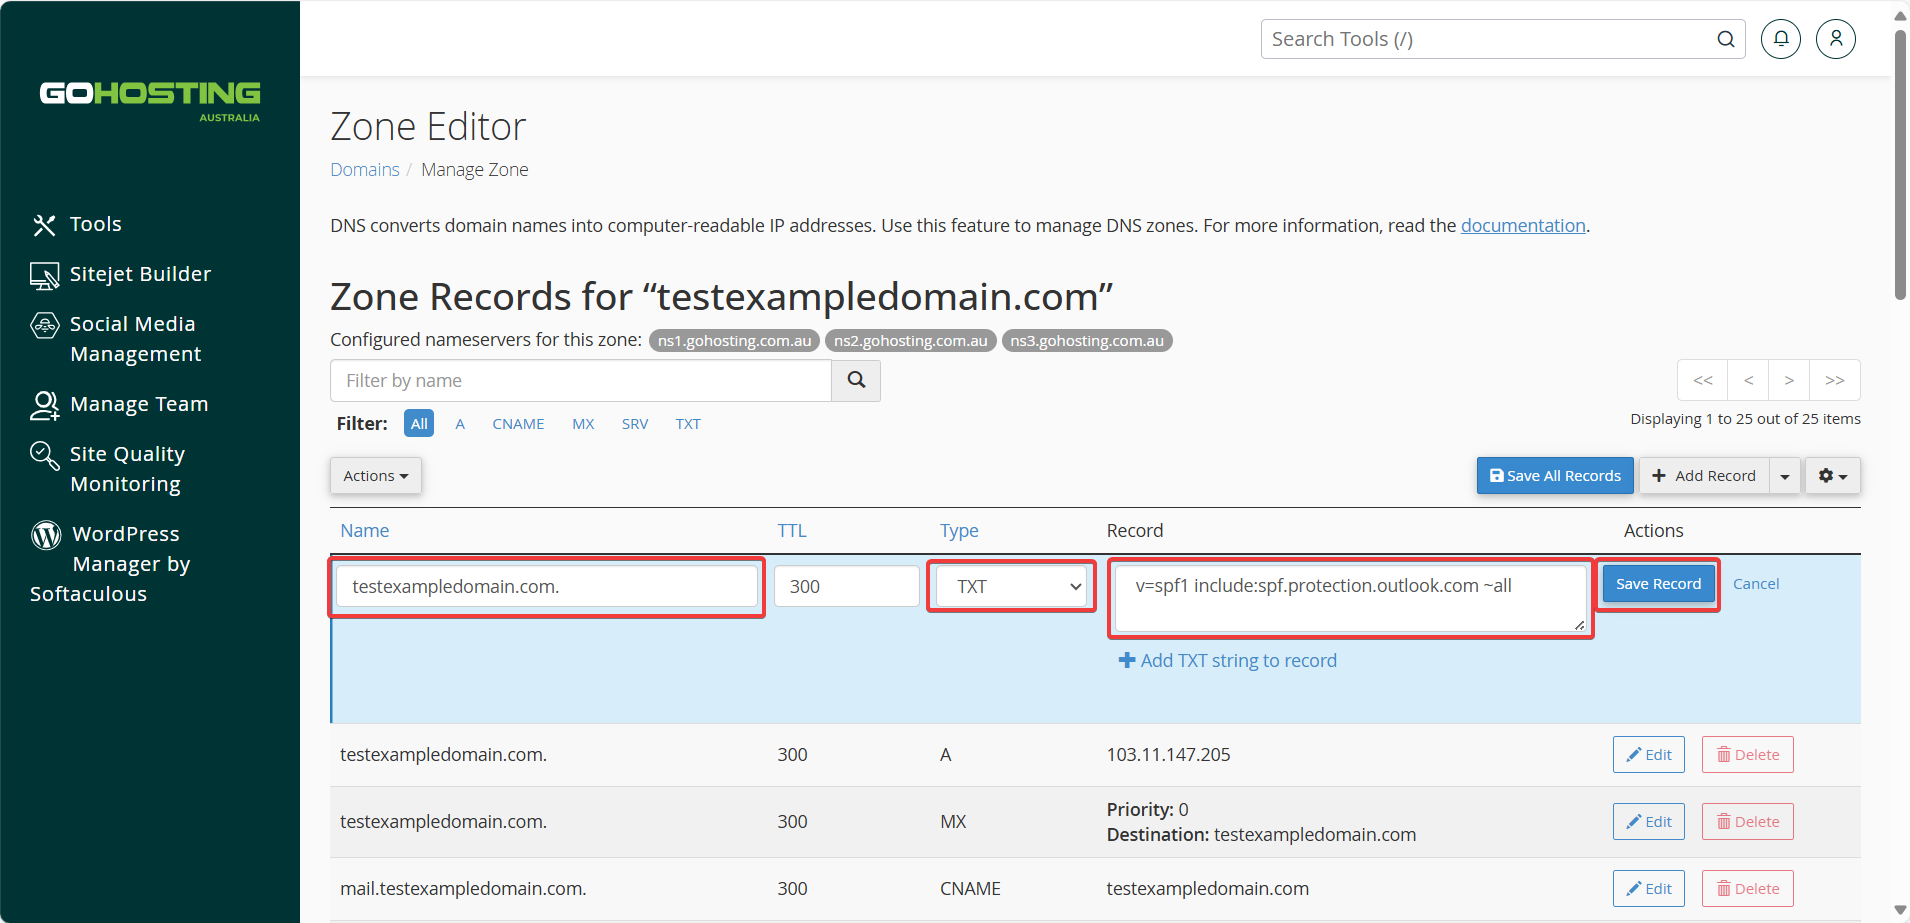
Include all the servers and services that send mail for you. But don’t exceed 10 DNS lookups in your SPF record.
When you're happy, click "Save Record".
Reminder: Do not create a new SPF record if you already have one. Always update the existing record or create a new one only if none exists.
6. Test your SPF record
After you add or update your SPF record, keep in mind that DNS changes can take anywhere from 5 minutes to 24 hours to fully update.
It’s a good idea to use an online SPF checker (such as dmarcian or MxToolbox) to verify that your SPF record is set up correctly. These tools can also catch issues like too many DNS lookups, which can cause SPF failures.
